February 2013
4-354
ColorQube® 9303 Family
REP 91.22
Repairs/Adjustments
REP 91.22 IOD Assembly
Parts List on PL 94.15
Removal
WARNING
Switch off the electricity to the machine. Refer to GP 14. Disconnect the power cord
from the customer supply while performing tasks that do not need electricity. Electricity
can cause death or injury. Moving parts can cause injury.
WARNING
Take care during this procedure. Sharp edges may be present that can cause injury.
CAUTION
Use care when working near the drum. The drum can be damaged easily, which will cause
print quality defects.
1. Open the front door.
2. Remove the inner cover, PL 81.11 Item 2.
3. Remove the cleaning unit, refer to REP 94.1.
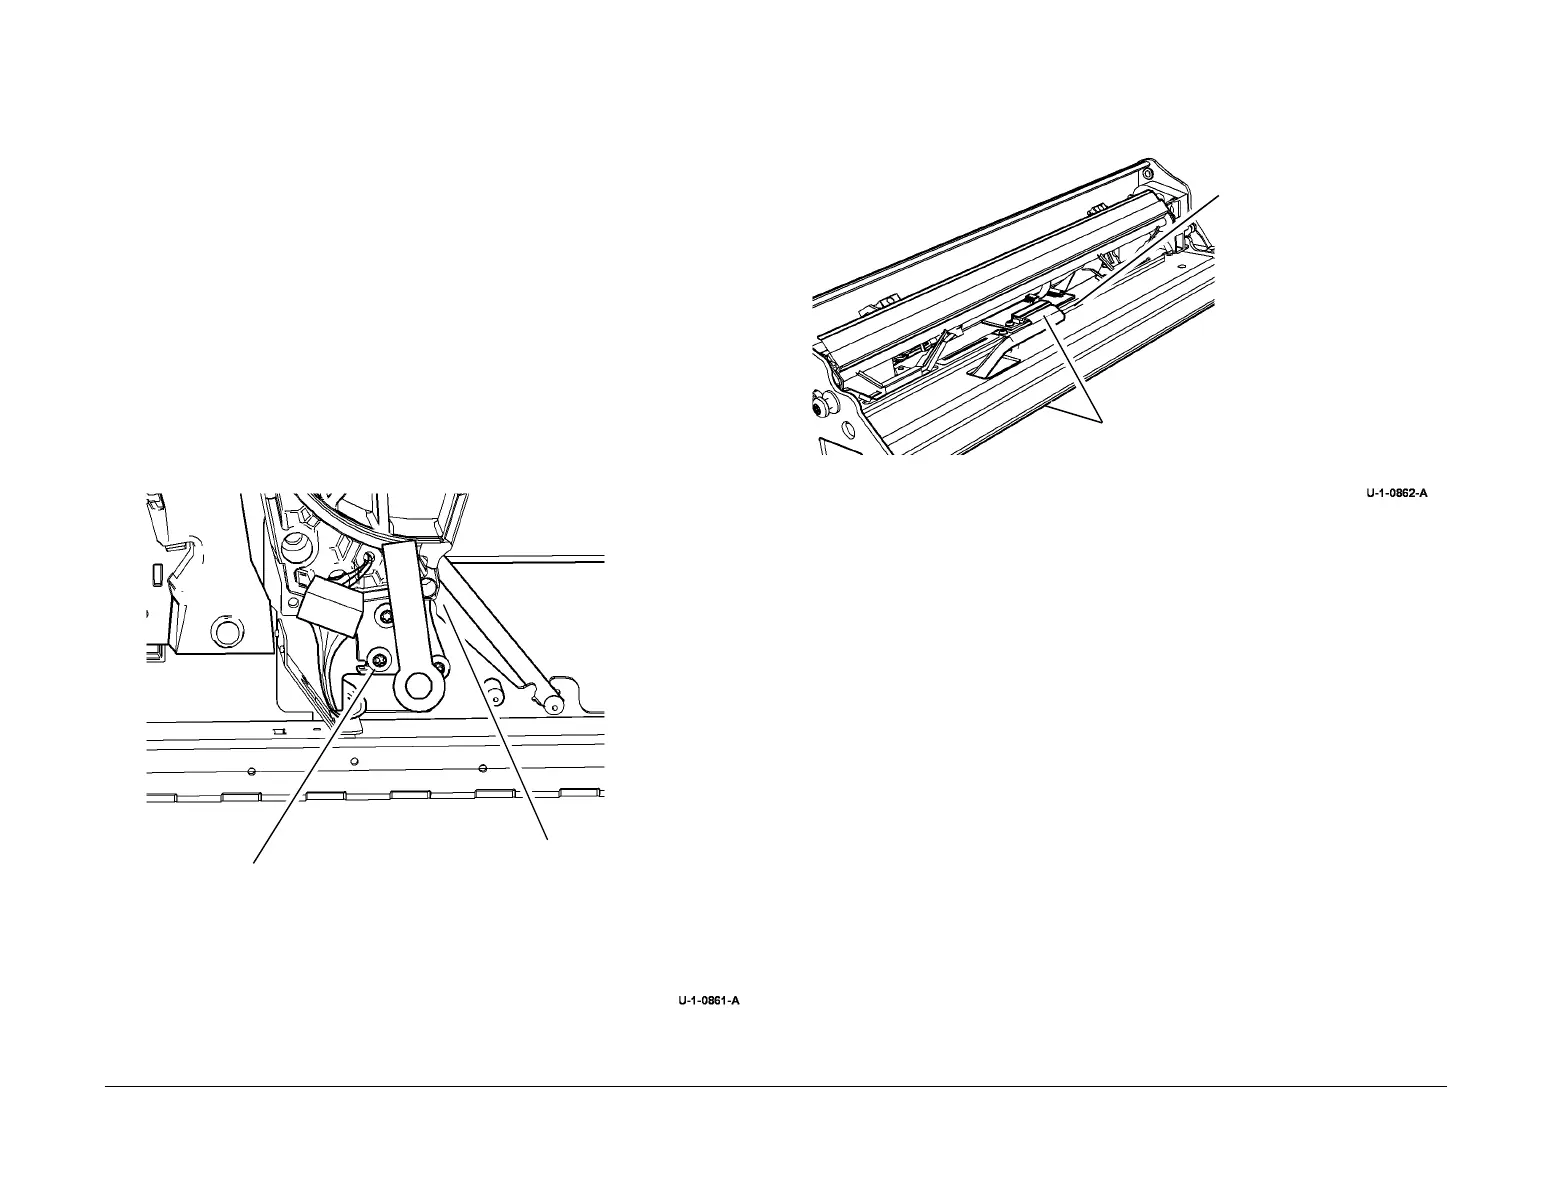
4. Remove abatement plenum, Figure 1.
Figure 1 Abatement plenum removal
5. Protect the underside of the drum with media to prevent damage.
6. Remove the IOD assembly, Figure 2.
Figure 2 IOD assembly removal
1
Remove 3 screws and the
lever assembly. Note the
position of the bearing.
2
Remove the abatement
plenum.
1
Disconnect harness and
tuck it under the cleaning
unit camshaft.
2
Use a small screw driver
under the frame near the clip.
Rotate the screw driver blade
to pop the clip out of the hole.
Rotate the IOD assembly
counterclockwise to remove
it.

 Loading...


