ENGINE REMOVAL
5-6
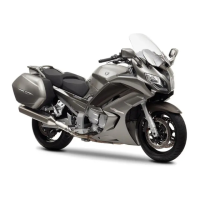
ET3P61023
REMOVING THE ENGINE
1. Loosen:
• Spacer bolt
NOTE:
Loosen the spacer bolt with the pivot shaft
wrench “1” and pivot shaft wrench adapter “2”.
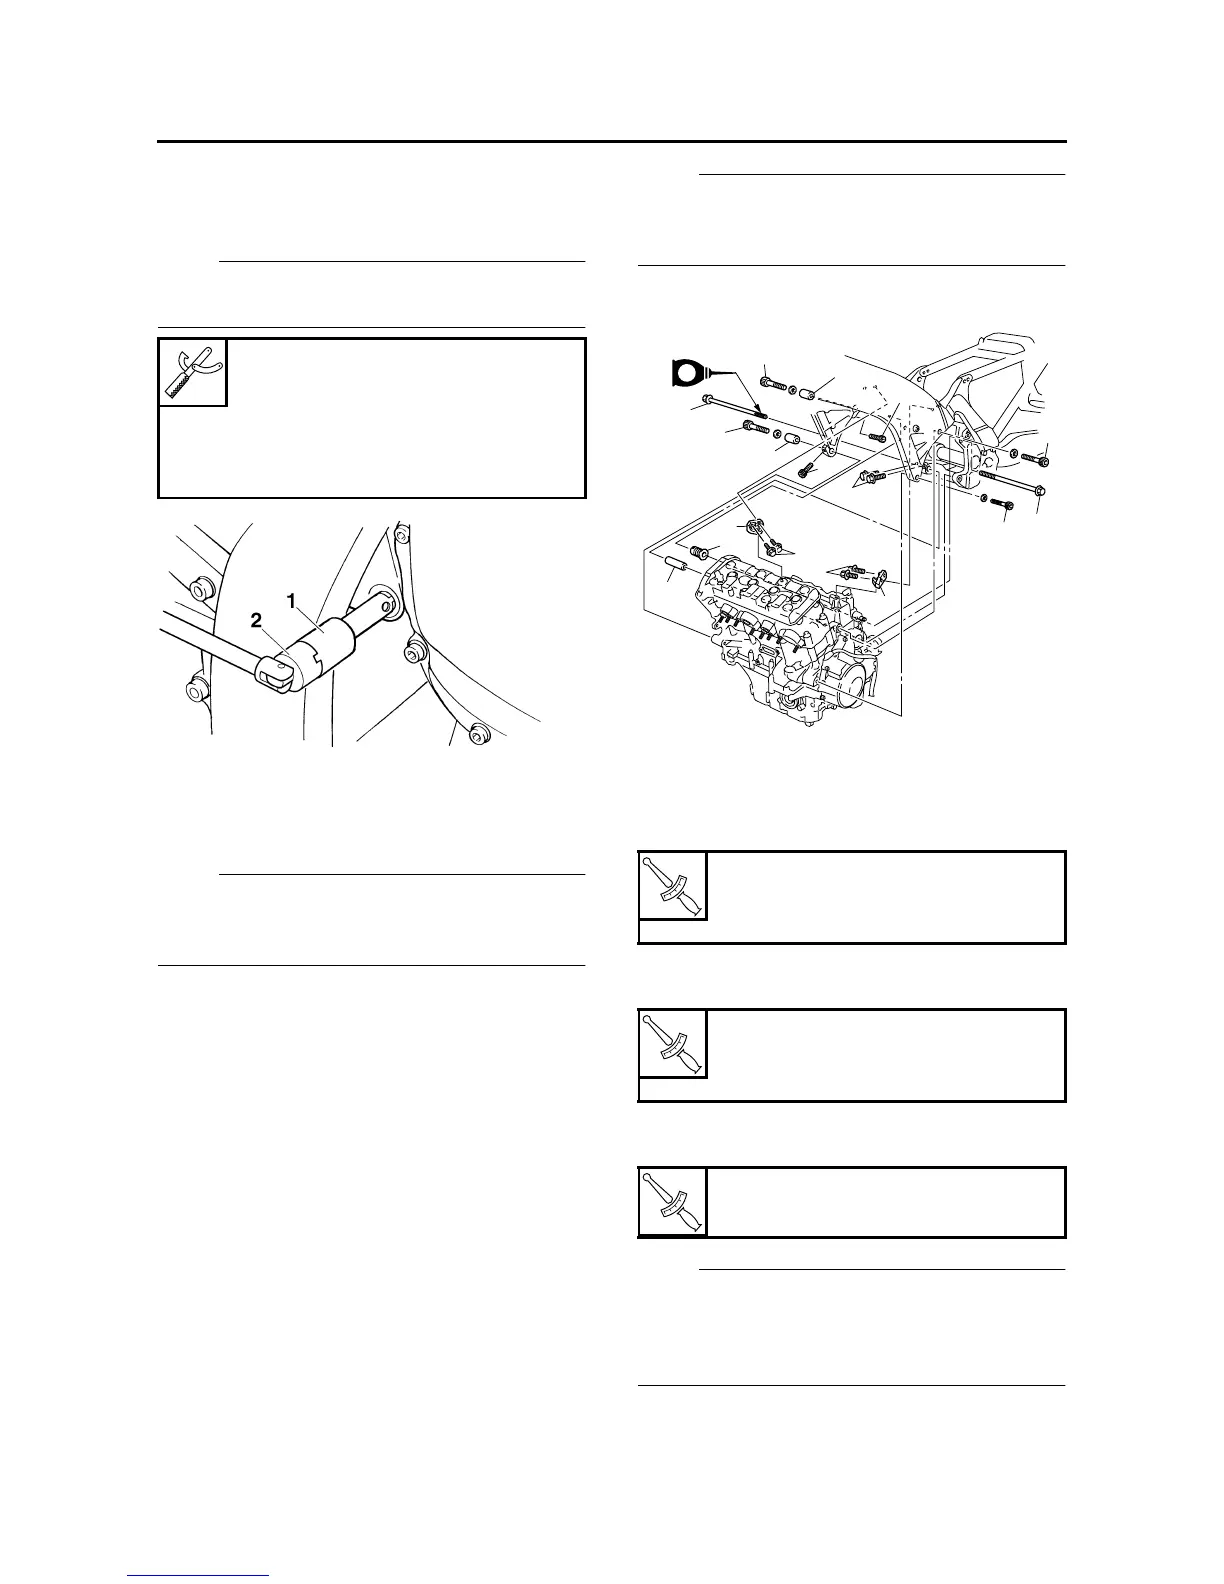
EAS23720
INSTALLING THE ENGINE
1. Install:
• Engine
NOTE:
When mounting the engine to the frame, be sure
to align the splines on the middle driven shaft
with the splines on the universal joint.
2. Install:
• Spacer bolt “1”
• Engine mounting bolt (rear upper side) “2”
• Spacer “3”
• Engine mounting bolt (rear lower side) “4”
• Engine mounting bolt (left front upper side)
“5”
• Engine mounting bolt (left front lower side) “6”
• Spacers “7”
• Engine mounting bolt (right front upper side)
“8”
• Engine mounting bolt (right front lower side)
“9”
• Pinch bolts (front side) “10”
• Pinch bolts (rear side) “11”
• Engine brackets (top) “12”
• Engine bracket bolts (top) “13”
NOTE:
• Lubricate the engine mounting bolt (rear lower
side) threads with engine oil.
• Do not fully tighten the bolts.
3. Tighten:
• Engine mounting bolt (left front upper side)
“5”
4. Tighten:
• Engine mounting bolt (rear lower side) “4”
5. Tighten:
• Spacer bolt “1”
NOTE:
• Tighten the spacer bolt “1” to specification with
a pivot shaft wrench.
• When tightened, the spacer bolt should be flat
against the engine surface.
Pivot shaft wrench
90890-01471
Frame spanner socket
YM-01471
Pivot shaft wrench adapter
90890-01476
T
R
.
.
Engine mounting bolt (left front
upper side)
49 Nm (4.9 m·kg, 35 ft·lb)
T
R
.
.
Engine mounting bolt (rear lower
side)
45 Nm (4.5 m·kg, 32 ft·lb)
T
R
.
.
Spacer bolt
18 Nm (1.8 m·kg, 13 ft·lb)
13
E
10
10
7
7
8
4
9
12
1
13
3
12
2
5
6
11