FRONT FORK
4-73
NOTE:
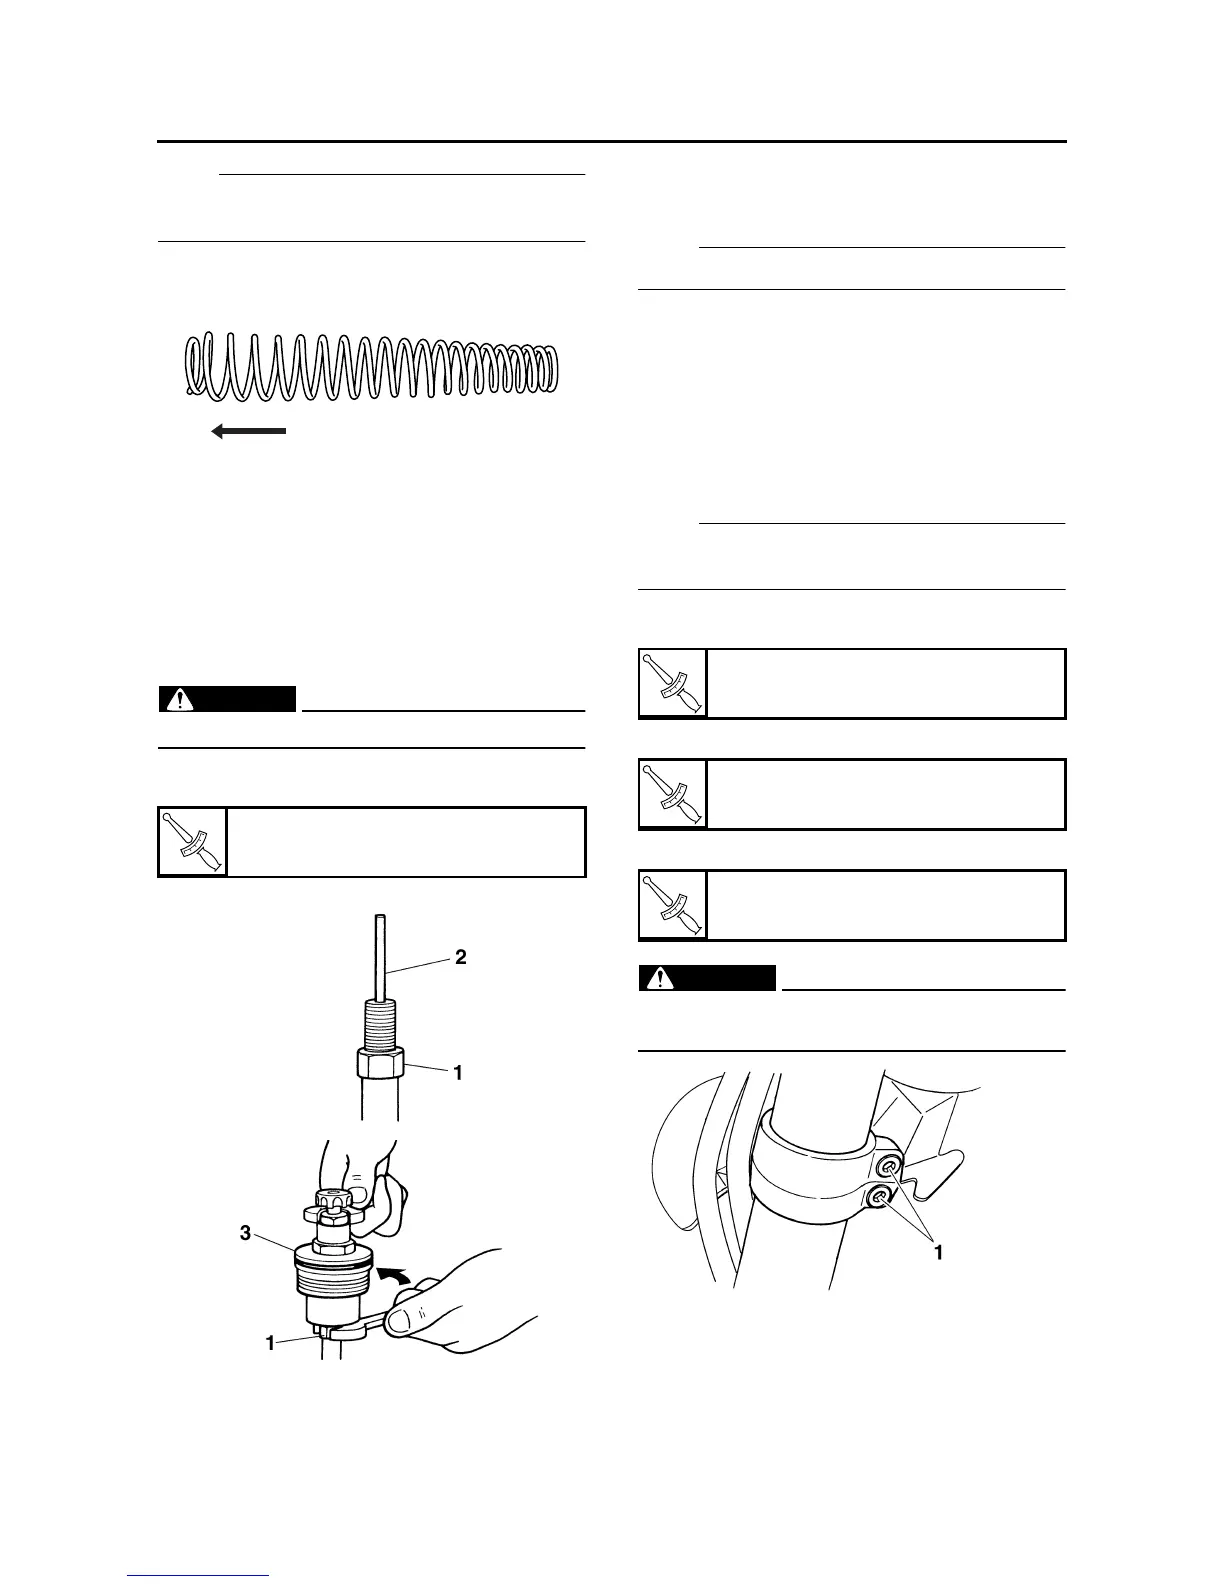
Install the fork spring so that the end “A” shown
in the illustration is facing up.
15.Install:
• Nut “1”
• Damper adjusting rod “2”
• Cap bolt “3”
▼▼▼▼▼▼▼▼▼ ▼ ▼▼▼▼▼▼▼▼▼ ▼ ▼▼▼▼ ▼ ▼▼▼▼ ▼▼▼
a. Install the nut “1” and finger tighten it.
b. Install the damper adjusting rod “2”.
c. Install the cap bolt “3” and finger tighten it.
WARNING
EWA13670
Always use a new cap bolt O-ring.
d. Hold the cap bolt and tighten the nut “1” to
specification.
▲▲▲▲▲▲▲▲▲ ▲ ▲▲▲▲▲▲▲▲▲ ▲ ▲▲▲▲ ▲ ▲▲▲▲ ▲▲▲
16.Install:
• Cap bolt
(to the outer tube)
NOTE:
Temporarily tighten the cap bolt.
EAS23050
INSTALLING THE FRONT FORK LEGS
The following procedure applies to both of the
front fork legs.
1. Install:
• Front fork leg
Temporarily tighten the upper and lower
bracket pinch bolts.
NOTE:
Make sure the inner tube is flush with the top of
the upper bracket.
2. Tighten:
• Lower bracket pinch bolts “1”
• Cap bolt “2”
• Upper bracket pinch bolt “3”
WARNING
EWA13680
Make sure the brake hoses are routed prop-
erly.
T
R
.
.
Nut
25 Nm (2.5 m·kg, 18 ft·lb)
A
T
R
.
.
Lower bracket pinch bolt
23 Nm (2.3 m·kg, 17 ft·lb)
T
R
.
.
Cap bolt
25 Nm (2.5 m·kg, 18 ft·lb)
T
R
.
.
Upper bracket pinch bolt
26 Nm (2.6 m·kg, 19 ft·lb)