CRANKSHAFT
AND
CONNECTING RODS ENG
A
CRANKCASE SEPARATION
1.Separate:
• Left crankcase
• Right crankcase
**********************************
Separation steps:
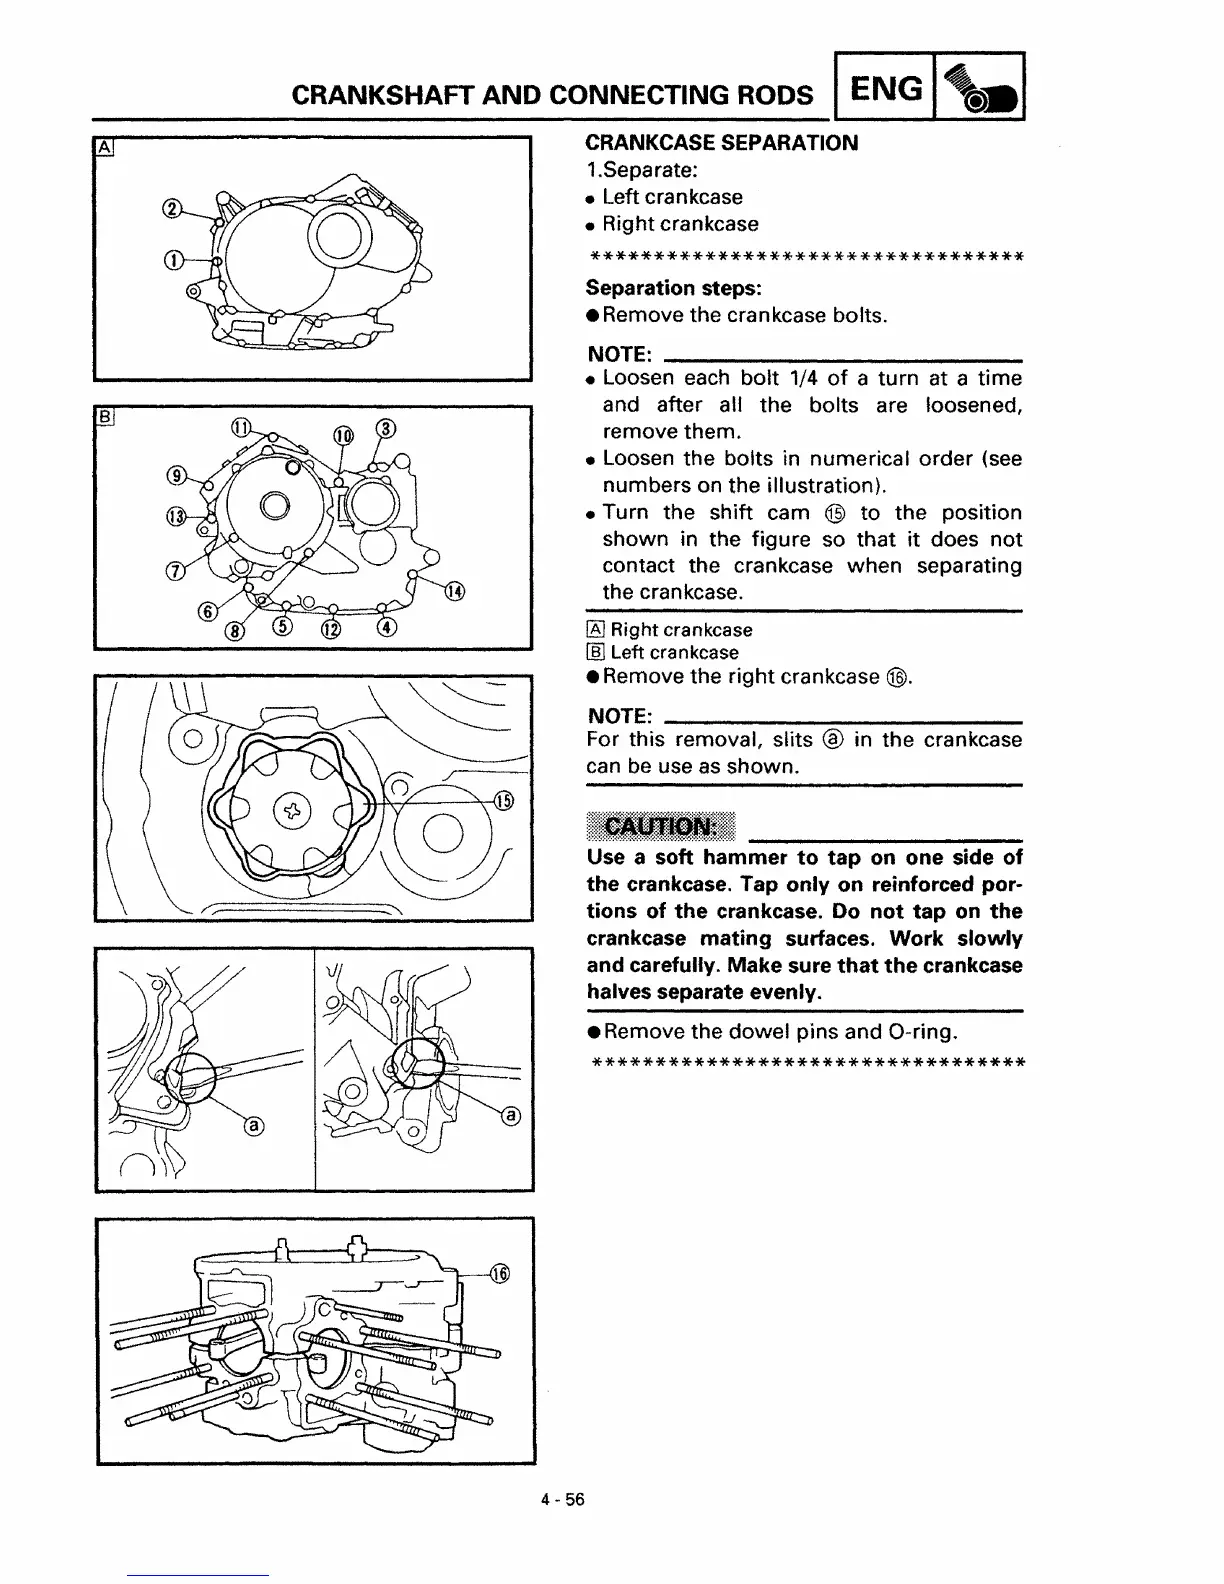
• Remove the crankcase bolts.
NOTE: _
• Loosen each
bolt
1/4
of
a turn at a time
and after all the bolts are loosened,
remove them.
• Loosen the bolts in numerical order (see
numbers on the illustration).
• Turn the shift cam
@
to
the position
shown in the figure so that
it
does
not
contact the crankcase when separating
the crankcase.
[8J
Right crankcase
[ID
Left crankcase
• Remove the right crankcase @.
NOTE: _
For this removal, slits ® in the crankcase
can
be
use
as
shown.
Use a soft hammer
to
tap
on one side
of
the
crankcase. Tap
only
on reinforced por-
tions
of
the
crankcase. Do
not
tap
on
the
crankcase
mating
surfaces.
Work
slowly
and carefully. Make sure
that
the
crankcase
halves separate evenly.
• Remove the dowel pins and O-ring.
**********************************
4 - 56










 To Next Page