3.6 Wiring the GS211 Rear Panel Terminal Plug
Follow the procedure below to wire the rear panel terminal plug on a GS211, which has
rear panel output terminals. To prevent electric shock and damage to the instrument,
follow the warnings given in section 3.5, “Wiring Precautions.”
1.
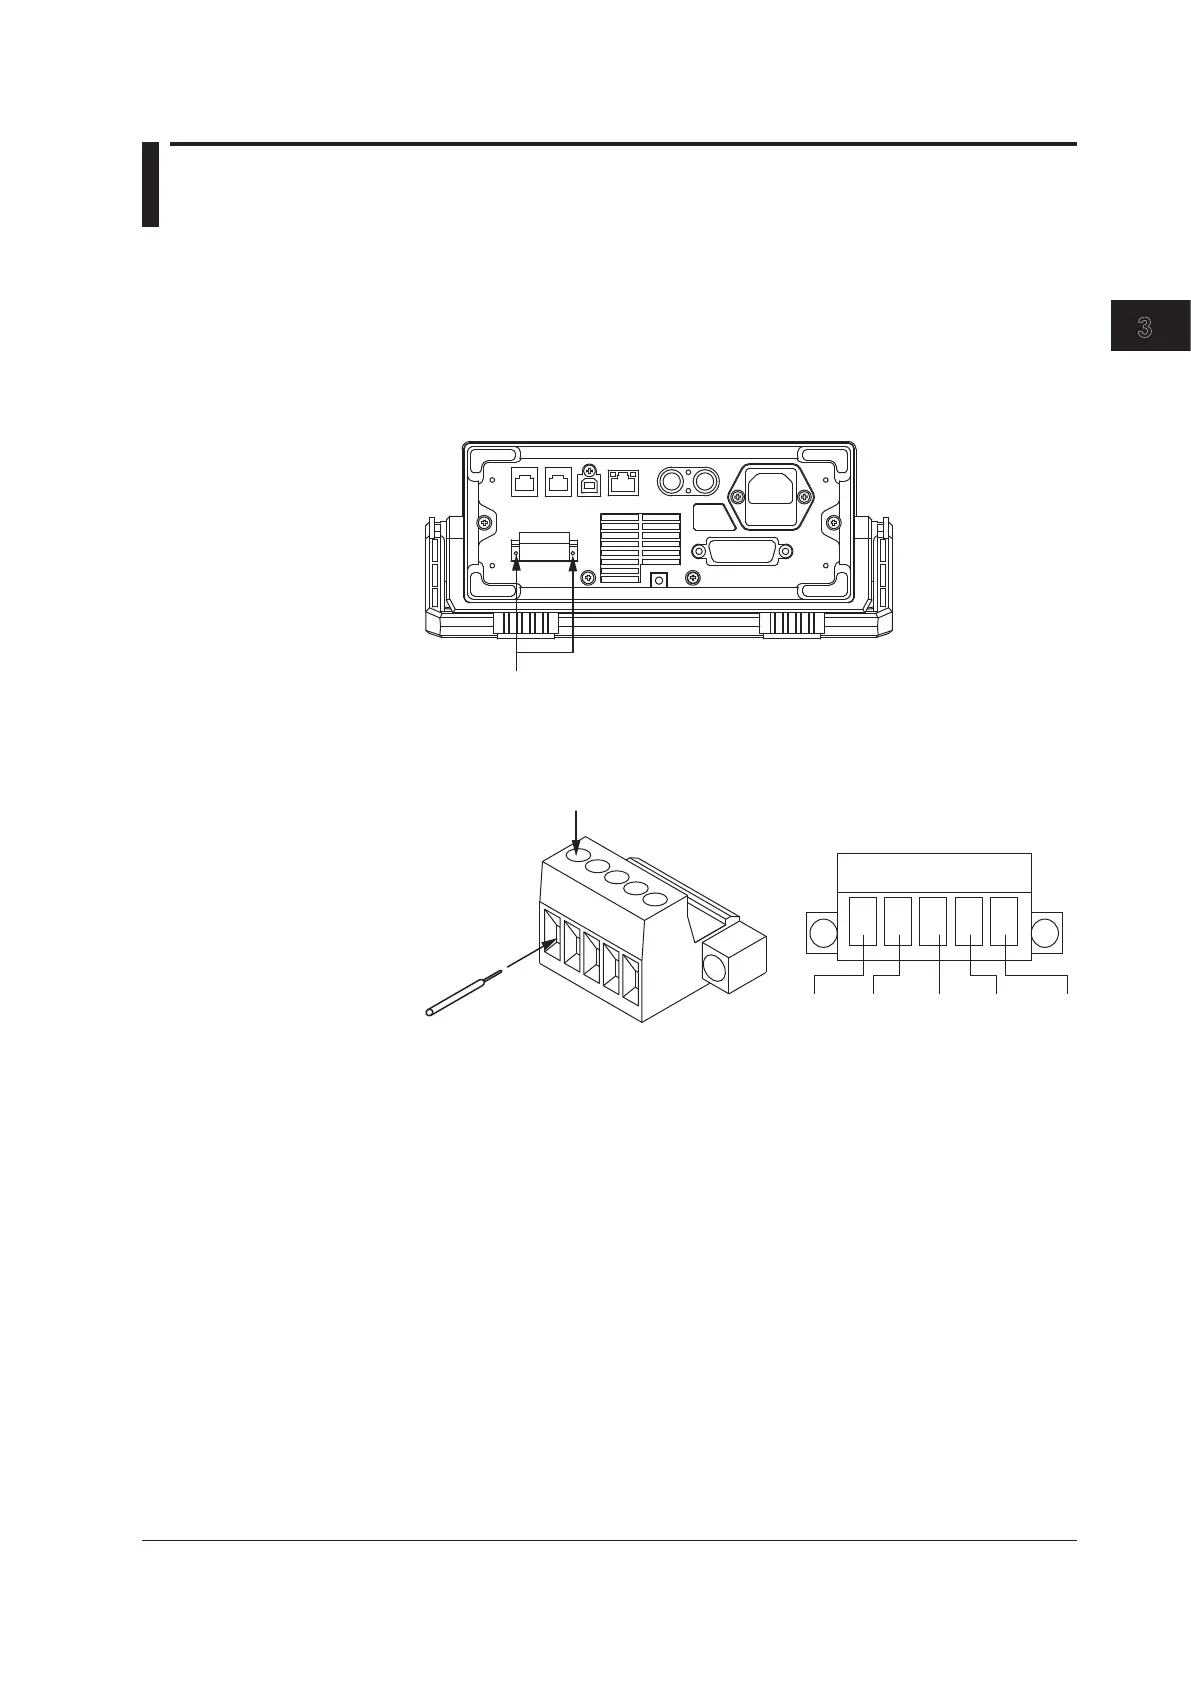
Unscrew the screws on the left and right of the terminal plug, and remove the
terminal plug from the GS211.
2.
Loosen the screws on the top of the terminal plug (these screws are used to fix
cables in place), and insert stripped cables into the holes.
Screw used to fix the cable in place
Cable
SENSE
Hi
SENSE
Lo
OUTPUT
Lo
G
OUTPUT
Hi
Terminal plug pinout
• Length of stripped cable: 7 mm
• Rated connecting capacity
Single wire: 0.2 mm
2
to 2.5 mm
2
Twisted wire: 0.2 mm
2
to 2.5 mm
2
AWG: 24 to 12
3.
Tighten the screws to fix the cables in place (screw tightening torque: 0.5 N•m to 0.6
N•m).
4.
Tighten the screws on the left and right of the terminal plug to attach it to the
GS211 (screw tightening torque: 0.2 N•m to 0.3 N•m).
3-9
IM GS210-01EN
Instrument Preparation and Common Operations
3
2
1
4
5
6
7
8
9
10
11
12
13
14
15
App
Index
 Loading...