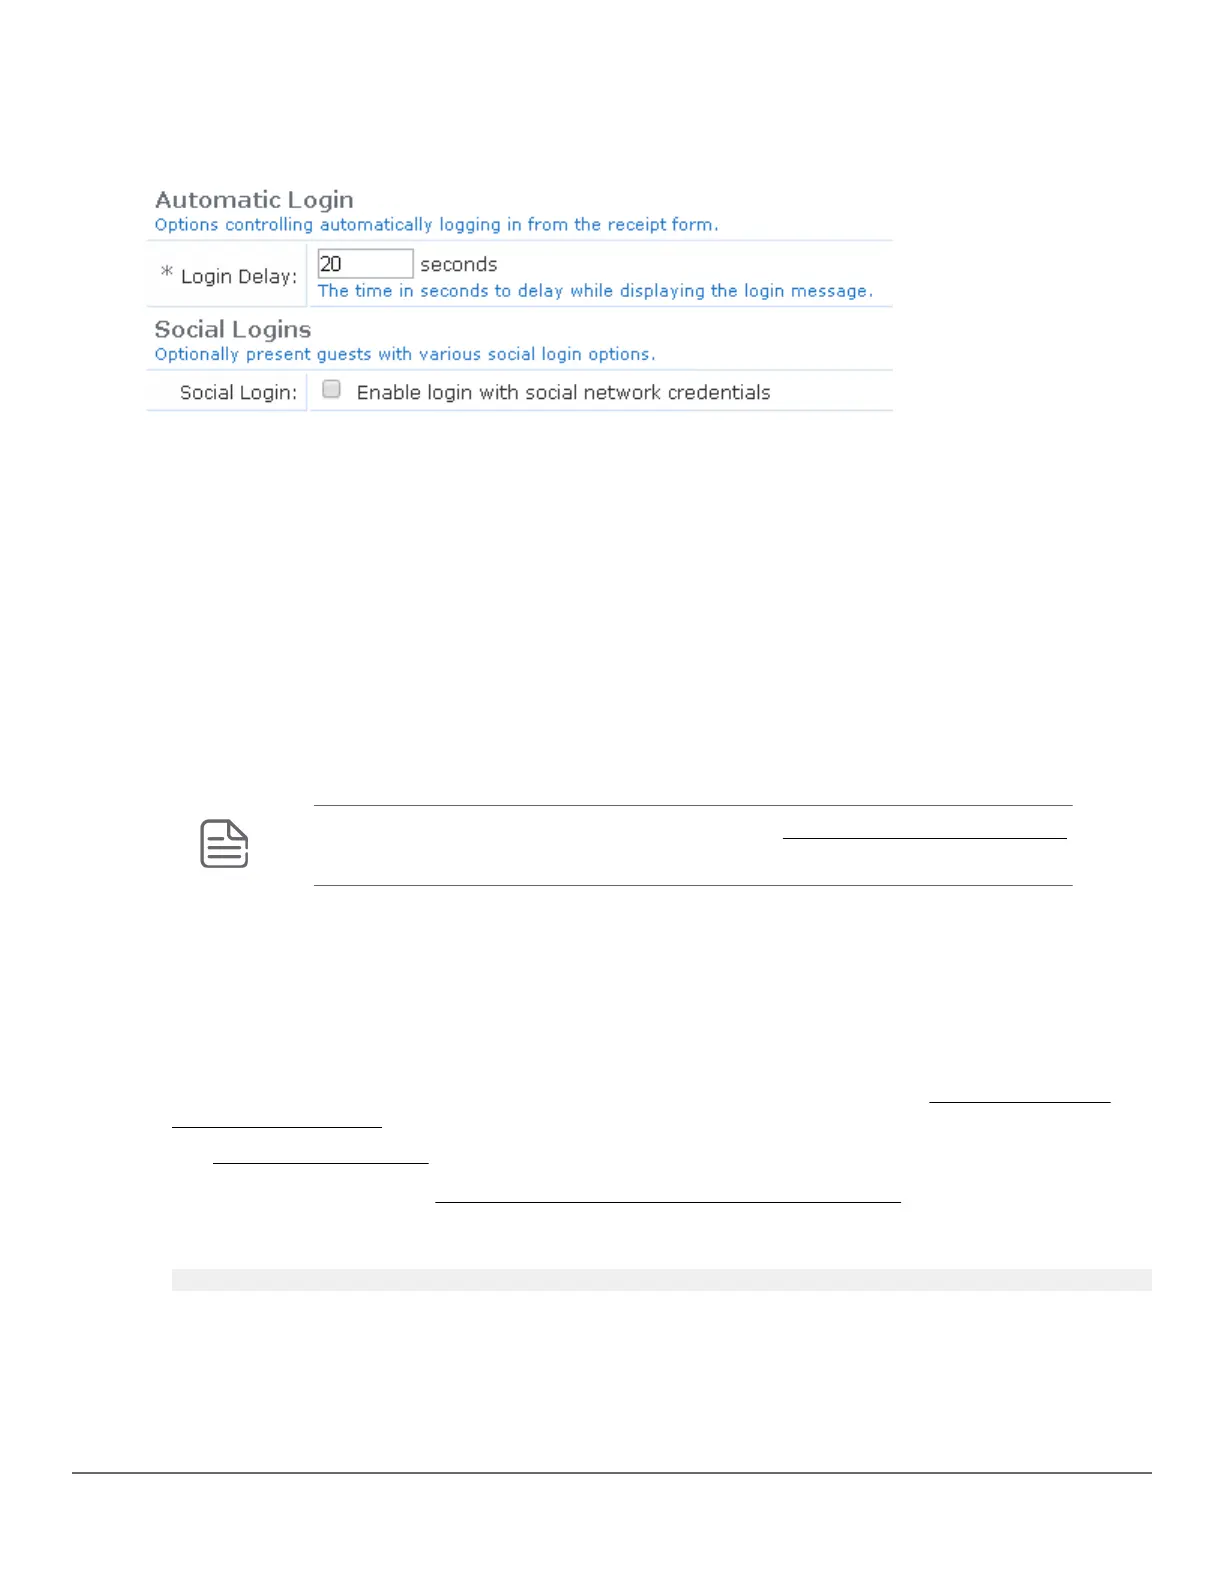
Configure the login delay
Enter the Login Delay value. The value must be greater than the HPE-Port-Bounce-Host attribute. In this
example, we set the login delay value to 20 seconds.
Configuring the switch
Once you have configured Captive Portal, you can configure the switch. To configure the switch, you must first
configure the switch as a RADIUS client, then configure the ports that will be used for Captive Portal, as follows:
Procedure
1. Configure the switch as a RADIUS client. In this example, the CPPM IP address is 10.73.4.136 and
secret is the secret key shared with the RADIUS server:
a. switch(config)# radius-server host 10.73.4.136 key "secret"
b. switch(config)# radius-server host 10.73.4.136 dyn-authorization
c. switch(config)# radius-server host 10.73.4.136 time-window 0
NOTE: Make sure to set your time-window to 0. See Event Timestamp not working.
2. Configure the ports that will be used for Captive Portal. In this example, the commands enable ports B3-B5 for
MAC Authentication:
a. switch(config)# aaa authentication port-access chap-radius
b. switch(config)# aaa port-access mac-based B3-B5
3. If you configured the Security Hash to Deny login on validation error in
Create a ClearPass
guest self-registration on page 214, configure the URL key.
See Configure the URL key on page 216.
4. Configure the certificate. See Configuring a certificate for Captive Portal usage on page 216
5. Enable Captive portal:
switch(config)# aaa authentication captive-portal enable
By default, Captive Portal is disabled. Once enabled, you are redirected to the URL supplied via the HPE-
Captive-Portal-URL VSA. Captive Portal is enabled on a global/switch wide basis.
Chapter 9 Captive Portal for ClearPass 215




 To Next Page