8.13. REMOVING / INSTALLING THE CLOSING FLAP
1. Switch off the equipment ( Chap. 8.3, page 54);
2. Then remove all side panels ( Chap. 8.3.1, page 54);
3. Remove the relevant mobile obstacle ( Chap. 8.10, page 62);
4. Remove the shelf on the side of the guides to be removed / replaced ( Chap. 8.15, page 69);
5. Remove the closing flap ( Chap. 8.12, page 66);
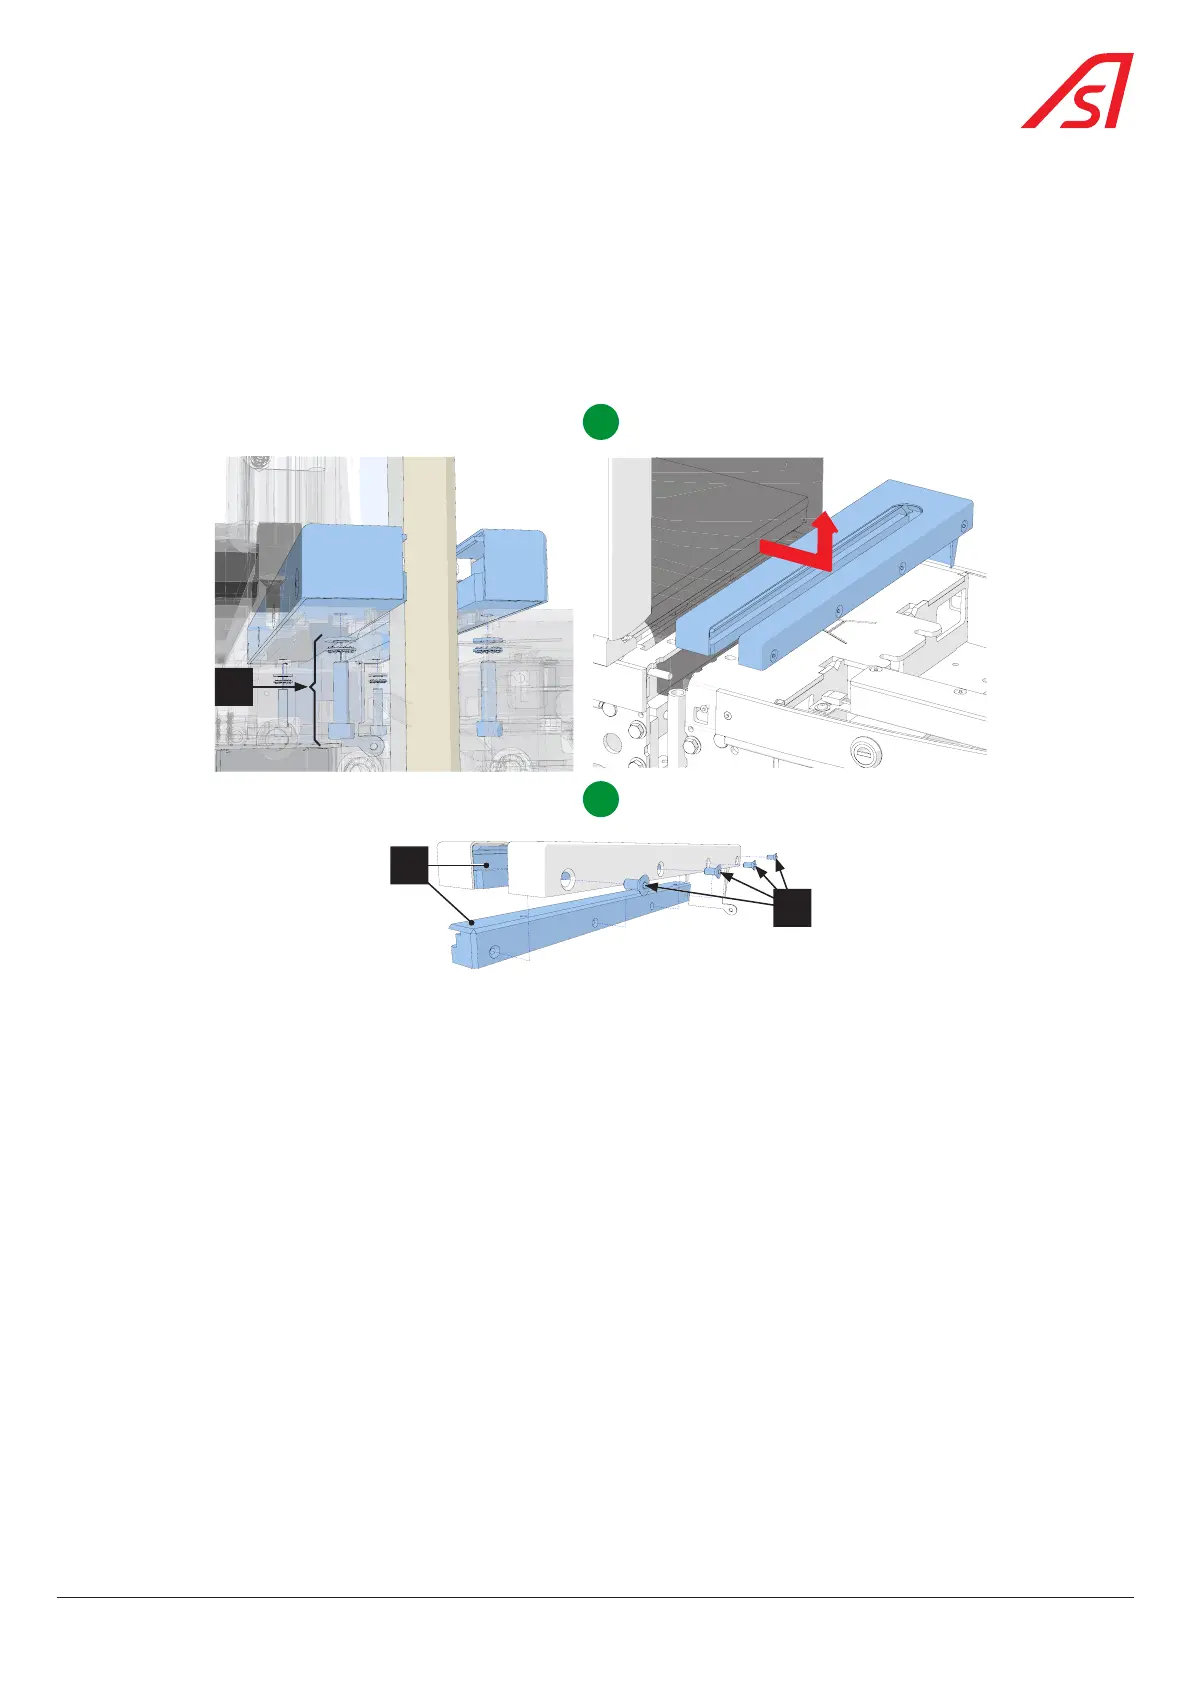
B
2
3
A
1
(4x)
Fig. 73 - Removing / replacing the closing flap guides
6. Remove the fixing elements (1) of the guide assembly and slide it under the fixed obstacle before extracting it; [A]
7. Unscrew the 4 fixing screws (3) and remove the used flap guides (2); [B]
8. To reassemble, after replacing the guides, follow the different steps in reverse order.
67
SmartLane