Creating Trackables in BTWYSIWYG
Trackables are objects or people that are to be tracked. A Trackable can be represented by a library
object from the Library Browser, or on a drawn object like a sphere or riser. Trackables are created on
the Trackables/Motion layer by default.
Important Notes:
Trackables are automatically named and patched when created.
By default, when a New Portfolio is launched from BlackTrax, BTWYSIWYG opens with 12
Trackables.
To create a trackable in BTWYSIWYG
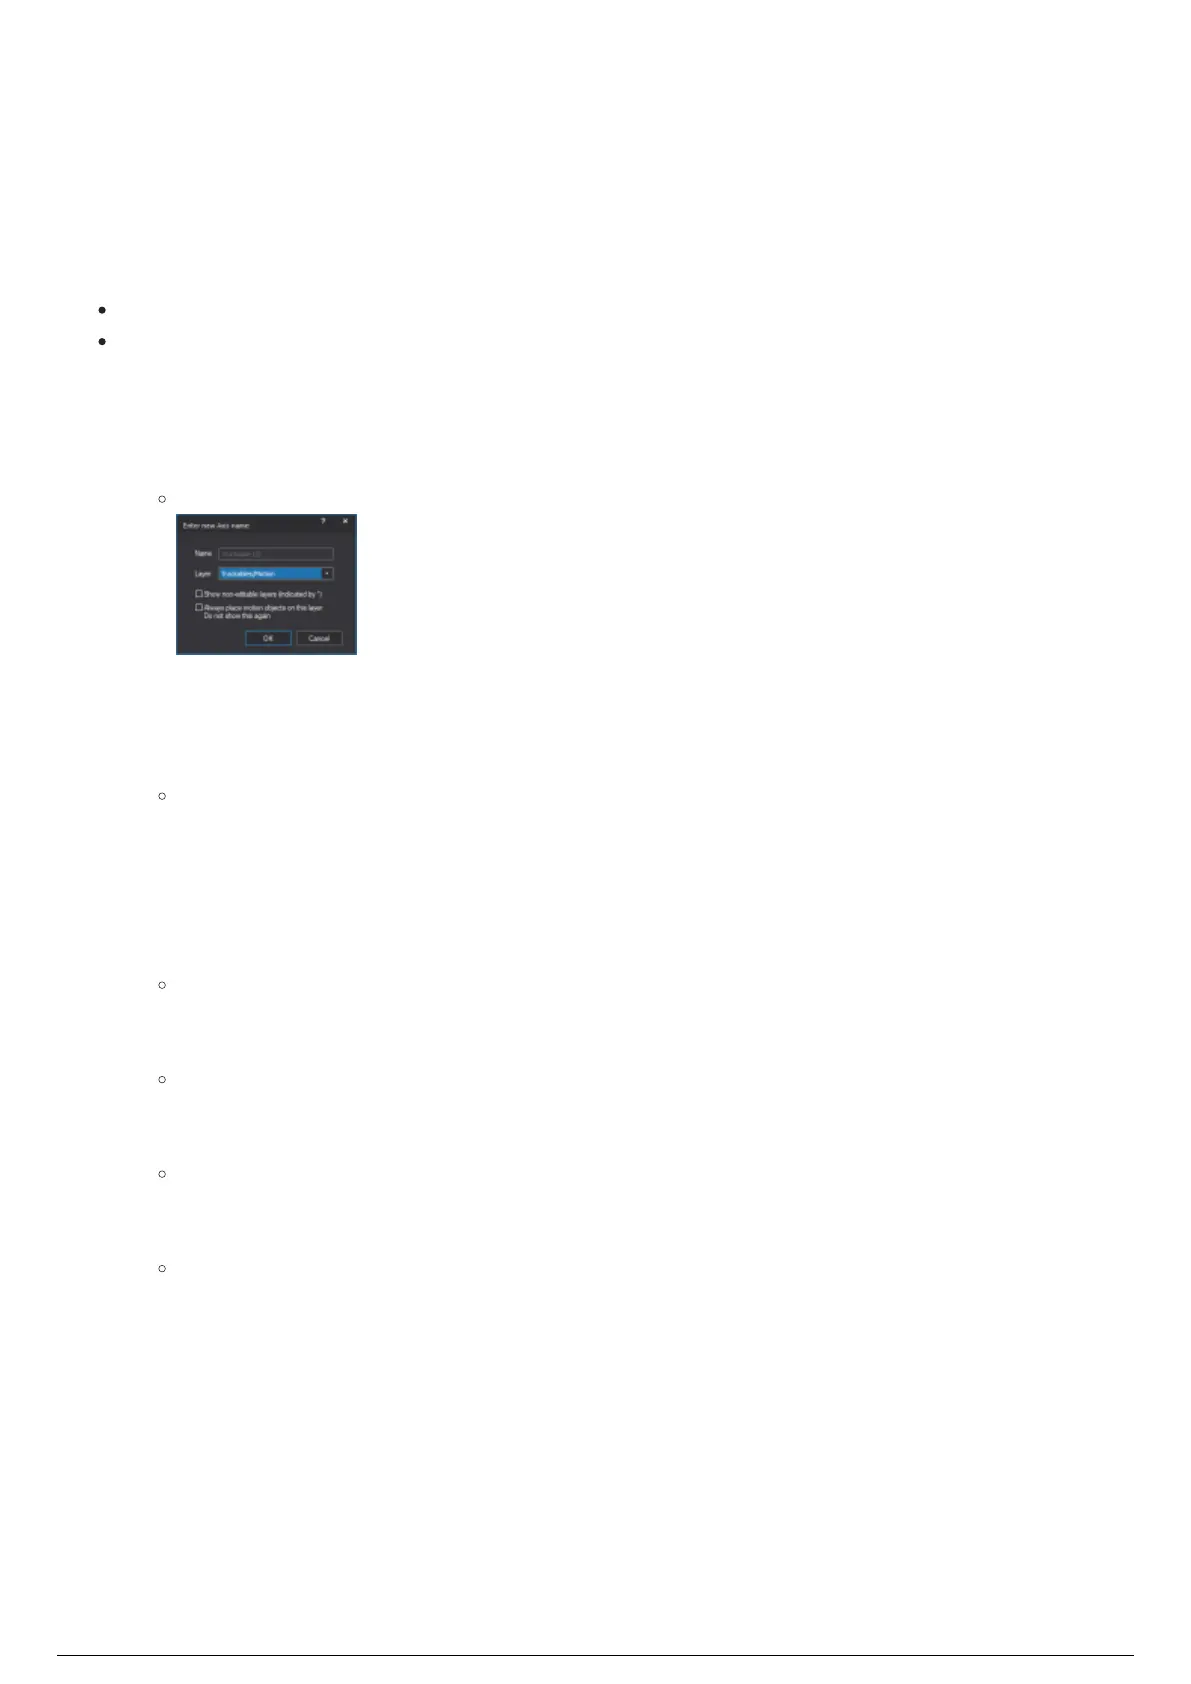
In BTWYSIWYG CAD mode, from the BlackTrax menu, choose BT Trackable.1.
Result: The Enter new Axis name window appears.
In the Enter new Axis name window, click the layer for the Trackable from the Layer drop-down list.2.
You can also select the checkboxes to enable the other options for the layer display.3.
Click OK.4.
On your drawing, click where you wish to place your Trackable.5.
Result: A Trackable object appears where the mouse was clicked. The Trackable object is
represented as a Cartesian axis.
To add a library object to your trackable
In BTWYSIWYG CAD mode, at the bottom of the screen, click the Wireframe view tab.1.
From the LIBRARY menu, choose Browse Library.2.
Result: The Library Browser window appears.
At the bottom of the Library Browser window, click the Library items tab to display the contents.3.
Navigate to the desired object you wish to represent a Trackable.4.
Note: The actual look of the Trackable is purely cosmetic and will only represent the
Trackable's position in the visualization.
At the top of the Library Browser, click the Insert tool.5.
Tip: You can also double-click the object name.
To insert the object, click on your drawing to place the object where you want in relation to the6.
Trackable.
Tip: You should place the object relative to the drawn Trackable where the stringers will be
on your physical tracked object. The object will then move and rotate around the centroid of
the Trackable.
To stop inserting the object, right-click on the drawing and select Finish Library Item from the7.
menu that appears.
Right-click on the Trackable object you inserted on the drawing.8.
From the menu that appears, select Properties.9.
On the General tab, from the Attach to Axis drop-down list, select the Trackable object you wish to10.
assign the Library object to.
Click OK.11.
Result: The Trackable is represented as the inserted object and its motion is associated with the