In BTWYSIWYG CAD mode Wireframe view, from the Tools menu, choose Quick Tools and then1.
choose Quick Tools. Alternately click the Quick Tools icon in the Tools toolbar.
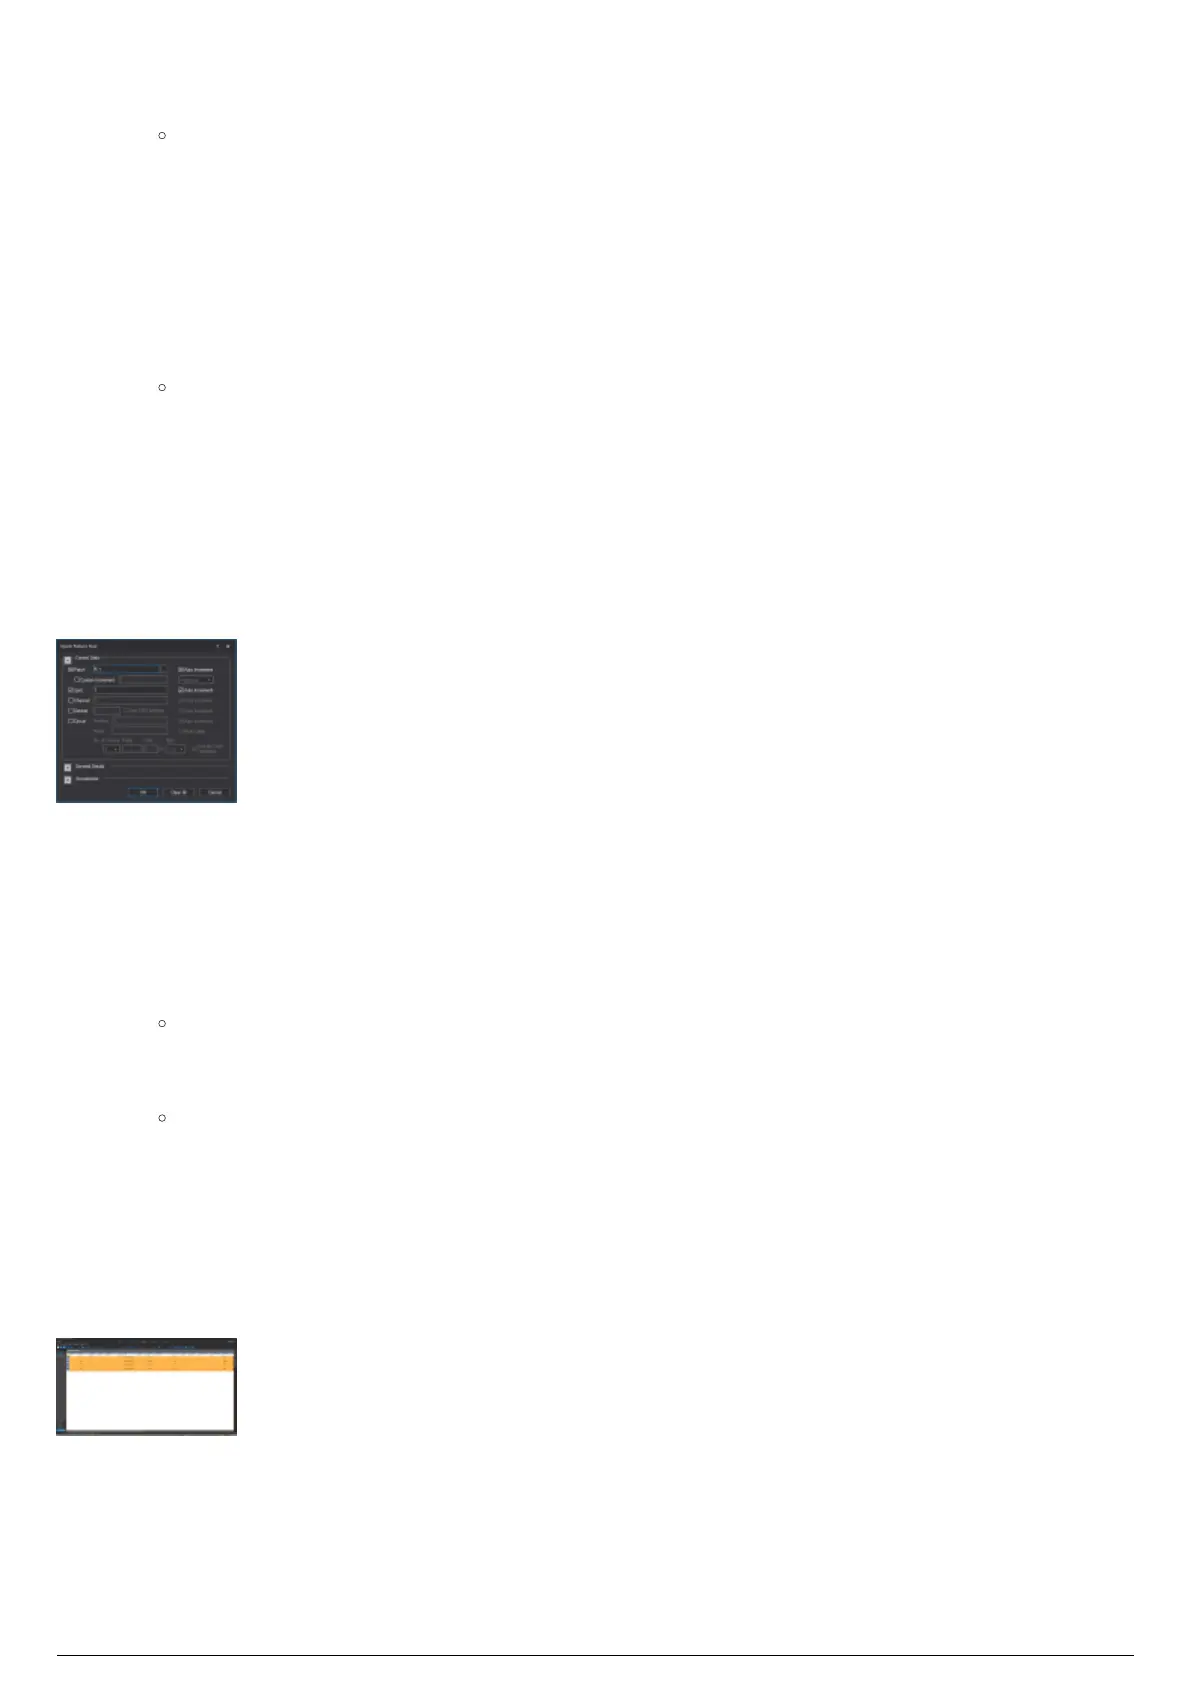
Result: The Quick Fixture Tool window appears.
In the Quick Fixture Tool window, in the Fixture Attributes section, select the Spot checkbox.2.
In the Spot field, enter a number which will be the first fixture ID used in the sequence.3.
In the Fixture Data section, select the Patch checkbox.4.
In the Patch field, enter the universe and channel the first fixture will patch to, separated by a5.
period.
Example: “A.1” would patch to universe A, address 1.
Click Ok.6.
Result: When a fixture is selected, it will be assigned a Universe and channel to operate on.
The first fixture selected will be assigned the to the channel number entered in Quick Tools.
Subsequent fixtures selected will be assigned the next sequential channel and Spot ID
number.
Click on a fixture to patch it to a universe and channel. Click on each fixture that you want to be7.
patched and assigned a spot ID.
To stop patching fixtures, right-click.8.
On the menu that appears, click Finish Quick Tools.9.
Quick Tools
To patch fixtures and assign spot IDs using the data spreadsheet
The Spreadsheet view In DATA mode displays information on all fixtures created in the BTWYSIWYG
project. You can edit the patch information and Spot ID directly in the spreadsheet table.
In BTWYSIWYG DATA mode, click on the Spreadsheet tab.1.
In the Columns section on the left side of the window, click All Data (Sortable).2.
Result: All fixture data are displayed in the spreadsheet.
In the Patch column, enter the appropriate patch information for each fixture.3.
In the Spot column, enter a unique Spot ID for each fixture.4.
Tip: It is possible to assign sequential values to fixtures quickly by selected all fields for the
fixtures you wish to edit (for example all spot ID fields for all fixtures) and type the spot ID of
the starting fixture and a '+' and hitting enter. For example, 101+ will set the first fixture to
spot 101, and every fixture after that will increase by 1. If this method is used to assign
values, it is recommended that fixtures are first sorted so fixtures are organized. Fixtures can
be sorted in order of position, or Unit # along a pipe/truss. This can also be used for patching
fixtures as well.
DATA>Spreadsheet with fixtures patched for BlackTrax