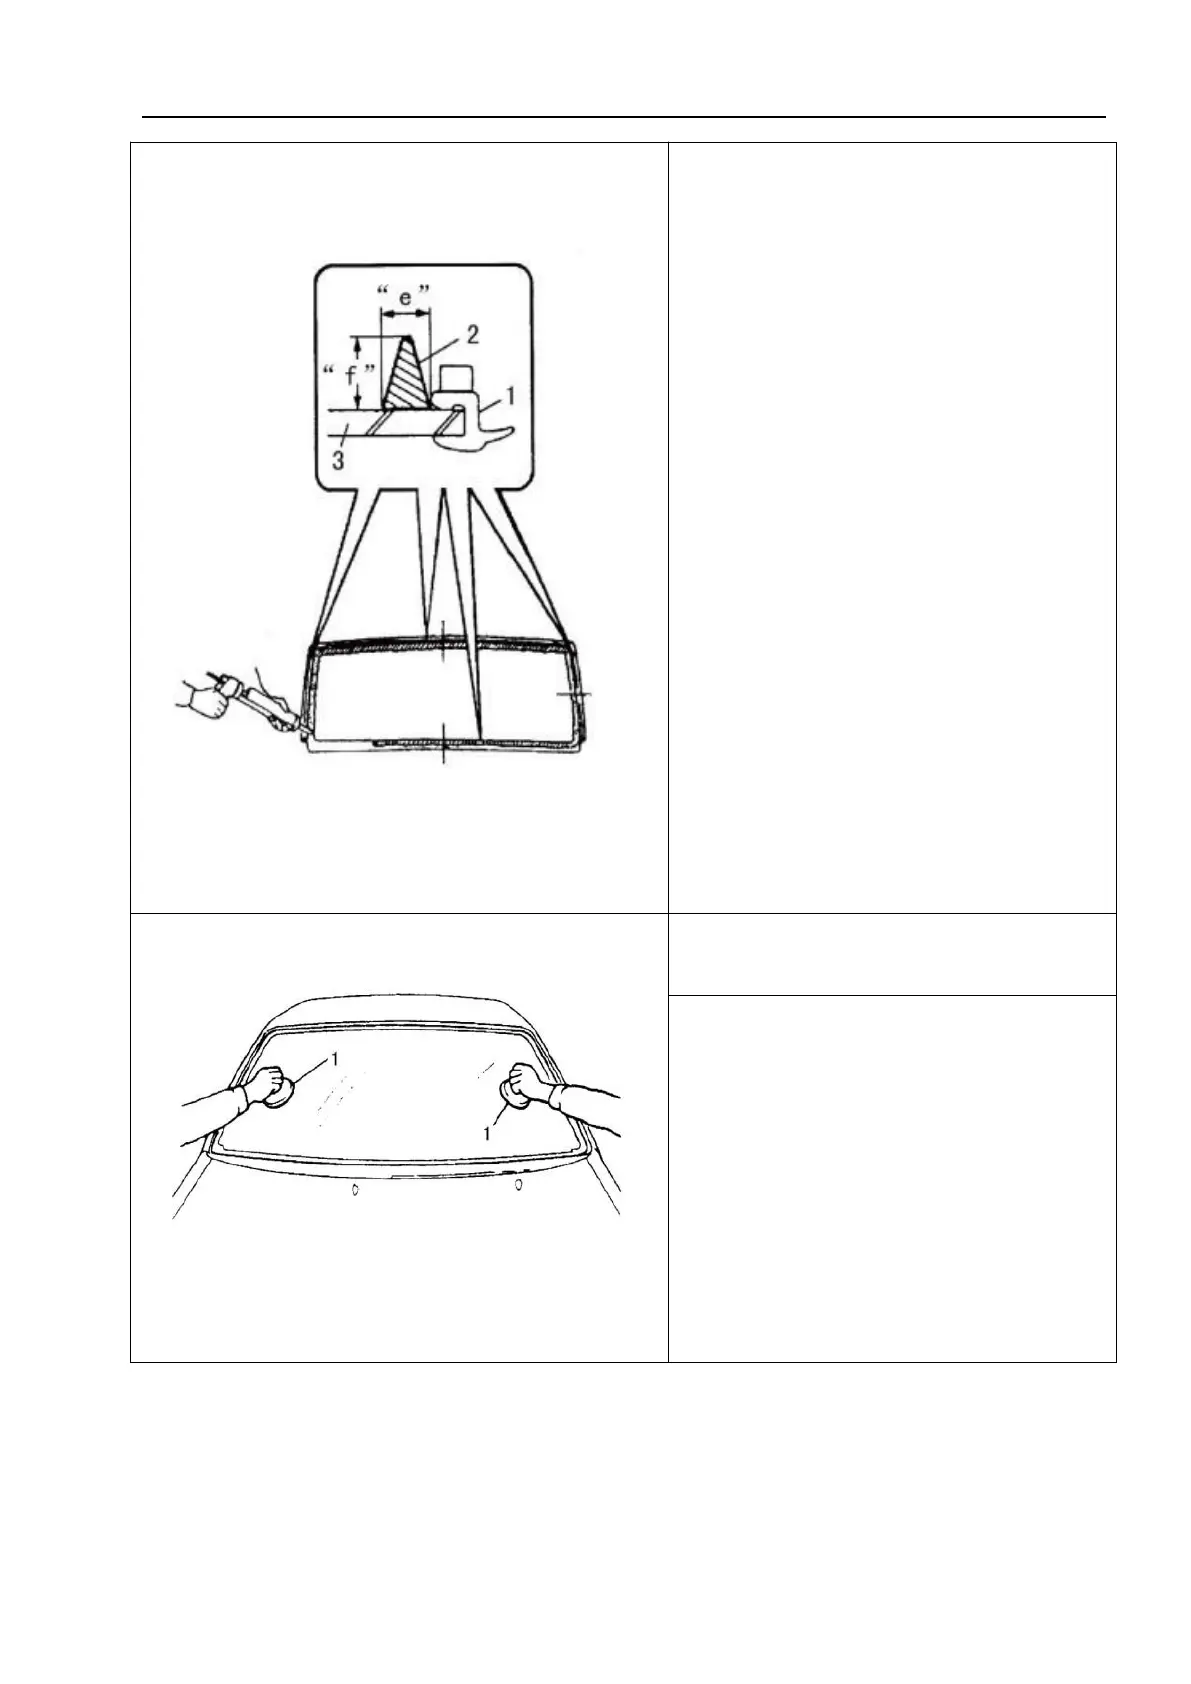
6. Apply adhesive as shown in the left
figure.
Width "f": approximately 16mm (0.63in.)
△
! Caution
Starting from the bottom edge of
the glass, be careful not to damage the
primer. The adhesive applied to the
bottom edge is higher than that to the
other three edges, the top, right, and left.
After painting, press the glass onto the
vehicle body as soon as possible, and
use rubber suction cup grip to install
and handle the glass. Complete steps 6
to 8 within 10 minutes to ensure
sufficient adhesion.
The correct operation and drying
time must be carried out according to
the adhesive manufacturer's
instructions.
8. Hold the rubber suction cup grip and
press the glass onto the vehicle body,
while gently tapping the surface of the
glass and surrounding the sealing strip
to make the glass fully adhere to the
vehicle body.
△! Caution
Be careful not to damage the glass
surface or the vehicle body.


 To Next Page