(3) Remove the vehicle wiring harness connector
from brake fluid level switch in master cylinder
brake fluid reservoir (Fig. 6).
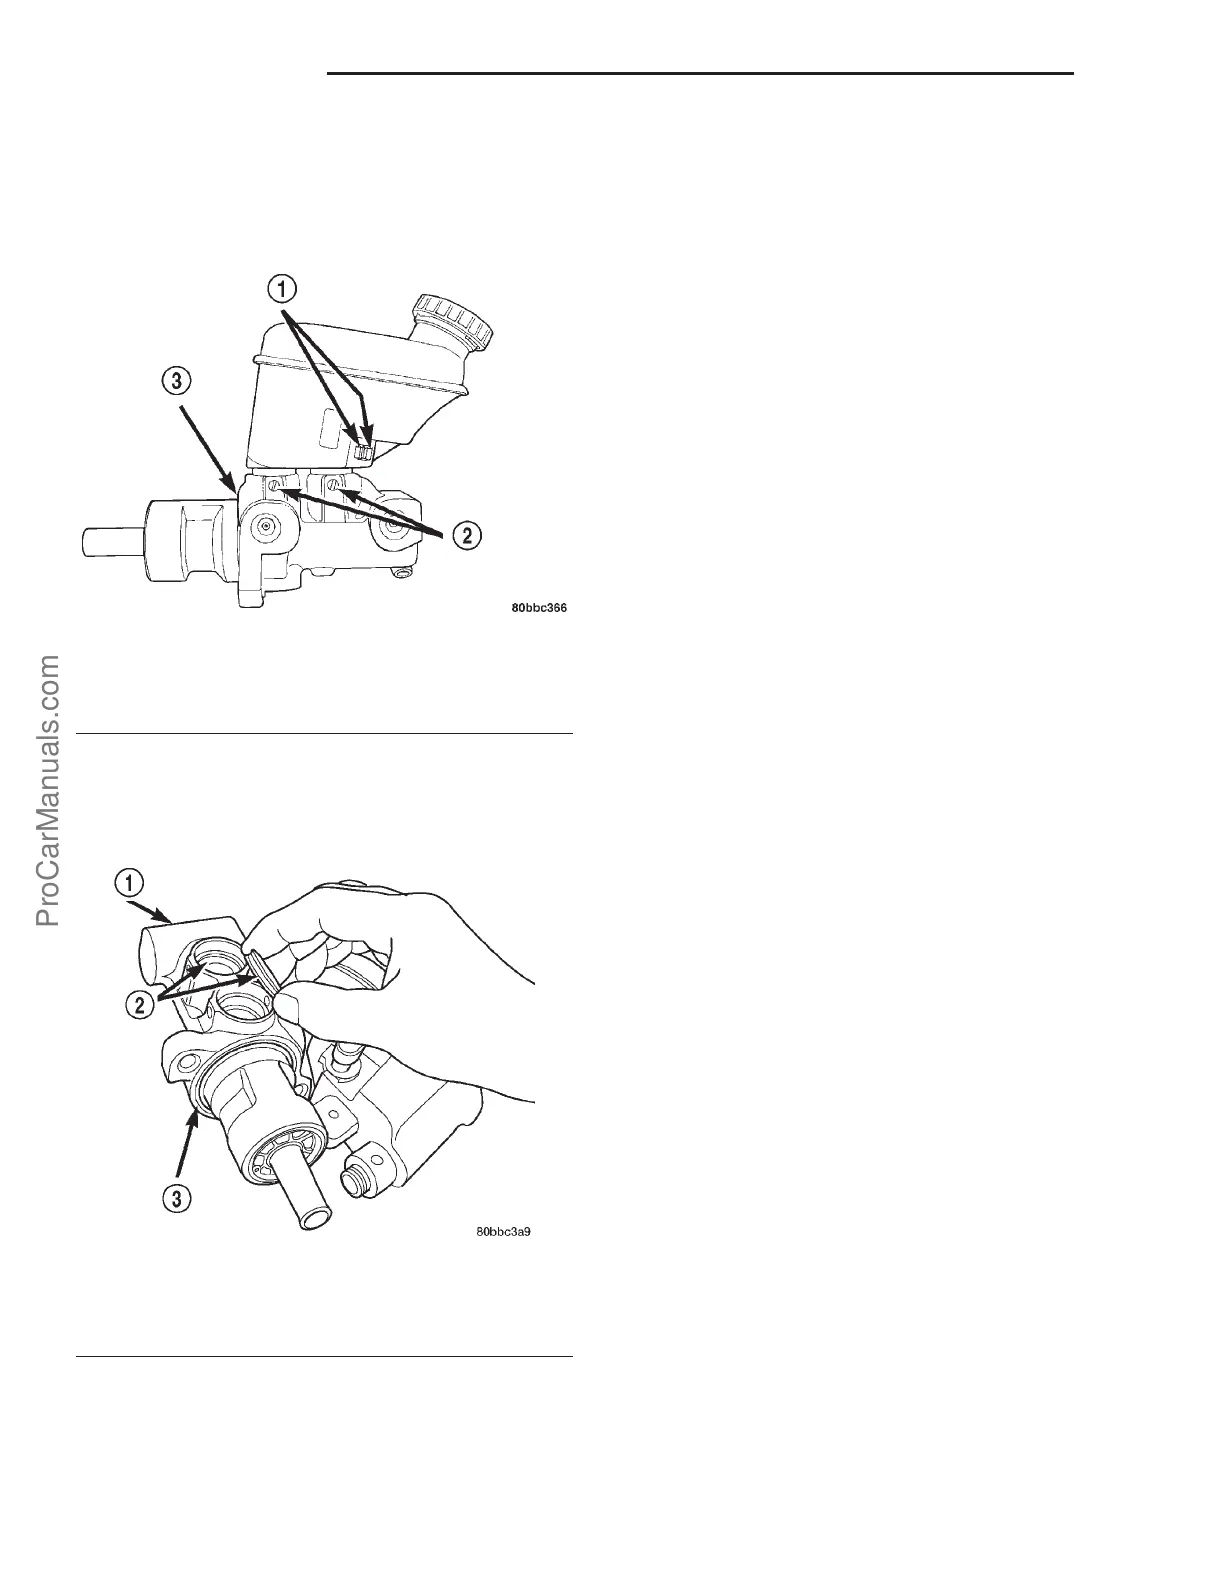
(4) Remove the two plastic pins holding the reser-
voir to the master cylinder (Fig. 4).
(5) Lift the reservoir from the master cylinder
casting.
(6) Remove the grommets sealing the reservoir to
the master cylinder housing (Fig. 5).
INSTALLATION
NOTE: Before proceeding with this procedure,
(Refer to 5 - BRAKES - WARNING).
NOTE: The master cylinder does not need to be
removed from the power brake booster for removal
and installation of the brake fluid reservoir.
(1) Install new sealing grommets in the master
cylinder housing (Fig. 5).
(2) Lubricate the sealing grommets with fresh
clean DOT 3 brake fluid. Place the reservoir in posi-
tion over the grommets making sure the filler hole is
towards the front of the vehicle. Seat the reservoir
into the grommets. While holding the reservoir firmly
against the grommets, install new plastic pins
through their mounting holes until they protrude out
the other side of the master cylinder reservoir (Fig.
4).
(3) Connect the brake fluid level switch wiring
connector (Fig. 6).
(4) Fill the reservoir with fresh clean DOT 3 brake
fluid. (Refer to 5 - BRAKES/HYDRAULIC/MECHAN-
ICAL/FLUID - STANDARD PROCEDURE).
MASTER CYLINDER-LHD
REMOVAL
NOTE: Before proceeding with this procedure,
(Refer to 5 - BRAKES - WARNING).
CAUTION: The vacuum in the power brake booster
must be pumped down before removing the master
cylinder to prevent the booster from sucking in any
contamination. This can be done by pumping the
brake pedal while the engine is not running until a
firm brake pedal is achieved.
(1) With the engine not running, pump the brake
pedal 4-5 strokes until the pedal feel is firm.
(2) Disconnect the negative (ground) cable from
the battery and isolate the cable.
(3) Disconnect the positive cable from the battery,
then remove the battery from the battery tray. There
is one nut securing the clamp on the backside of the
battery holding it in place.
(4) Remove the vehicle wiring harness connector
from brake fluid level switch in master cylinder
brake fluid reservoir (Fig. 6).
(5) Disconnect the two brake tubes from the mas-
ter cylinder, and two brake tubes from the propor-
tioning valves (Fig. 7). Install plugs at all of the open
brake tube outlets on the master cylinder.
(6) Clean the area around where the master cylin-
der attaches to the power brake booster using a suit-
able brake cleaner such as Mopar Brake Parts
Cleaner or an equivalent.
Fig. 4 Master Cylinder
1 - BRAKE FLUID LEVEL SWITCH RETAINING TABS
2 - RESERVOIR RETAINING PINS
3 - SEAL
Fig. 5 Sealing Grommets
1 - MASTER CYLINDER
2 - GROMMETS
3 - SEAL
5s - 10 BRAKES-BASE PL
FLUID RESERVOIR (Continued)
ProCarManuals.com