(c) Perform functional check by shifting trans-
axle into all gears.
(12) Install center console assembly (Fig. 40). Ver-
ify that boot is not pinched at console opening before
tightening.
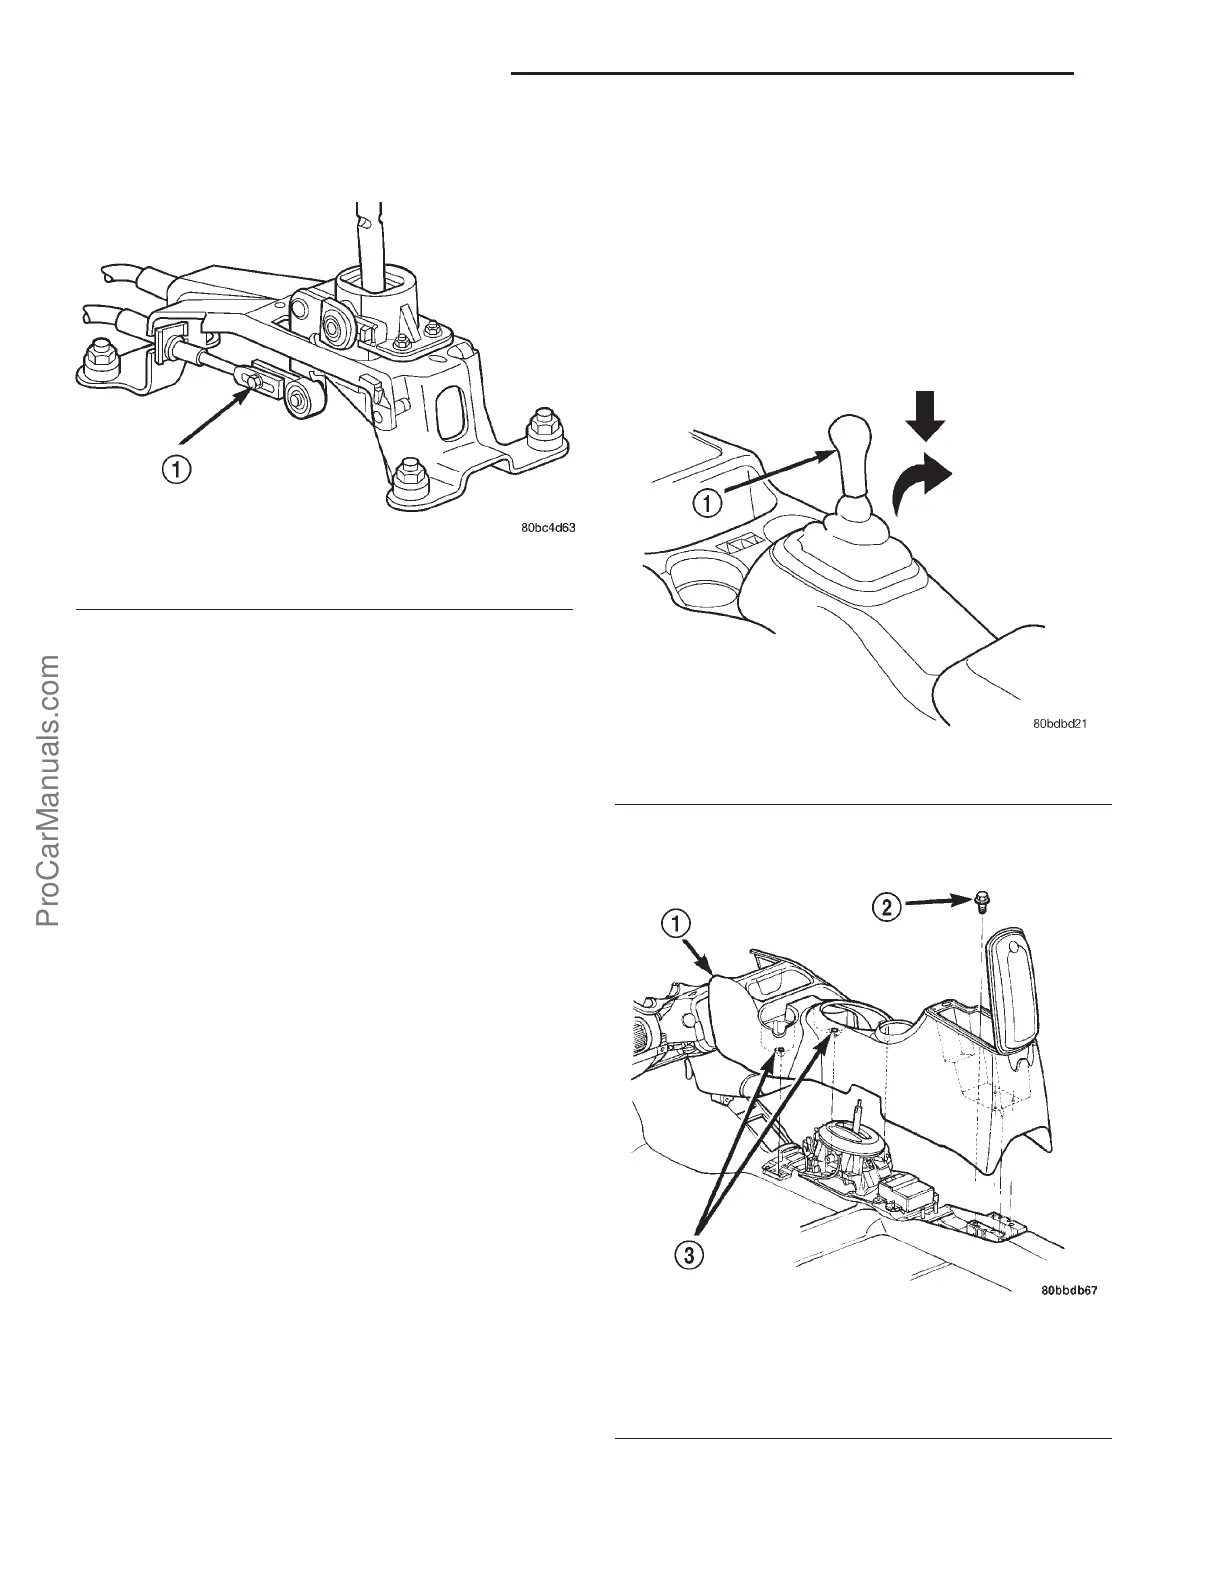
(13) Install knob/boot assembly to shifter lever,
align knob to three o’clock position, push knob down
to engage spring and rotate counter clockwise to
secure (Fig. 39).
(14) Locate boot to console at forward tab and
secure with retaining tabs.
(15) Return shifter boot to its original position
(seated around knob lip).
(16) Install the air cleaner/throttle body assy. (Fig.
43) as follows:
(a) Connect the accelerator and speed control (if
equipped) cables to the air cleaner/throttle body
assy.
(b) Install assy into position, making sure the
air cleaner locating slot is engaged to the battery
bracket tab, and tighten fasteners to 14 N·m (120
in. lbs.) torque.
(c) Verify throttle body duct is fully seated to
intake manifold and tighten clamp to 5 N·m (40 in.
lbs.) torque.
(d) Connect the Throttle Position Sensor (TPS)
and Idle Air Control (IAC) connectors.
(e) Connect proportional purge solenoid (PPS)
and crankcase vent hose from throttle body.
(17) Connect battery negative cable.
ADJUSTMENTS
NOTE: Only the crossover cable is adjustable. The
selector cable does not have adjustment capabili-
ties.
(1) Disengage gearshift boot retaining tabs to free
it from console.
(2) Push down on knob and rotate clockwise to
remove shifter boot/knob assembly (Fig. 48).
(3) Remove the center console assembly as shown
in (Fig. 49).
Fig. 47 Crossover Cable Adjustment Screw
1 - CROSSOVER ADJUSTMENT SCREW
Fig. 48 Gearshift Knob/Boot Removal
1 - GEARSHIFT KNOB
Fig. 49 Center Console Removal/Installation—
Typical
1 - CONSOLE
2 - SCREW (4)
3 - SCREW (2)
21s - 20 A578 MANUAL TRANSMISSION PL
GEAR SHIFT CABLE (Continued)
ProCarManuals.com