(7) Connect two heater hoses to heater tubes near
battery. Ensure clamps are positioned properly to
seal hoses and avoid contact with engine components.
(8) Connect PCV vacuum hose to intake manifold.
(9) Install air cleaner housing and throttle body to
intake manifold hose.
(10) Raise vehicle on hoist.
(11) Close radiator draincock.
(12) Lower vehicle
(13) Install battery. Connect positive battery cable.
Connect negative battery cable.
(14) Fill cooling system (Refer to 7 - COOLING -
STANDARD PROCEDURE).
RADIATOR FAN
REMOVAL - DUAL RADIATOR FAN (4 SPEED
AUTOMATIC TRANSMISSION EQUIPPED
VEHICLES)
WARNING: DO NOT REMOVE THE CYLINDER
BLOCK PLUG OR THE RADIATOR DRAINCOCK
WITH THE SYSTEM HOT AND UNDER PRESSURE
BECAUSE SERIOUS BURNS FROM COOLANT CAN
OCCUR.
(1) Disconnect negative cable from battery.
(2) Drain cooling system below the upper radiator
hose level. (Refer to 7 - COOLING - STANDARD
PROCEDURE)
(3) Remove the upper hose from radiator (Fig. 1).
(4) Remove the air cleaner housing and throttle
body as an assembly.
(5) Remove the powertrain control module (PCM)
with bracket (Refer to 8 - ELECTRICAL/ELEC-
TRONIC CONTROL MODULES/POWERTRAIN
CONTROL MODULE - REMOVAL).
(6) Disconnect radiator fan electrical connector
(Fig. 2).
(7) Remove the radiator upper support mounts
(Fig. 1).
(8) Remove air conditioning line support bracket
screw (Fig. 3).
(9) Remove radiator fan assembly screws from
radiator (Fig. 1).
(10) Carefully lift radiator fan assembly upward.
Fig. 1 RADIATOR AND FAN
1 - RADIATOR FAN ATTACHING SCREWS
2 - RADIATOR HOSE - UPPER
3 - RADIATOR SUPPORTS - UPPER
Fig. 2 RADIATOR FAN MOTOR CONNECTOR
1 - RADIATOR FAN ELECTRICAL CONNECTOR
2 - RADIATOR HOSE - LOWER
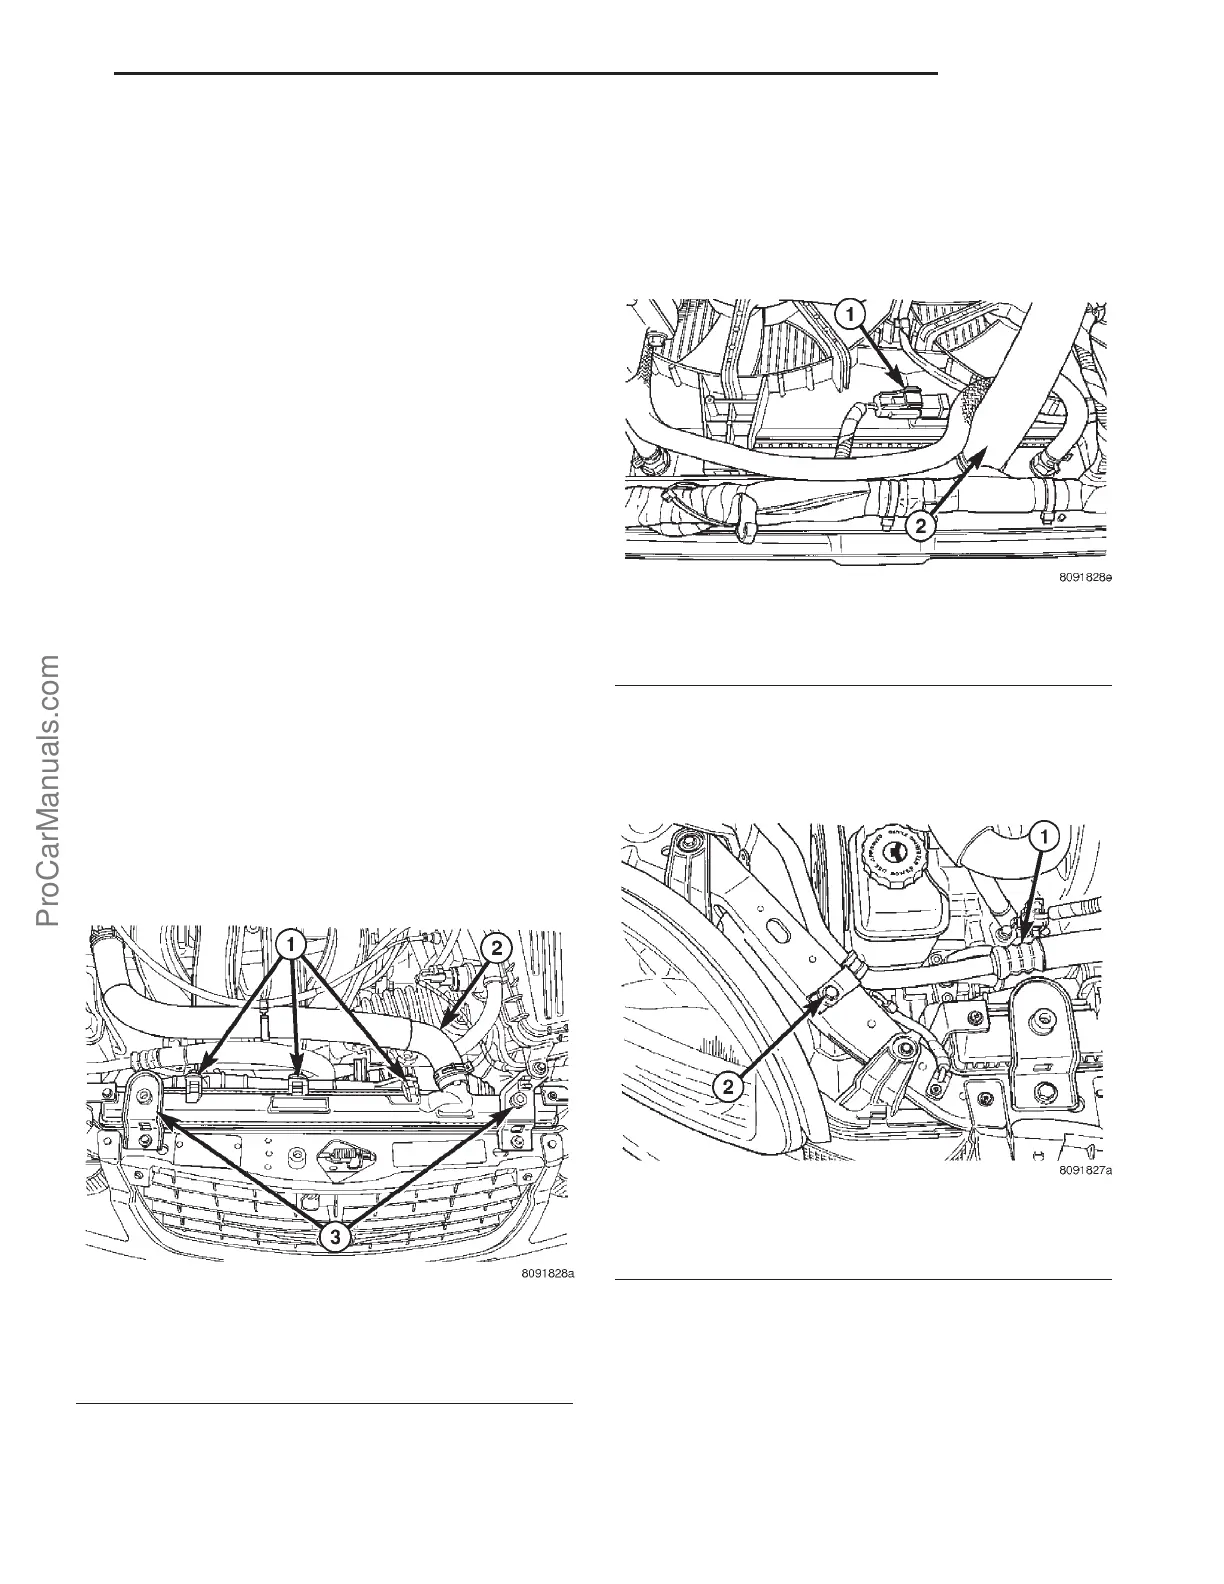
Fig. 3 A/C LINE SUPPORT
1 - A/C LINE
2 - SCREW
PL ENGINE 7s - 7
HEATER SUPPLY/RETURN TUBES (Continued)
ProCarManuals.com