(25) If installing a new or replacement transaxle,
remove the upper mount as shown in (Fig. 11), trans-
fer to the replacement unit and torque all bolts to 68
N·m (50 ft. lbs.) torque.
INSTALLATION
(1) Install clutch module onto input shaft. Install
transaxle into position.
(2) Install transaxle-to-engine mounting bolts (Fig.
10)and tighten to 95 N·m (70 ft. lbs.) torque.
(3) Raise engine and transaxle with screw jack
until through hole in upper mount aligns with hole
in mount bracket. Install mount bolt and tighten to
108 N·m (80 ft. lbs.) torque (Fig. 9).
(4) Remove screwjack.
(5) Install drive plate-to-clutch module bolts and
torque to 88 N·m (65 ft. lbs.) torque.
(6) Install starter motor and tighten bolts to 54
N·m (40 ft. lbs.) torque. Make sure to fasten ground
cable to upper starter bolt as shown in (Fig. 8).
(7) Connect starter electrical harness and tighten
positive cable nut to 10 N·m (90 in. lbs.) torque.
(8) Install bellhousing dust cover (Fig. 6).
(9) Install left engine-to-transaxle bending brace
(Fig. 6).
(10) Install structural collar (Fig. 6) as follows:
(a) Position collar and install all bolts finger
tight.
(b) Tighten the collar-to-oil pan bolts to 3 N·m
(30 in. lbs.) torque.
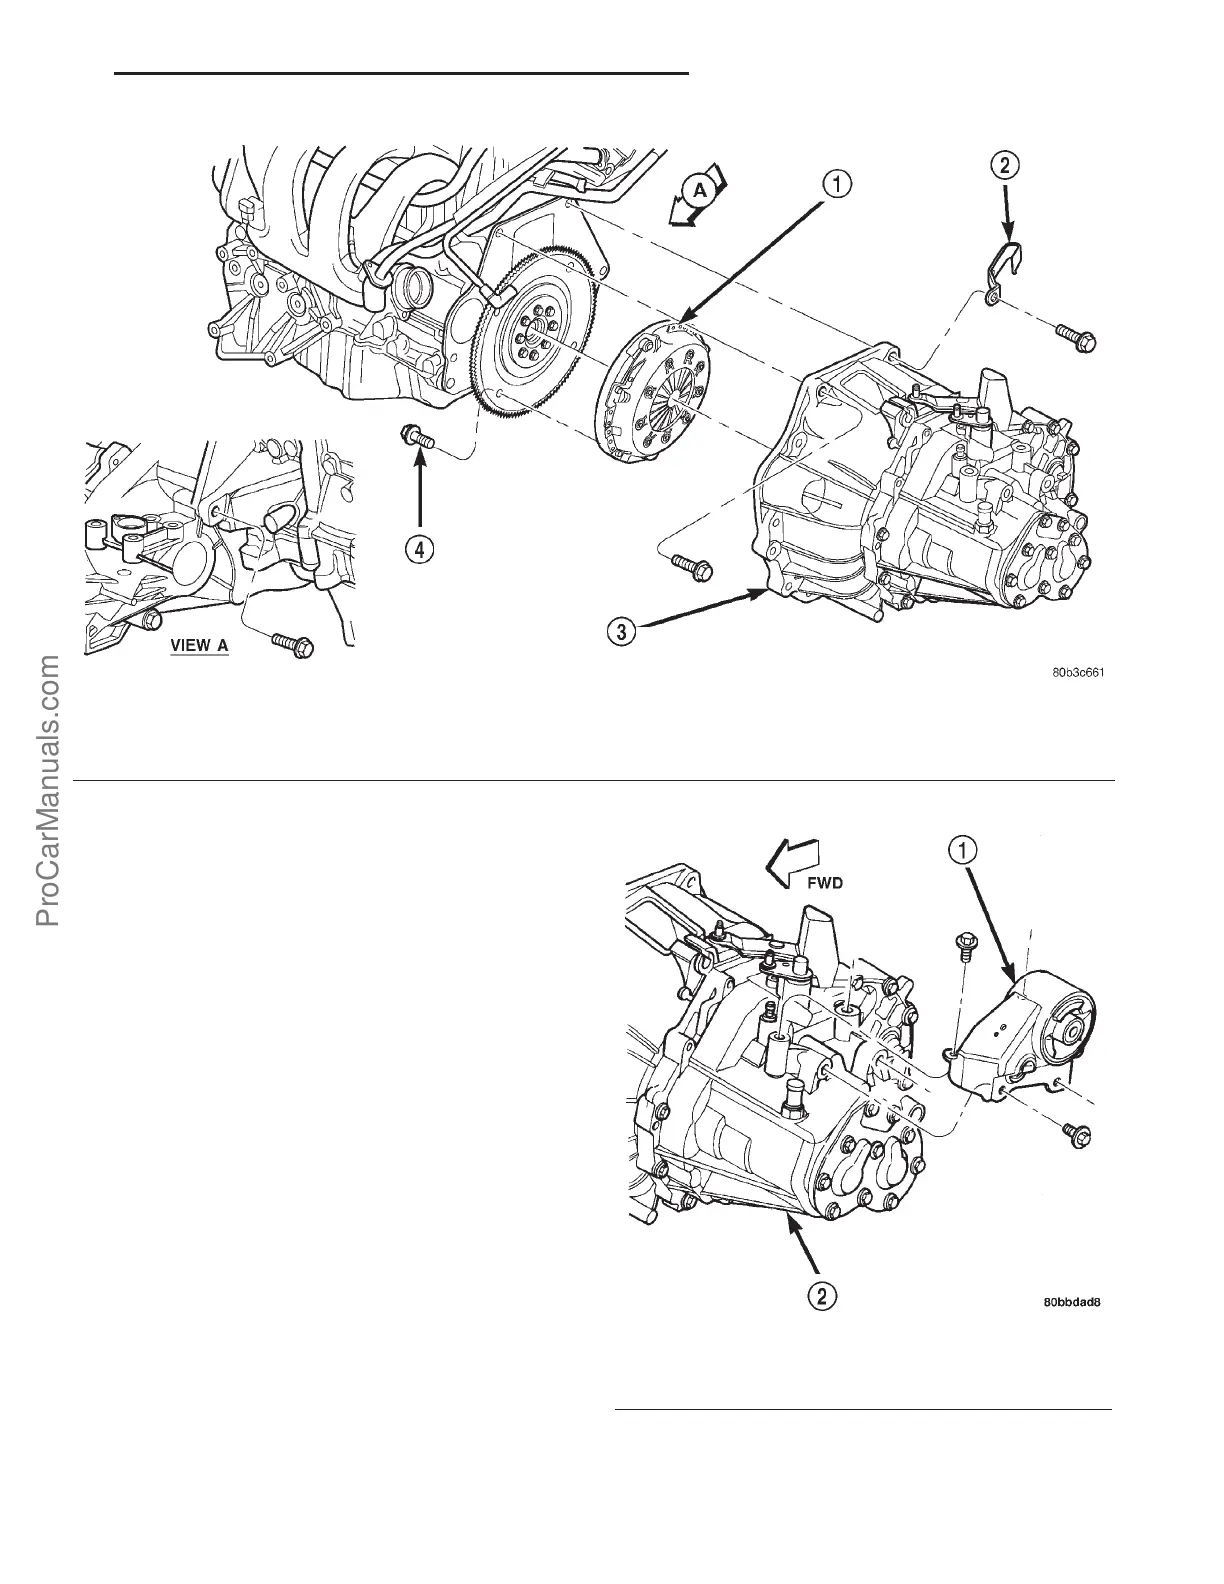
Fig. 10 Transaxle Removal/Installation
1 - MODULAR CLUTCH ASSEMBLY
2 - CLIP
3 - TRANSAXLE
4 - CLUTCH MODULE BOLT (4)
Fig. 11 Transaxle Upper Mount and Bracket
1 - MOUNT
2 - TRANSAXLE
PL A578 MANUAL TRANSMISSION 21s - 5
A578 MANUAL TRANSMISSION (Continued)
ProCarManuals.com