ASSEMBLY
CAUTION: If transaxle failure has occurred, it is
necessary to flush the transaxle oil cooler and lines
to remove debris and particles that could contami-
nate and/or fail a new or rebuilt unit. (Refer to 7 -
COOLING/TRANSMISSION - STANDARD PROCE-
DURE)
NOTE: This procedure does not include assembly
of final drive (differential) components. (Refer to 21
- TRANSMISSION/TRANSAXLE/AUTOMATIC - 31TH/
FINAL DRIVE - ASSEMBLY)
NOTE: This procedure does not include assembly
of transfer system (transfer shaft and output shaft)
components. (Refer to 21 - TRANSMISSION/TRANS-
AXLE/AUTOMATIC - 31TH/TRANSFER SYSTEM -
INSTALLATION)
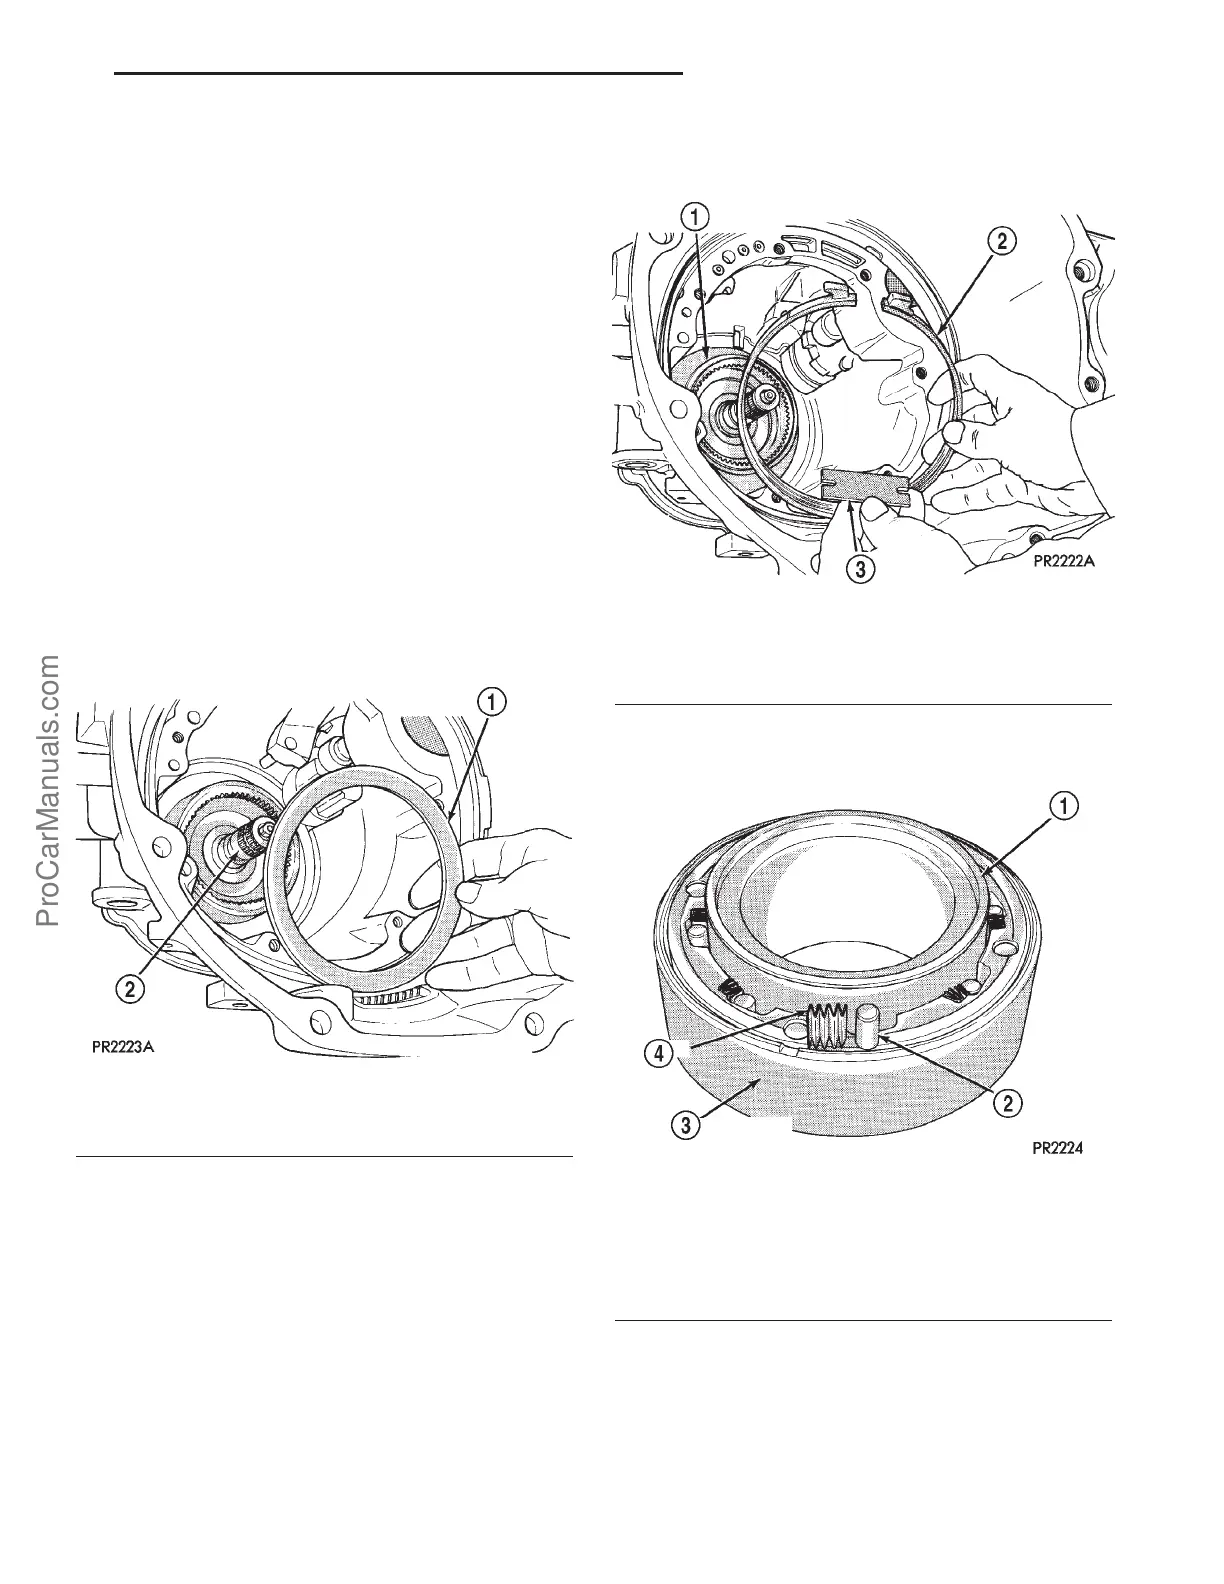
(1) Install #11 thrust washer (Fig. 45).
(2) Install low/reverse band (Fig. 46). Do not
install strut or adjust at this time.
(3) Assemble Tool L-4440 to overrunning clutch as
shown in (Fig. 47).
Fig. 45 No. 11 Thrust Washer
1 - #11 THRUST WASHER
2 - OUTPUT SHAFT
Fig. 46 Low/Reverse Band and Strut
1 - #11 THRUST WASHER
2 - LOW-REVERSE BAND
3 - STRUT
Fig. 47 Install Overrunning Clutch Rollers and
Springs
1 - TOOL L-4440
2 - ROLLER (8)
3 - OVERRUNNING CLUTCH CAM ASSEMBLY
4 - SPRING (8)
PL 31TH AUTOMATIC TRANSAXLE 21s - 35
31TH AUTOMATIC TRANSAXLE (Continued)
ProCarManuals.com