Some suspected converter housing fluid leaks may
not be leaks at all. They may only be the result of
residual fluid in the converter housing, or excess
fluid spilled during factory fill, or fill after repair.
Converter housing leaks have several potential
sources. Through careful observation, a leak source
can be identified before removing the transmission
for repair.
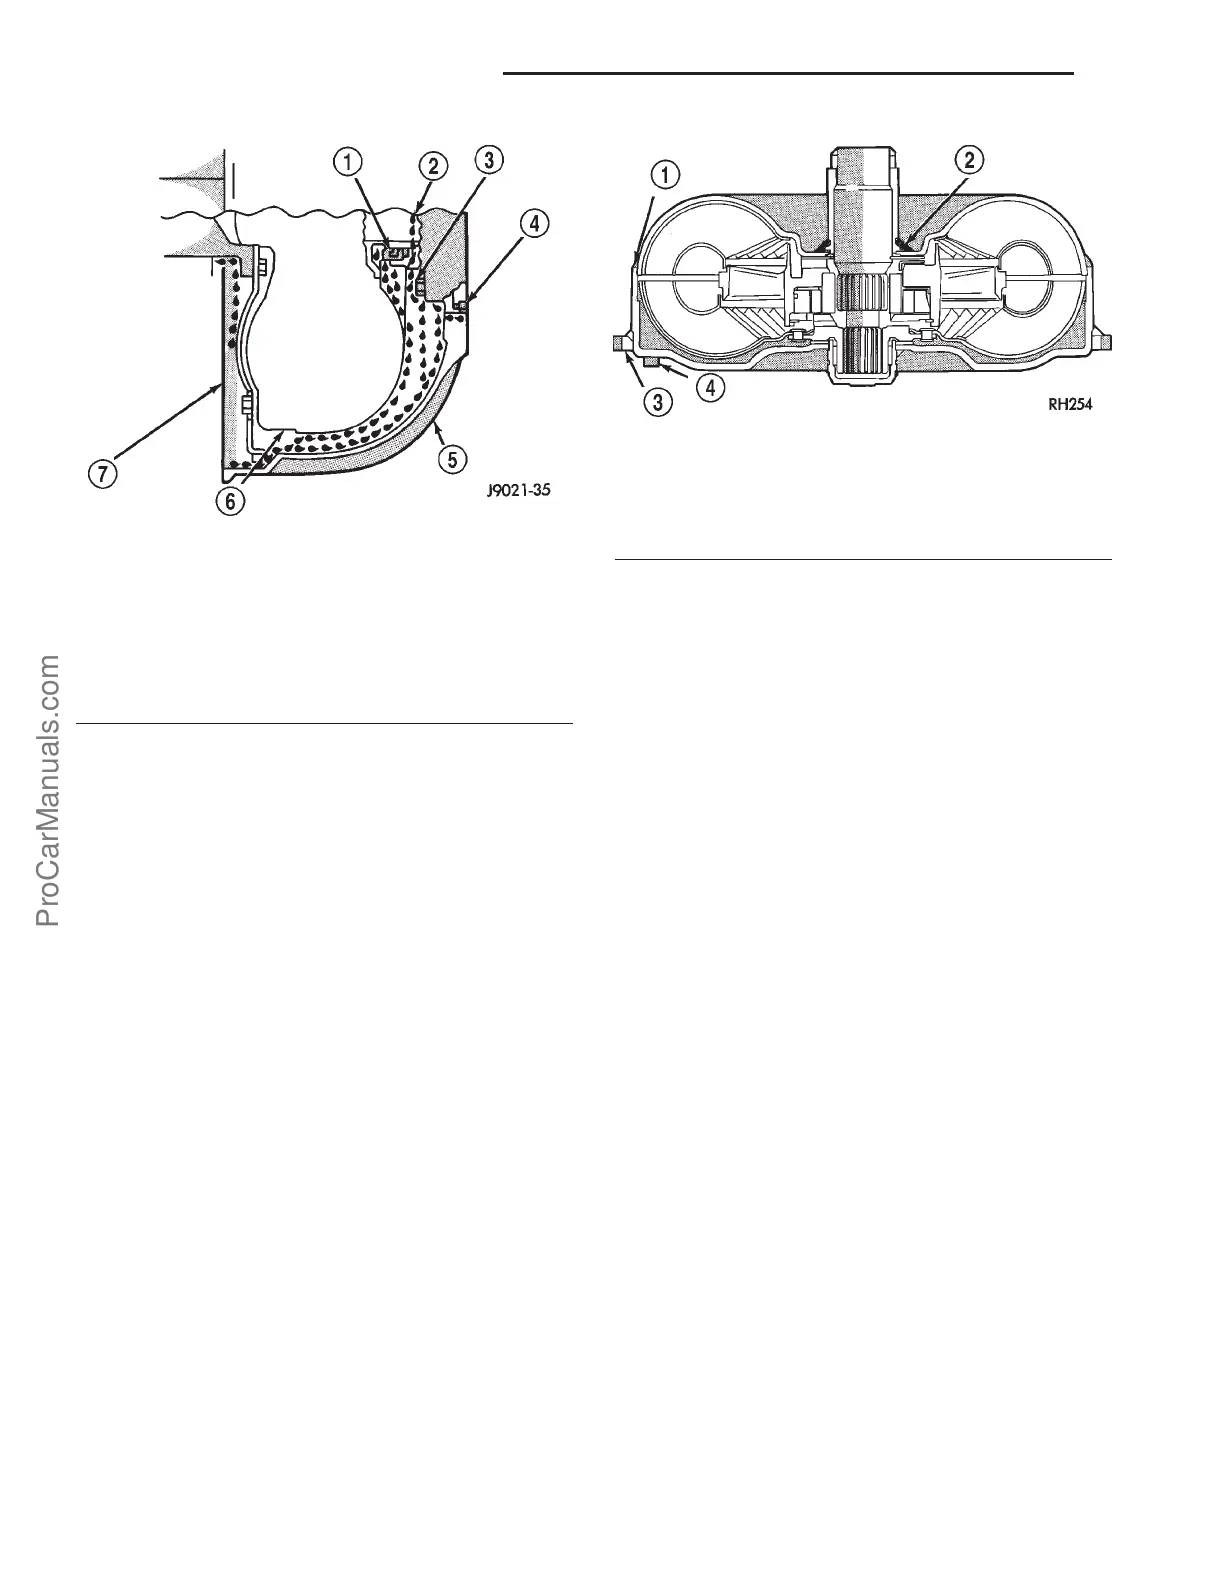
Pump seal leaks tend to move along the drive hub
and onto the rear of the converter (Fig. 6). Pump
o-ring or pump body leaks follow the same path as a
seal leak. Pump attaching bolt leaks are generally
deposited on the inside of the converter housing and
not on the converter itself. Pump seal or gasket leaks
usually travel down the inside of the converter hous-
ing (Fig. 6).
TORQUE CONVERTER LEAKAGE
Possible sources of torque converter leakage are:
• Torque converter weld leaks at the outside diam-
eter weld (Fig. 7).
• Torque converter hub weld (Fig. 7).
REMOVAL
(1) Disconnect battery cables.
(2) Remove hold down and battery.
(3) Remove battery tray.
(4) Remove air cleaner/throttle body assembly.
(5) Using a suitable blade or cutter, cut transaxle
oil cooler hoses off flush with end of fittings. A ser-
vice splice kit will be installed upon reinstallation.
(6) Disconnect input speed sensor connector.
(7) Disconnect output speed sensor connector.
(8) Disconnect solenoid/pressure switch assembly
connector.
(9) Disconnect gearshift cable from manual valve.
(10) Disconnect gearshift cable from upper mount
bracket. Secure cable out of the way.
(11) Remove starter motor upper mounting bolt.
(12) Raise vehicle on hoist.
(13) Remove halfshafts.
(14) Remove structural collar.
(15) Remove left lateral bending brace.
(16) Remove starter motor and position out of way.
(17) Remove power steering cooler-to-crossmember
fasteners. Secure cooler out of way.
(18) Remove right lateral bending brace-to-trans-
axle bolt.
(19) Remove converter dust shield.
(20) Remove torque converter-to-drive plate bolts.
(21) Remove both lower transaxle bellhousing-to-
engine bolts.
(22) Support engine with a screw jack and wood
block.
(23) Remove transaxle upper mount through-bolt.
Lower engine/transaxle assembly with screw jack.
(24) Obtain helper and transmission jack.
(25) Position transmission jack to transaxle.
Secure transaxle to jack.
(26) Remove two (2) transaxle bellhousing-to-block
bolts (upper).
(27) Remove transaxle from vehicle.
Fig. 6 Converter Housing Leak Paths
1 - PUMP SEAL
2 - PUMP VENT
3 - PUMP BOLT
4 - PUMP GASKET
5 - CONVERTER HOUSING
6 - CONVERTER
7 - REAR MAIN SEAL LEAK
Fig. 7 Converter Leak Points - Typical
1 - OUTSIDE DIAMETER WELD
2 - TORQUE CONVERTER HUB WELD
3 - STARTER RING GEAR
4 - LUG
21s - 76 41TE AUTOMATIC TRANSAXLE PL
41TE AUTOMATIC TRANSAXLE (Continued)
ProCarManuals.com