(7) Remove the two nuts attaching the master cyl-
inder to the power brake booster.
(8) Slide the master cylinder straight out of the
power brake booster.
(9) To remove the proportioning valves, unthread
each from the master cylinder.
INSTALLATION
NOTE: Before proceeding with this procedure,
(Refer to 5 - BRAKES - WARNING).
NOTE: The master cylinder must be bled before
installing it on the vehicle.
(1) If removed, install the proportioning valves in
their master cylinder ports. The valves are identical,
so they can be installed in either master cylinder
port going to the rear brakes. Make sure the O-rings
on the proportioning valves are new.
(2) Bleed the master cylinder before installing it
on the vehicle. (Refer to 5 - BRAKES/HYDRAULIC/
MECHANICAL/MASTER CYLINDER - STANDARD
PROCEDURE).
(3) Wipe the face of the power brake booster clean
where the master cylinder seal comes in contact
when it’s installed. Do not get any cleaner or debris
inside the booster.
(4) Position the master cylinder on the studs of the
power brake booster, aligning the push rod of the
power brake booster with master cylinder piston
push rod. Carefully push the master cylinder onto
the studs until it contacts the face of the booster.
(5) Install the two master cylinder mounting nuts
and tighten each to a torque of 18 N·m (160 in. lbs.).
(6) Connect the four brake tubes to the master cyl-
inder and proportioning valve ports (Fig. 7). Tighten
all tube nuts to a torque of 17 N·m (145 in. lbs.).
(7) Connect the brake fluid level switch wiring
connector.
(8) Install the battery and clamp it in place.
(9) Connect the positive, then the negative
(ground) cable on the battery.
(10) Fill the master cylinder to the proper level.
(11) Road test the vehicle to ensure proper opera-
tion of the brakes.
MASTER CYLINDER-RHD
REMOVAL
(1) Disconnect and isolate the negative battery
cable.
CAUTION: Pump the brake pedal several times to
relieve the vacuum in the power brake booster. This
will prevent the booster from sucking in any con-
tamination when the master cylinder is removed.
(2) Disconnect the brake fluid level sensor electri-
cal connector (Fig. 8).
(3) Remove the brake lines from the master cylin-
der (Fig. 8).
(4) Remove the (2) master cylinder retaining nuts.
(5) Slide the master cylinder assembly straight out
of the power brake booster.
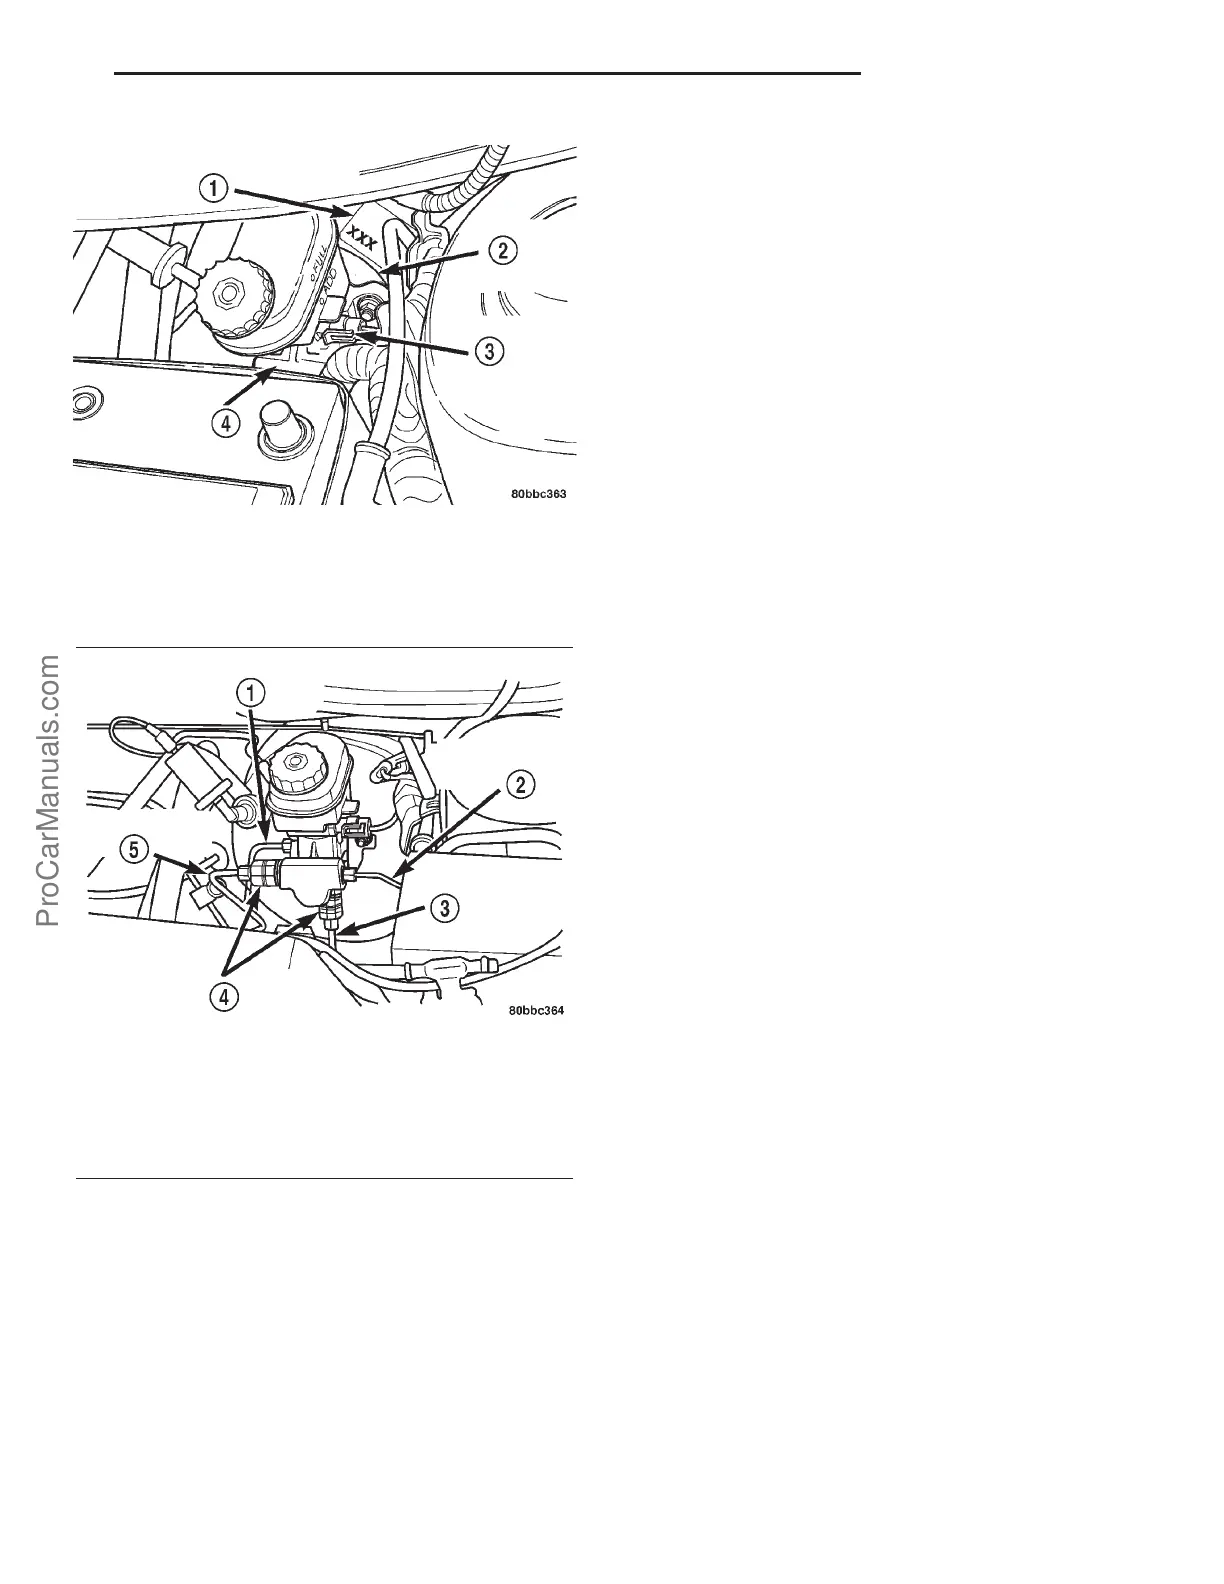
Fig. 6 Master Cylinder
1 - POWER BRAKE BOOSTER PARTS IDENTIFICATION TAG
2 - POWER BRAKE BOOSTER
3 - BRAKE FLUID PRESSURE SWITCH
4 - MASTER CYLINDER
Fig. 7 Brake
1 - RIGHT FRONT BRAKE TUBE
2 - LEFT FRONT BRAKE TUBE
3 - LEFT REAR BRAKE TUBE
4 - REAR PROPORTIONING VALVES
5 - RIGHT REAR BRAKE TUBE
PL BRAKES-BASE 5s - 11
MASTER CYLINDER-LHD (Continued)
ProCarManuals.com