REMOVAL
NOTE: Replacement slave cylinder assemblies
come pre-filled with fluid. No fluid service or sys-
tem bleeding should be required.
(1) Raise vehicle on hoist.
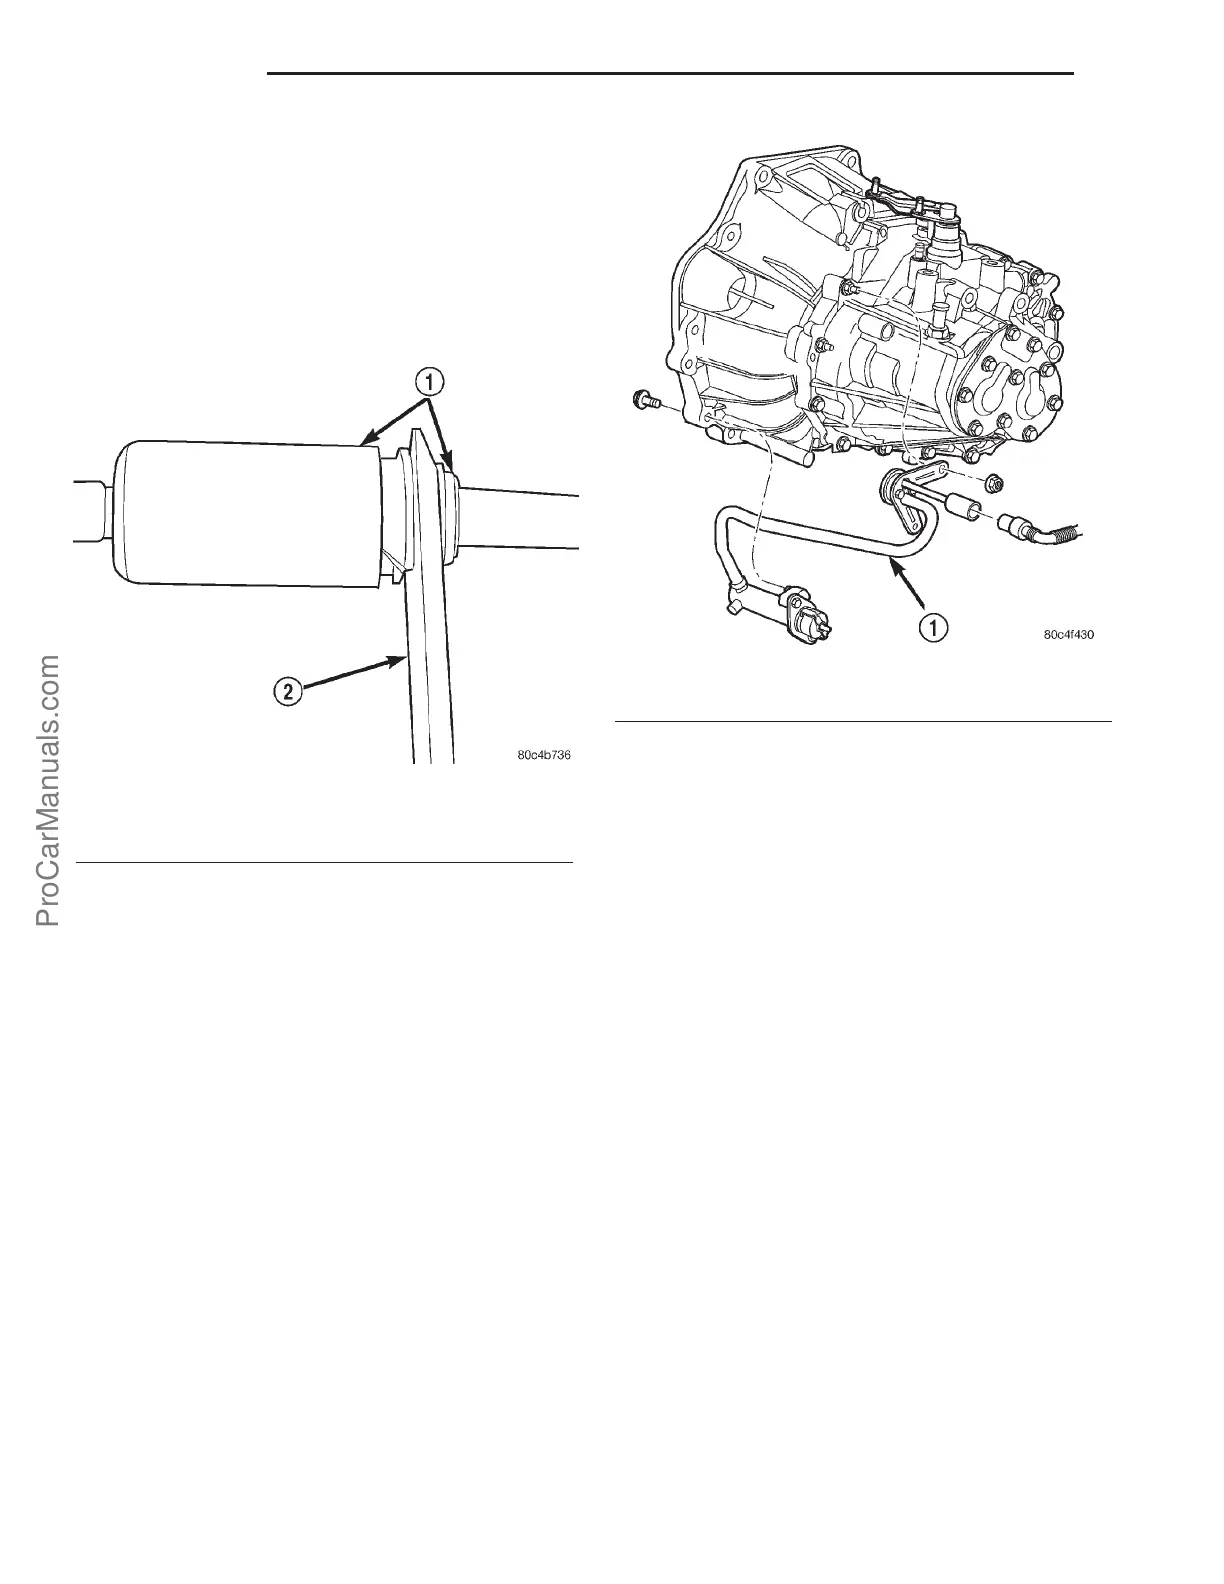
(2) Disconnect clutch hydraulic quick connect
using tool 6638A (Fig. 32).
(3) Remove damper bracket nuts (Fig. 33).
(4) Remove slave cylinder mounting bolts (Fig. 33).
(5) Remove slave cylinder from vehicle.
INSTALLATION
NOTE: Replacement slave cylinder assemblies
come pre-filled with fluid. No fluid service or sys-
tem bleeding should be required.
(1) Install the slave cylinder assembly into position
on transaxle (Fig. 33). Start damper and slave cylin-
der fasteners by hand.
(2) Tighten slave cylinder bolts to 19 N·m (170 in.
lbs.) torque.
(3) Tighten damper nuts to 23 N·m (200 in. lbs.)
torque.
(4) Connect clutch hydraulic supply tube (Fig. 33) .
An audible click should be heard. Verify connection
by pulling outward.
(5) Lower vehicle.
(6) Verify clutch master cylinder reservoir is full.
Top off with DOT 3 brake fluid if necessary.
(7) Actuate clutch pedal a minimum of ten times
to allow any air ingested into the system to vent to
the master cylinder reservoir.
(8) Verify proper clutch release system operation.
(9) If slave cylinder was replaced with a new unit,
verify that the shipping strap has been broken. If
not, remove straps to prevent high pedal effort.
Fig. 32 Disconnect Quick-Connect Using Tool 6638A
1 - QUICK CONNECT FITTING
2 - TOOL 6638A
Fig. 33 Slave Cylinder Removal/Installation
1 - SLAVE CYLINDER
6s - 16 CLUTCH PL
SLAVE CYLINDER (Continued)
ProCarManuals.com