(11) Pull the tensioner plunger retaining pin. Pre-
tension is correct when the pin can be removed and
installed into tensioner housing and plunger.
(12) Rotate crankshaft 2 revolutions and check the
alignment of the timing marks (Fig. 25) and (Fig.
24).
(13) Check belt tension by installing pin into ten-
sioner housing. If pin cannot be re-installed, repeat
belt tension procedure.
(14) Install the timing belt front cover. (Refer to 9
- ENGINE/VALVE TIMING/TIMING BELT / CHAIN
COVER(S) - INSTALLATION)
(15) Install the engine mount bracket. (Refer to 9 -
ENGINE/ENGINE MOUNTING/ENGINE MOUNT
BRACKET - INSTALLATION)
(16) Install the engine right mount to engine
mount bracket through bolt.
(17) Remove jack from under engine.
(18) Install the upper torque strut. (Refer to 9 -
ENGINE/ENGINE MOUNTING/TORQUE STRUT -
INSTALLATION)
(19) Install power steering pump assembly.
(20) Raise vehicle and install lower torque strut.
(Refer to 9 - ENGINE/ENGINE MOUNTING/
TORQUE STRUT - INSTALLATION)
(21) Install the crankshaft damper. (Refer to 9 -
ENGINE/ENGINE BLOCK/VIBRATION DAMPER -
INSTALLATION)
(22) Install accessory drive belts. (Refer to 7 -
COOLING/ACCESSORY DRIVE/DRIVE BELTS -
INSTALLATION)
(23) Install right inner splash shield.
(24) Lower vehicle and perform camshaft and
crankshaft timing relearn procedure as follows:
• Connect the DRB scan tool to the data link
(diagnostic) connector. This connector is located in
the passenger compartment; at the lower edge of
instrument panel; near the steering column.
• Turn the ignition switch on and access the “mis-
cellaneous” screen.
• Select “re-learn cam/crank” option and follow
directions on DRB screen.
TIMING BELT TENSIONER &
PULLEY
REMOVAL
(1) Remove the timing belt. (Refer to 9 - ENGINE/
VALVE TIMING/TIMING BELT/CHAIN AND
SPROCKETS - REMOVAL)
(2) Remove the bolts attaching the tensioner pul-
ley assembly to engine.
(3)
Remove the tensioner pulley assembly (Fig. 28).
INSTALLATION
(1) Position tensioner pulley assembly to the
engine and install attaching bolts. Tighten bolts to 31
N·m (23 ft. lbs.)
(2) Install the timing belt. (Refer to 9 - ENGINE/
VALVE TIMING/TIMING BELT/CHAIN AND
SPROCKETS - INSTALLATION)
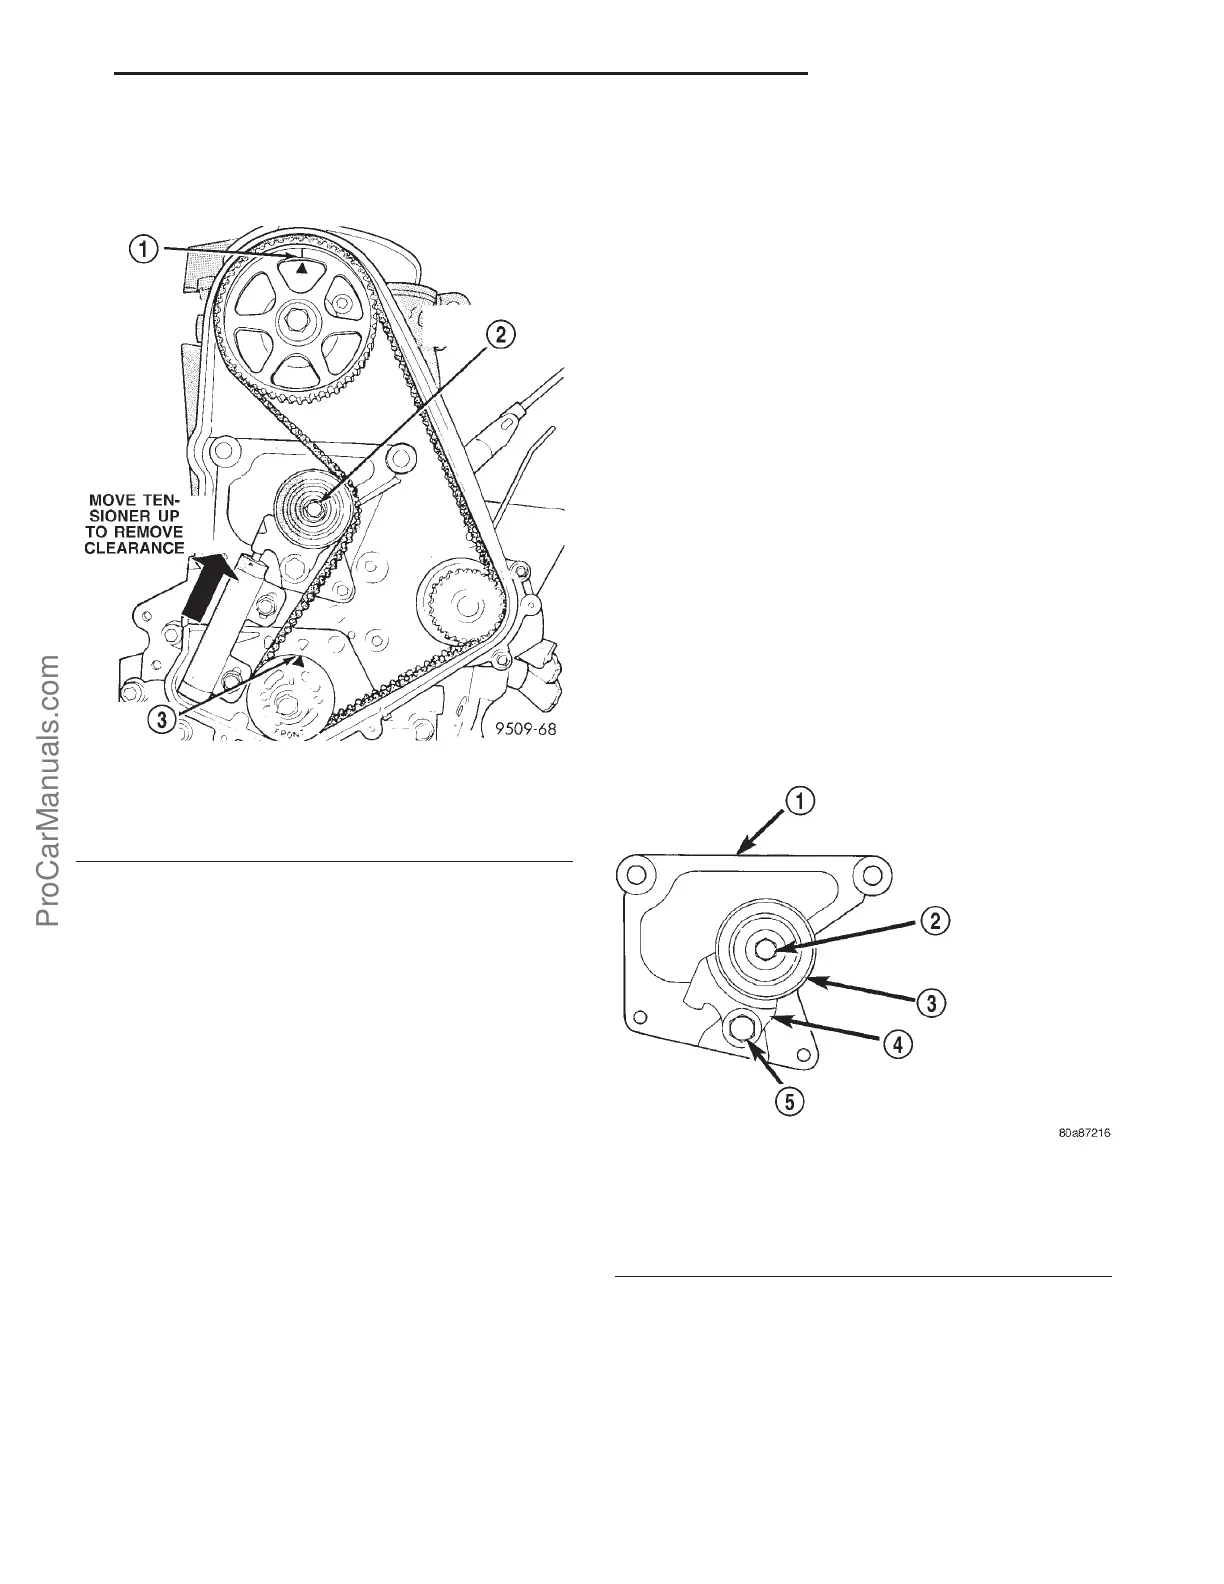
Fig. 27 TIMING BELT TENSION ADJUSTMENT
1 - CAMSHAFT TIMING MARKS
2 - TENSIONER PULLEY BOLT
3 - CRANKSHAFT AT TDC
Fig. 28 TENSIONER ASSEMBLY
1 - BRACKET
2 - PULLEY BOLT
3 - PULLEY
4 - PULLEY PIVOT BRACKET
5 - PIVOT BOLT (DO NOT REMOVE)
PL ENGINE-2.0L SOHC 9s - 11
TIMING BELT AND SPROCKETS (Continued)
ProCarManuals.com