INSTALLATION
(1) Install cable assembly through floor pan open-
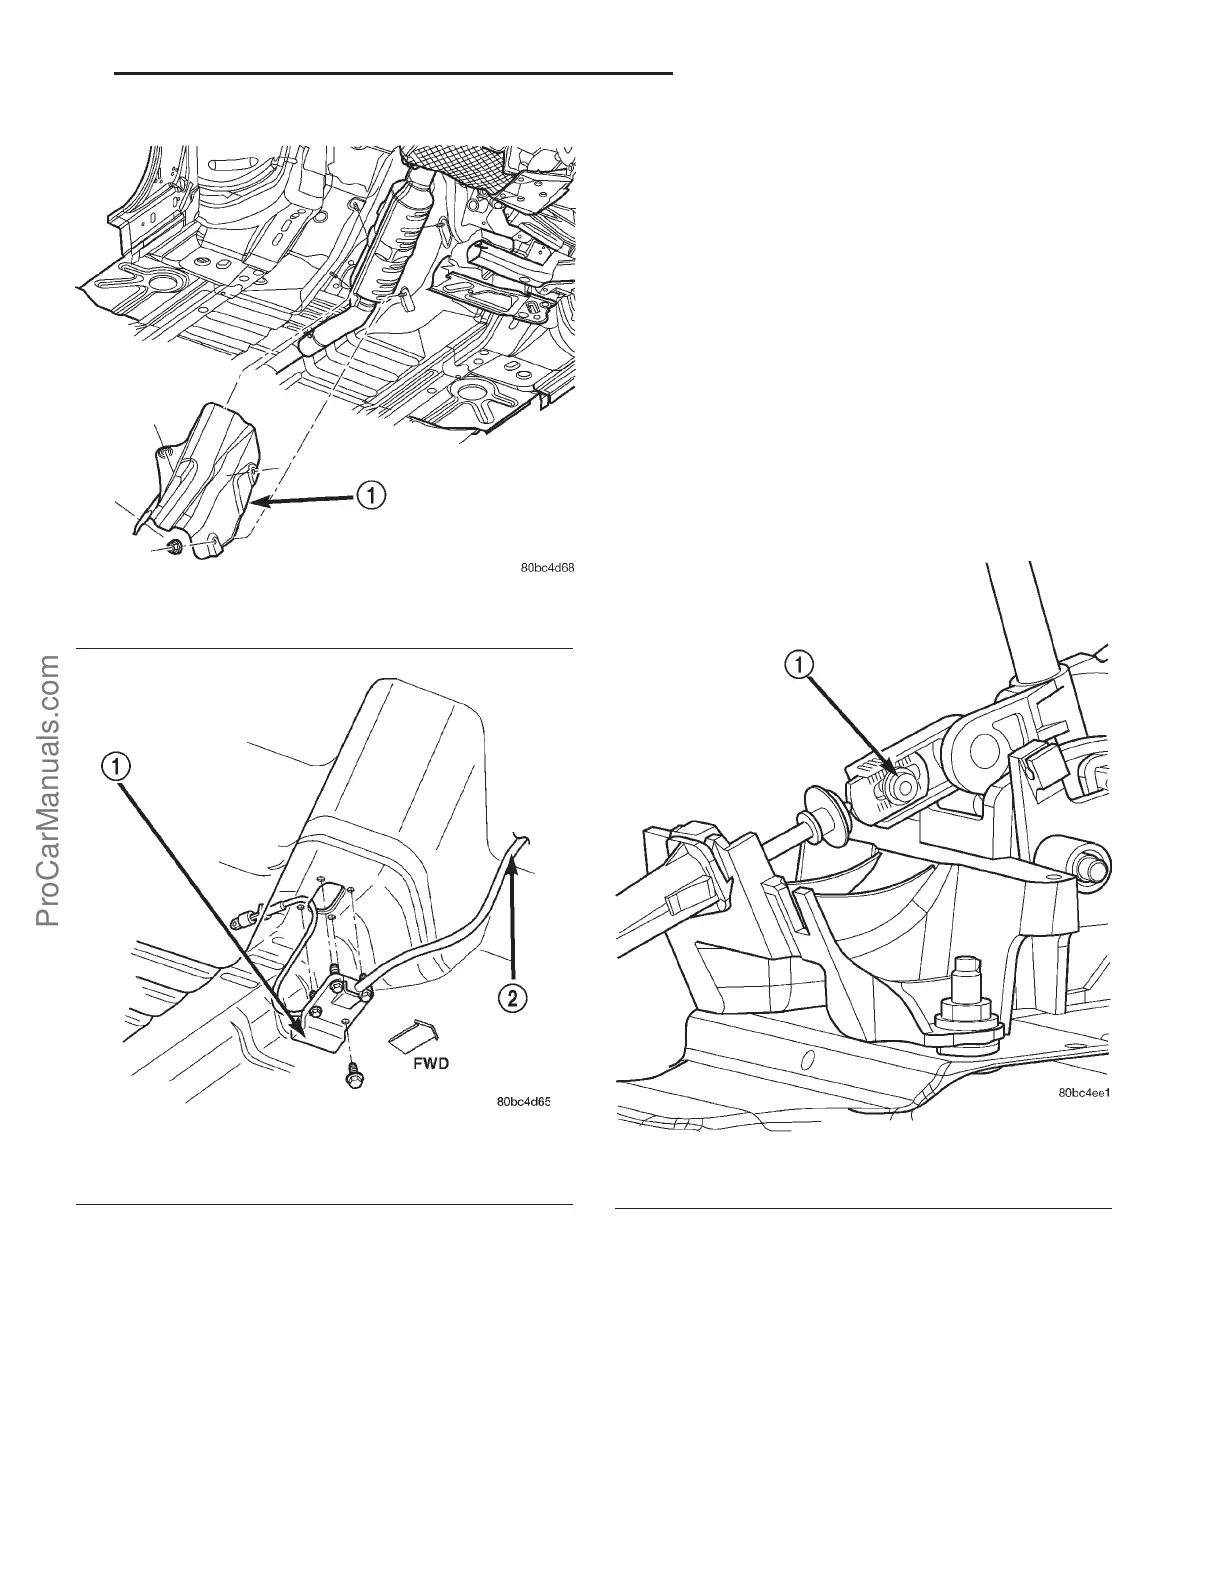
ing and secure to floor pan with grommet plate and
one screw (Fig. 187). Make sure the three grommet
plate studs protrude through cable assembly and
floor pan and tighten screw to 7 N·m (60 in. lbs.).
(2) Route transaxle end of cable assembly into
engine compartment and over transaxle assembly.
(3) Install and tighten intermediate pipe heat
shield front screws.
(4) Install catalytic converter heat shield (Fig.
186).
(5) Install gear shift cable to bracket and connect
to shift lever (Fig. 185).
(6) Install and tighten the three grommet plate-to-
floor pan nuts. Tighten to 6 N·m (50 in. lbs.) torque.
(7) Connect gearshift cable to shifter assembly as
shown in (Fig. 183).
(8) Install shifter bezel (Fig. 182).
(9) Adjust gearshift cable as follows:
(a)
Place gearshift lever in the PARK (P) position.
(b) Loosen shift cable adjustment screw (Fig.
188).
(c) Verify transaxle is in the PARK (P) position
and the shifter lever is in gated PARK..
(d) Tighten shift cable adjustment screw to 8
N·m (70 in. lbs.) torque.
(10) Install battery tray.
(11) Install battery and hold down clamp.
(12) Install the air cleaner/throttle body assy. (Fig.
184)as follows:
(a) Connect the accelerator and speed control (if
equipped) cables to the air cleaner/throttle body
assy.
(b) Install assy into position, making sure the
air cleaner locating slot is engaged to the battery
bracket tab, and tighten fasteners to 14 N·m (120
in. lbs.) torque.
Fig. 186 Catalytic Converter Heat Shield
1 - CONVERTER HEAT SHIELD
Fig. 187 Grommet Plate/Shift Cable at Floor Pan
1 - GROMMET PLATE
2 - SHIFT CABLE
Fig. 188 Gearshift Cable Adjustment Screw
1 - GEARSHIFT CABLE ADJUSTMENT SCREW
PL 41TE AUTOMATIC TRANSAXLE 21s - 151
GEARSHIFT CABLE (Continued)
ProCarManuals.com