NOTE: Verify that the suction line is inserted to the
lowest point of the transaxle oil pan. This will
ensure complete evacuation of the fluid in the pan.
(4) Follow the manufacturers recommended proce-
dure and evacuate the fluid from the transaxle.
(5) Remove the suction line from the dipstick tube.
(6) Pour four quarts of Mopart ATF+4 (Automatic
Transmission Fluid) Type 9602 through the dipstick
opening.
(7) Start engine and allow to idle for at least one
minute. Then, with parking and service brakes
applied, move selector lever momentarily to each
position, ending in the park or neutral position.
(8) Check the transaxle fluid level and add an
appropriate amount to bring the transaxle fluid level
to 3mm (1/8 in.) below the lowest mark on the dip-
stick (Fig. 179).
(9) Recheck the fluid level after the transaxle has
reached normal operating temperature (180°F.).
(Refer to 21 - TRANSMISSION/TRANSAXLE/AUTO-
MATIC - 41TE/FLUID - STANDARD PROCEDURE)
(10) To prevent dirt from entering transaxle, make
certain that dipstick is fully seated into the dipstick
opening.
GEARSHIFT CABLE
REMOVAL
(1) Loosen set screw and remove knob from shifter
handle (Fig. 180).
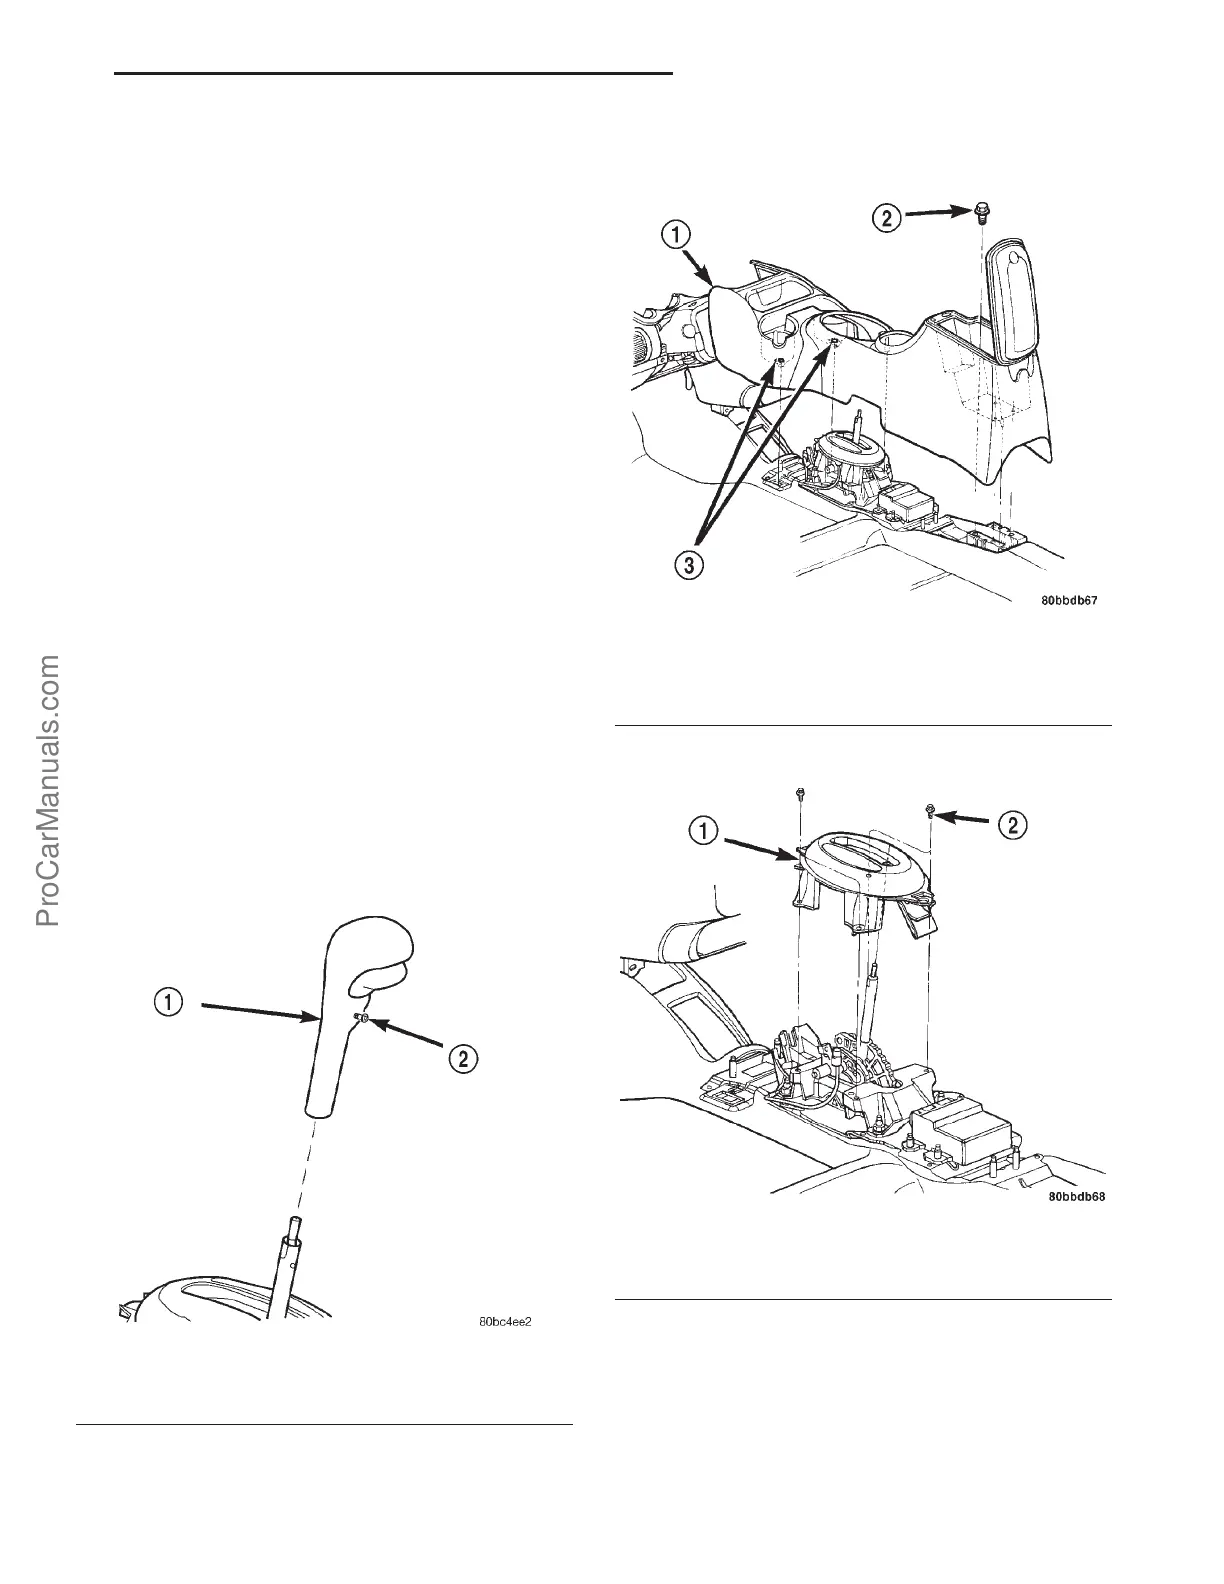
(2) Remove the center console assembly as shown
in (Fig. 181).
(3) Remove shifter bezel (Fig. 182).
Fig. 180 Gearshift Knob Removal/Installation
1 - SHIFTER KNOB
2 - SET SCREW
Fig. 181 Center Console Removal/Installation
1 - CONSOLE
2 - SCREW (4)
3 - SCREW (2)
Fig. 182 Shifter Bezel Removal/Installation
1 - BEZEL
2 - SCREW (4)
PL 41TE AUTOMATIC TRANSAXLE 21s - 149
FLUID (Continued)
ProCarManuals.com
 Loading...


