(22) Carefully lower engine and transaxle on screw
jack until proper removal clearance is obtained.
(23) Obtain a helper to assist in holding transaxle
while removing transaxle-to-engine mounting bolts
(Fig. 29).
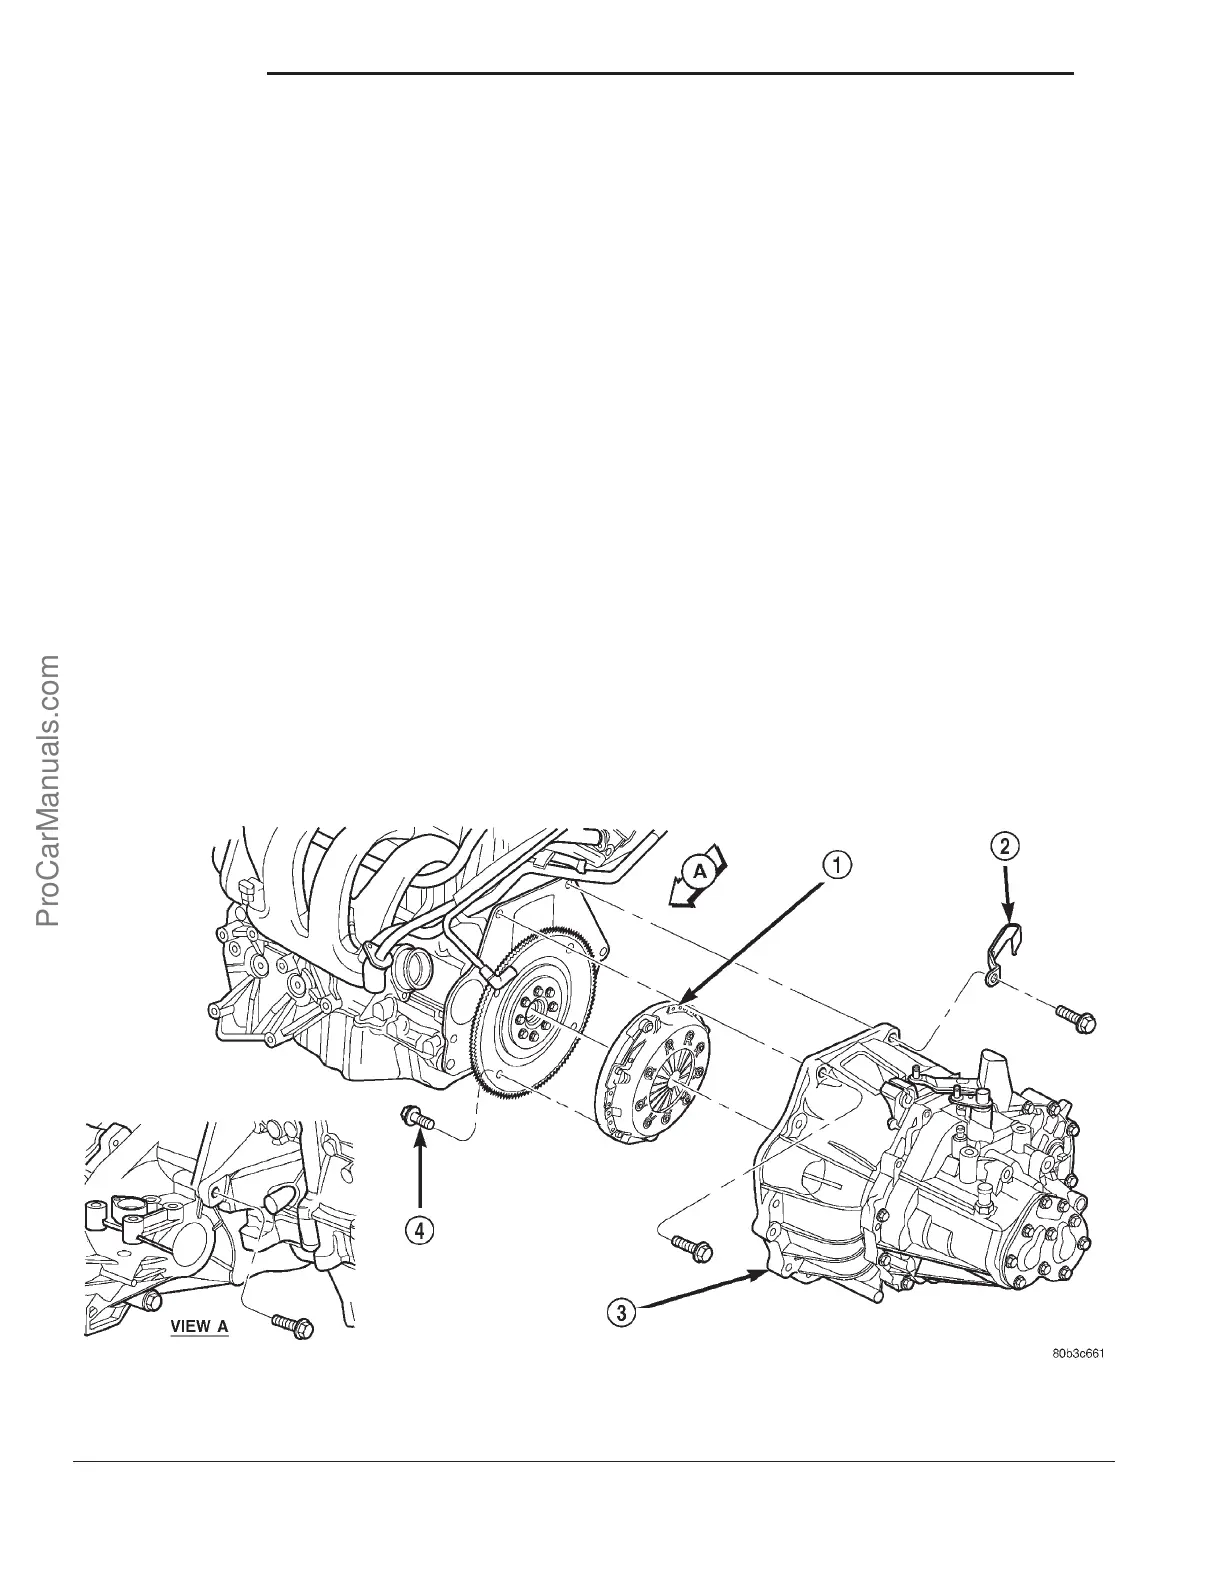
(24) Remove transaxle from vehicle (Fig. 29).
(25) Remove modular clutch assembly from trans-
axle input shaft.
INSTALLATION
(1) Inspect clutch release bearing and lever for
excessive wear and replace as necessary.
(2) Install clutch module onto input shaft. Install
transaxle into position.
(3) Install transaxle-to-engine mounting bolts (Fig.
29) and tighten to 95 N·m (70 ft. lbs.) torque.
(4) Raise engine and transaxle with screw jack
until through hole in upper mount aligns with hole
in mount bracket. Install mount bolt and tighten to
108 N·m (70 ft. lbs.) torque (Fig. 28).
(5) Remove screwjack.
(6) Install NEW drive plate-to-clutch module bolts
and progressively tighten all bolts in a criss-cross
pattern until the modular clutch assembly seats
against the drive plate. Final torque the bolts to 88
N·m (65 ft. lbs.) torque.
(7) Install starter motor and tighten bolts to 54
N·m (40 ft. lbs.) torque. Make sure to fasten ground
cable to upper starter bolt as shown in (Fig. 27).
(8) Connect starter electrical harness and tighten
positive cable nut to 10 N·m (90 in. lbs.) torque.
(9) Install bellhousing dust cover (Fig. 25).
(10) Install left engine-to-transaxle bending brace
(Fig. 25).
(11) Install structural collar (Fig. 25) as follows:
(a) Position collar and install all bolts finger
tight.
(b) Tighten the collar-to-oil pan bolts to 3 N·m
(30 in. lbs.) torque.
(c) Tighten the collar-to-transaxle bolts to 108
N·m (80 ft. lbs.) torque.
(d) Final torque the collar-to-oil pan bolts to 54
N·m (40 ft. lbs.) torque.
(12) Install the right lateral bending brace and
tighten bolts to 81 N·m (60 ft. lbs.) torque (Fig. 26).
(13) Install both front axle driveshafts. (Refer to 3
- DIFFERENTIAL & DRIVELINE/HALF SHAFT -
INSTALLATION)
(14) Fill transaxle with suitable amount of Mopart
Manual Transaxle Lubricant (PN 04874465).
(15) Lower vehicle.
(16) Connect vehicle speed sensor connector (Fig.
24).
Fig. 29 Transaxle Removal/Installation
1 - MODULAR CLUTCH ASSEMBLY
2 - CLIP
3 - TRANSAXLE
4 - CLUTCH MODULE BOLT (4)
6s - 14 CLUTCH PL
MODULAR CLUTCH (Continued)
ProCarManuals.com