9 Installation of the Temperature Probe (Optional) FLUXUS G60x
UMFLUXUS_G6V4-2DE, 2011-03-29 61
9 Installation of the Temperature Probe (Optional)
9.1 Cleaning of the Pipe Surface
• Remove rust, insulation material and loose paint to get a good thermal contact.
• Clean the pipe surface.
Select the installation instructions that correspond to the supplied temperature probe
(see section 9.2 or section 9.3).
9.2 Installation of the Temperature Probe (Response Time 50 s)
Select the installation instructions that correspond to the supplied clasp:
• for the installation with a clasp see section 9.2.1
• for the installation with a FLEXIM clasp see section 9.2.2
• for the installation with a quick release clasp see section 9.2.3
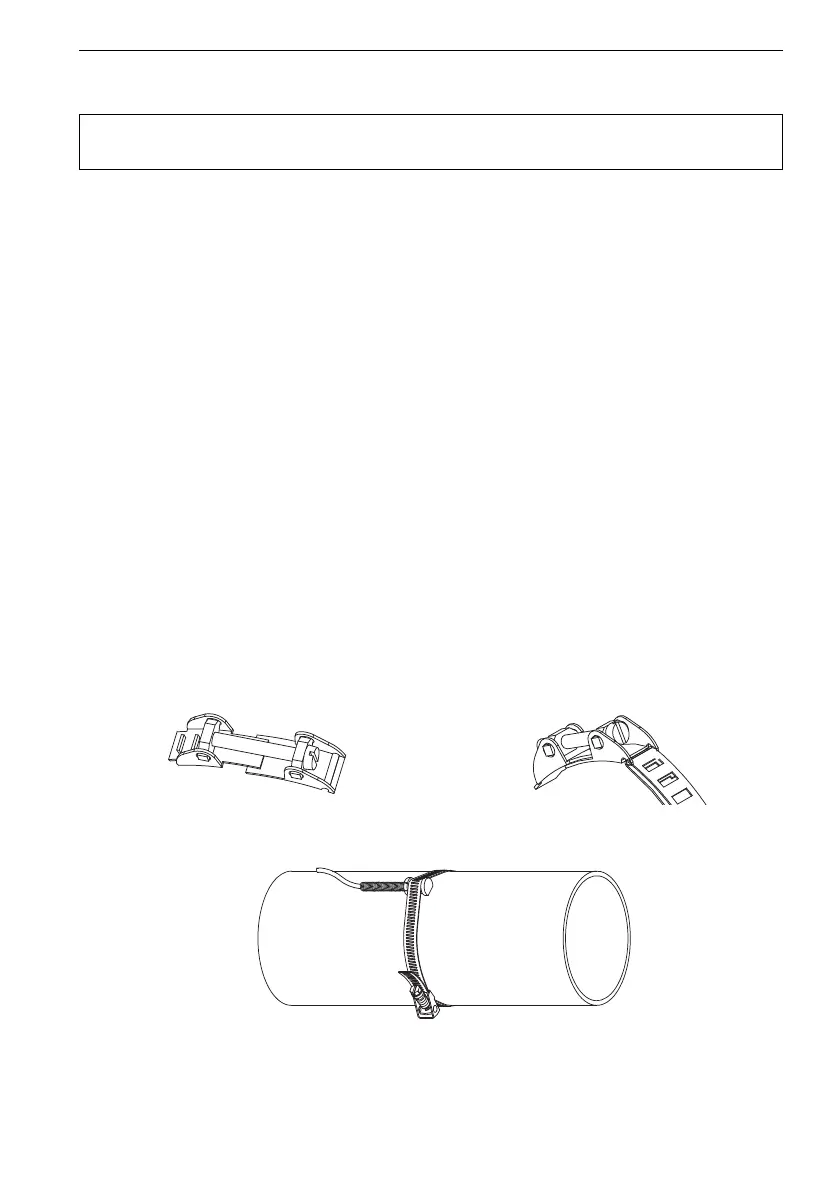
9.2.1 Installation with a Clasp
• Cut the tension strap to length (pipe circumference + 120 mm).
• Make sure that part (2) of the clasp is on top of part (1) (see Fig. 9.1). The hooks of part
(2) must be on the outer side of the clasp.
• Pull approx. 2 cm of the tension strap through the slot of the clasp (see Fig. 9.2) to fix
the clasp to the tension strap.
• Bend the end of the tension strap back.
Attention! Observe the Safety Instructions for the Use in Explosive Atmo-
sphere (see document SIFLUXUS_608).
Fig. 9.1: Clasp Fig. 9.2: Clasp with tension strap
Fig. 9.3: Temperature probe on the pipe