4-25
Chapter 4 Connection to the External Devices Using the Magnetic Card Reader
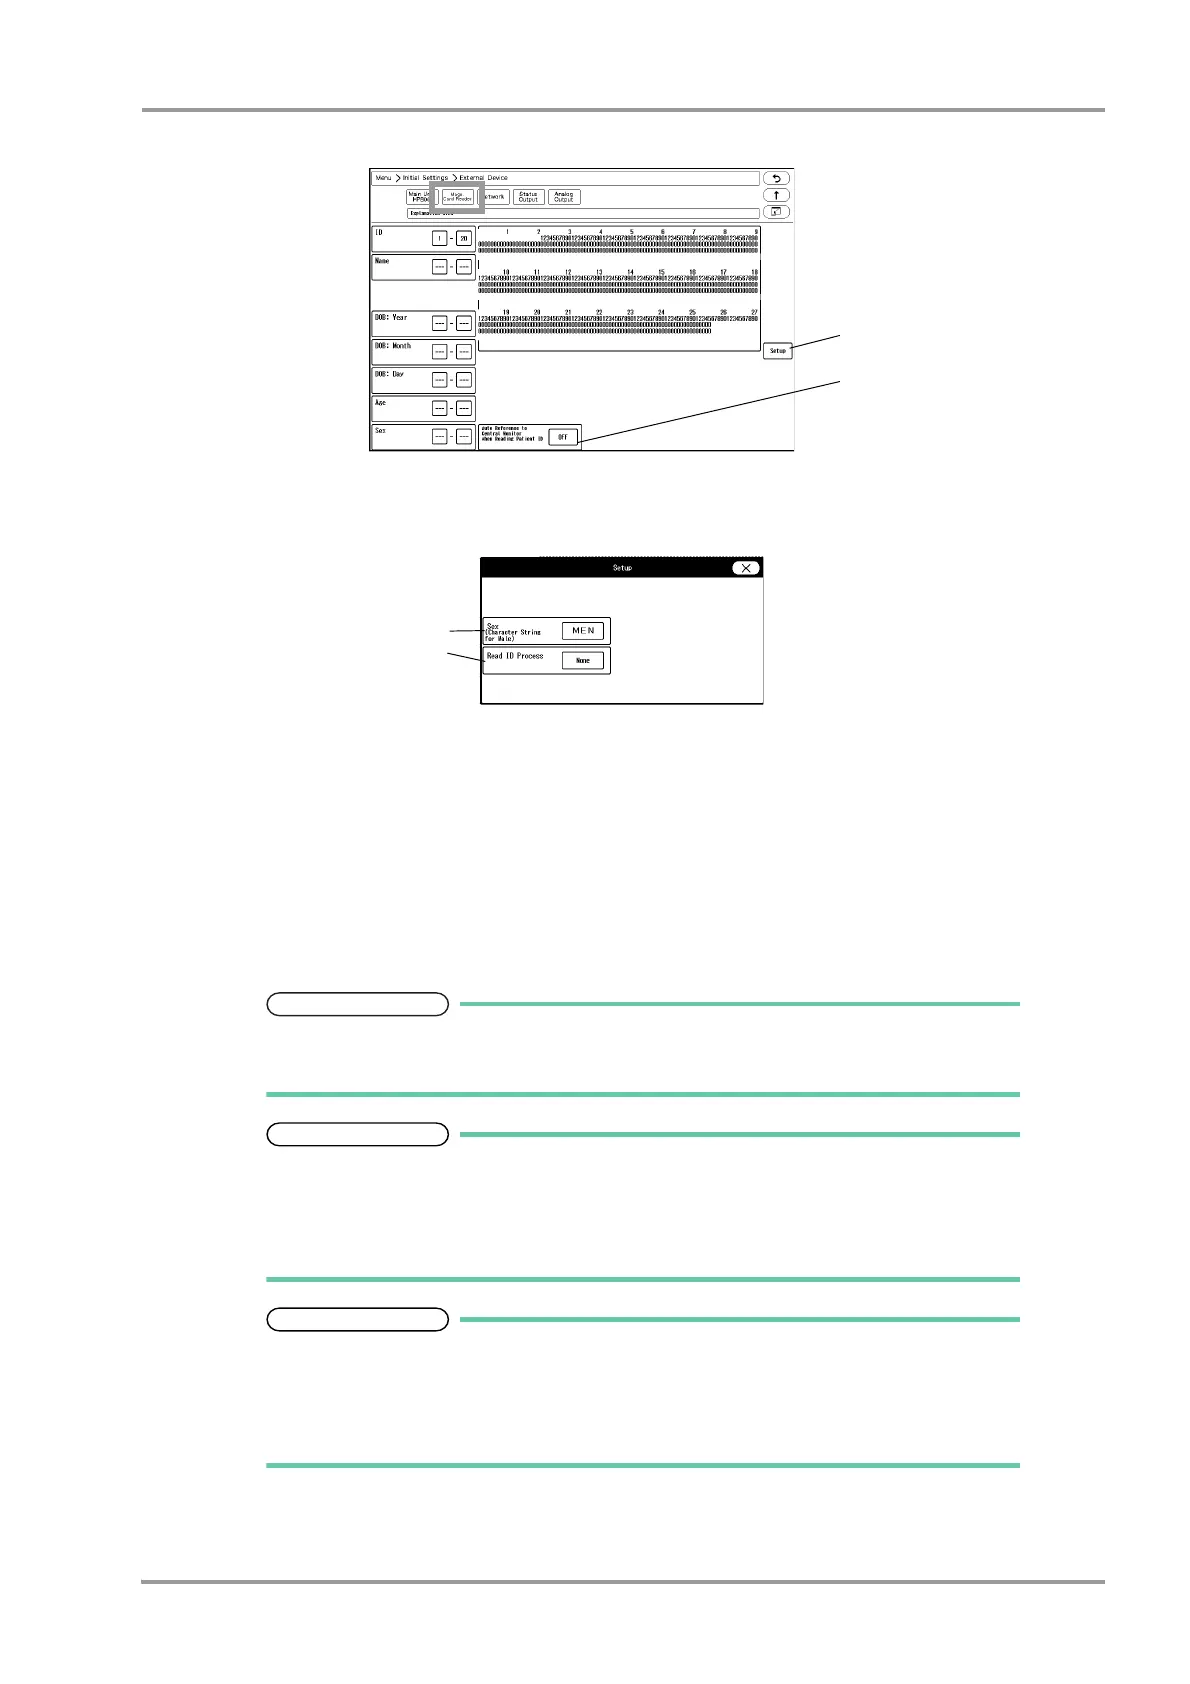
The "Magnetic Card Reader" setup menu will be displayed.
5Press the [Setup] key to preconfigure the magnetic card reader.
The character strings to indicate birth date, sex, etc., can be set.
1 Press the key for "Sex" to display "Character String for Male" window. Enter the character string for male
(max. 3 characters) used on the magnetic card.
2 Set the "Read ID Process".
[None]: The whole patient ID will be read as the patient ID.
[Numeric]: Only the numerics will be read as the patient ID.
[Alphanumeric]: The numerics and alphabets will be read as the patient ID.
6Analyze the starting and ending digit of the data read from a magnetic card.
The procedure to analyze the data read from the magnetic card is explained below.
If not analyzing the data on the magnetic card, proceed to step 7.
On the "Magnetic Card Reader" setup menu, starting and ending digit of each data such
as [ID], [DOB: Year] can be set.
From: Starting digit number of the data to be read from the magnetic card
To: Ending digit number of the data to be read from the magnetic card.
The analyzing procedure is explained using the example of patient data below.
Patient ID:0123456789
Patient Name: FUKUDA DENSHI
Date of Birth: Jan. 1, 1980
Sex: Male
1 While the first page of the "Magnetic Card Reader" setup menu is displayed, scan the magnetic card.
At the first and second row, the data read from the card will be displayed in hexadecimal. At the third
 Loading...