Figure 5-4 Access Holes
e. Using a 7 mm socket or wrench, remove and discard the nuts and star washers from the set screw
located on each side of the heater door bracket. Using a 2 mm hex key, remove and discard the two set
screws and the two spacers from the side seals. (Refer to Figure 5-2.)
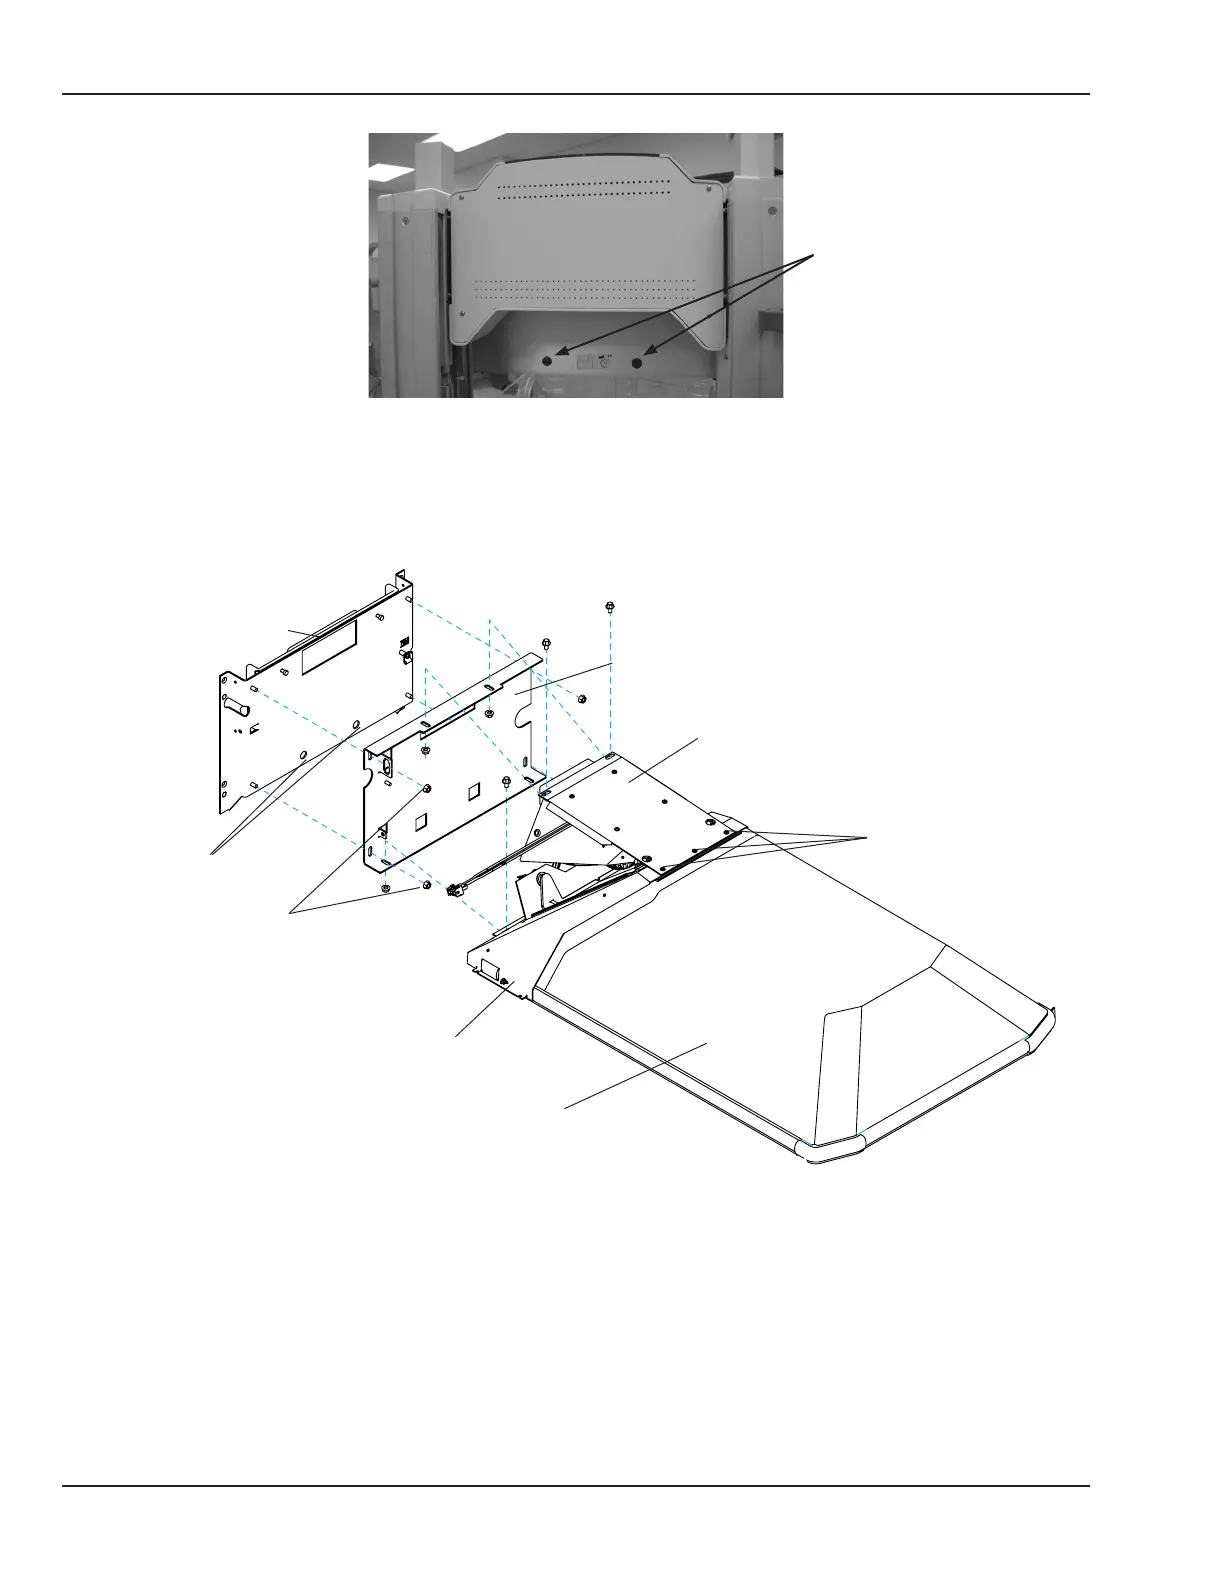
Heater Housing
Button head screws
and threaded inserts
Canopy mounting nuts
Canopy Bracket
Housing bracket
Access holes
Heater Door Bracket
Canopy
Figure 5-5 Canopy, Bracket, and Heater Housing
f. Support the canopy and hold the threaded inserts inside the canopy while using a 2.5 mm hex key
to remove the three button head screws across the top of the canopy. This step may require the
assistance of another person to support the canopy. Save all hardware from this step for reassembly
(the threaded inserts, three button-head screws, lock washers, and at washers).
Access holes
74 6600-0343-000 104 © 2001 by Datex-Ohmeda, Inc.. All rights reserved.
Chapter 5: Repair Procedures
 Loading...


