GE HealthCare CONFIDENTIAL
DIRECTION 5936427, REV. 1 LOGIQ TOTUS Basic Service Manual
Section 8-8 - Replacing Main Console 8 - 133
8-8-5 Replacement of the Unity Protector Assy
This table includes information specific to these instructions. For more information 8-2-6 "Tools needed
for servicing the LOGIQ Totus" on page 8-5 /8-2-7 "PPE Required During Service" on page 8-6
8-8-5-1 Preparations
1.) Remove the Unity Base Tray as described in 8-8-2 "Replacement of the Unity Base Tray" on page
8-130
2.) Remove the Front Cover Assy-T as described in 8-8-3 "Replacement of the Front Cover Assy-T" on
page 8-131
8-8-5-2 Removal Procedure
8-8-5-3 Installation Procedure
1.) Parts to be installed in reverse order of removal
2.) Perform “Functional Checks after FRU replacement (Debrief Guideline)”
as described in Section 8-
12 on page 8-223
Table 8-67 Manpower, Time, Tools, and PPE
Manpower Time Tools PPE
One person Approximately 5 minutes Philips Screwdriver
Cut resistant gloves
Knee Pad
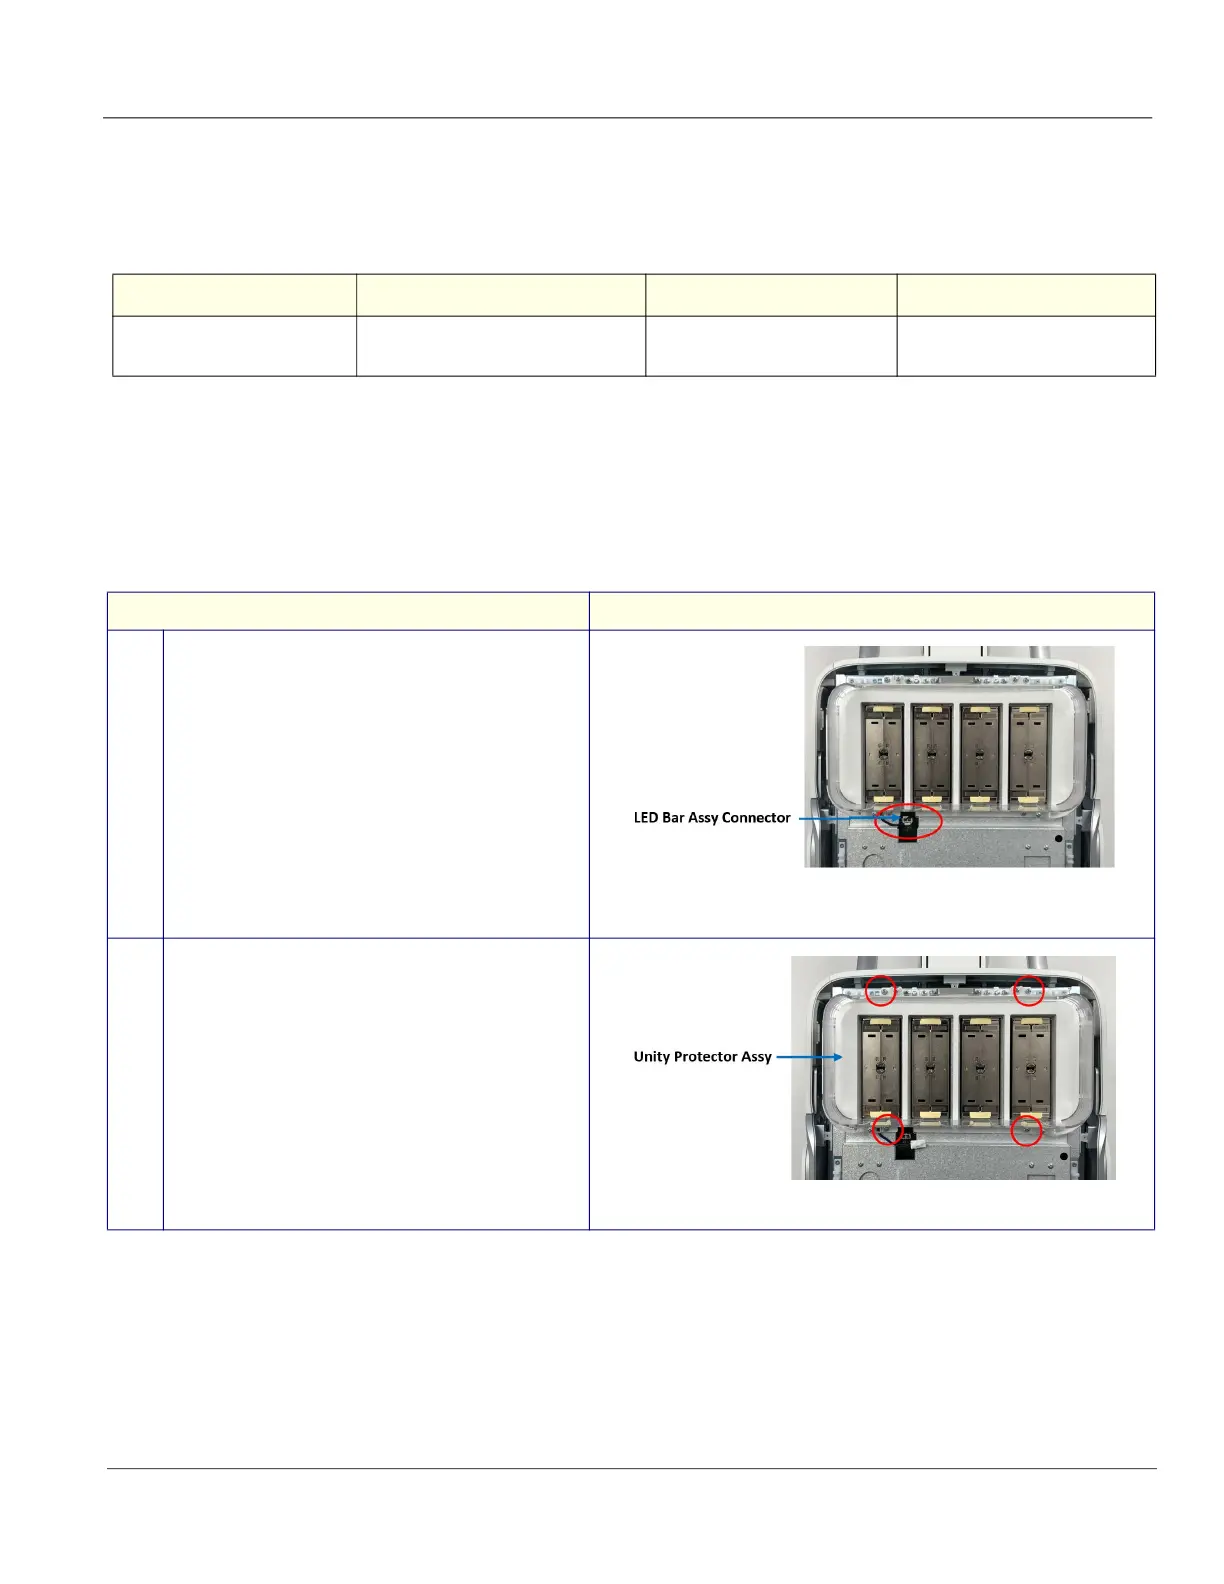
Step Corresponding graphic
1.
Unplug the LED Bar Assy Connector from the
console.
2.
Unscrew 4 screws to remove the Unity Protector
Assy from the console.
 Loading...


