GE HealthCare CONFIDENTIAL
DIRECTION 5936427, REV. 1 LOGIQ TOTUS Basic Service Manual
Section 8-7 - Replacing OPIO 8 - 109
8-7-18 Replacement of the OPIO Button Set-T and the User Define Key Cap Set-T
This table includes information specific to these instructions. For more information 8-2-6 "Tools needed
for servicing the LOGIQ Totus" on page 8-5 /8-2-7 "PPE Required During Service" on page 8-6
8-7-18-1 Preparations
1.) Remove the OPIO Top Cover Set-T as described in 8-7-2 "Replacement of the OPIO Top Cover
Set-T" on page 8-89
2.) Remove the UOPIO-T Assy as described in 8-7-10 "Replacement of the UOPIO-T Assy" on page
8-98
3.) Remove the OPIO Laser Color Trackball with Cable as described in 8-7-11 "Replacement of the
Trackball assy-U_FLT20UFA-GJ" on page 8-101
4.) Remove T2 OPIO Lower Assy as described in 8-7-14 "Replacement of the T2 OPIO Lower Assy"
on page 8-104
5.) Remove OPIO Knob Set-T Assy as described in 8-7-16 "Replacement of the OPIO Knob Set-T" on
page 8-106
8-7-18-2 Removal Procedure
8-7-18-3 Installation Procedure
1.) Parts to be installed in reverse order of removal
2.) Perform “Functional Checks after FRU replacement (Debrief Guideline)” as described in Section 8-
12 on page 8-223
Table 8-54 Manpower, Time, Tools, and PPE
Manpower Time Tools PPE
One person Approximately 15 minutes Philips Screwdriver
Cut resistant gloves
Knee Pad
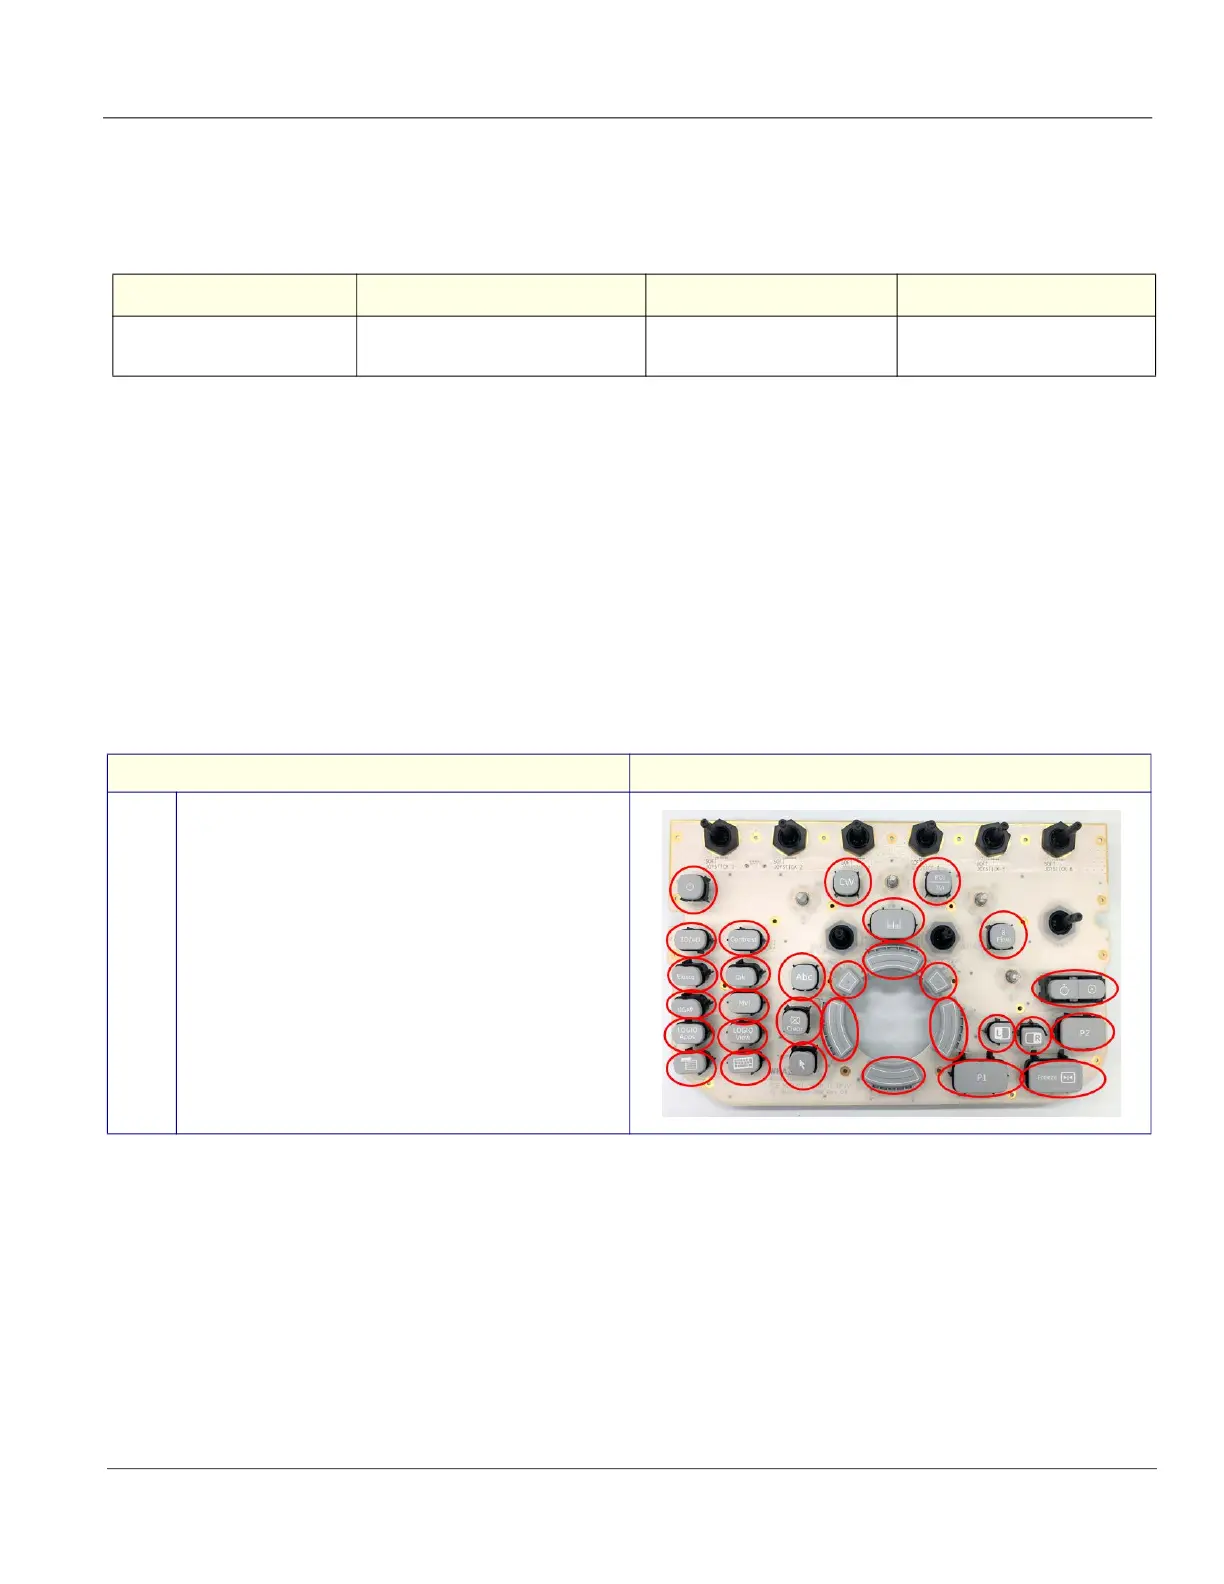
Step Corresponding graphic
1. Remove the buttons from the OPIO LOWER
 Loading...


