Engine mechanism - Timing chain assembly
14. Remove drive belt tensioner device.
Hint: operate the jack up and down to remove bolts.
15. Remove water pump components [4G18-1307110].
(a) Remove 6 bolts and water pump components.
16. Remove engine stabilizer bracket on engine cross
member.
17. Remove compressor.
18. Remove speed sensor.
19. Remove chain tensioner components
[4G18-1006160].
Note: do not turn crankshaft before installing chain
tensioner components.
20. Remove timing chain hood components
[4G18-1006140].
(a) Remove 11 bolts and nuts.
(b) Remove studs with star wrench.
(c) Pry open timing chain hood from timing chain hood pro-
trusion part between cylinder head and body with screw-
driver and remove it.
Note: be careful not to damage timing chain
hood, the contact surface of cylinder head and
body.
21. Remove crankshaft front oil seal assembly
[4G18-1006150].
Remove oil seal with screwdriver.
22. Remove speed sensor signal panel
[4G18-3600011A].
23. Remove chain tension rail components
[4G18-1006120].
24. Remove chain guide rail components
[4G18-1006130].
25. Remove timing chain [4G18-1006110].
Remove it with 2 screwdrivers.
Notes:
Place a piece of cloth to protect engine.
In the state of timing chain separating from timing
sprocket and turning camshaft, turn crankshaft 1/4
circle to avoid valve contacting with piston.
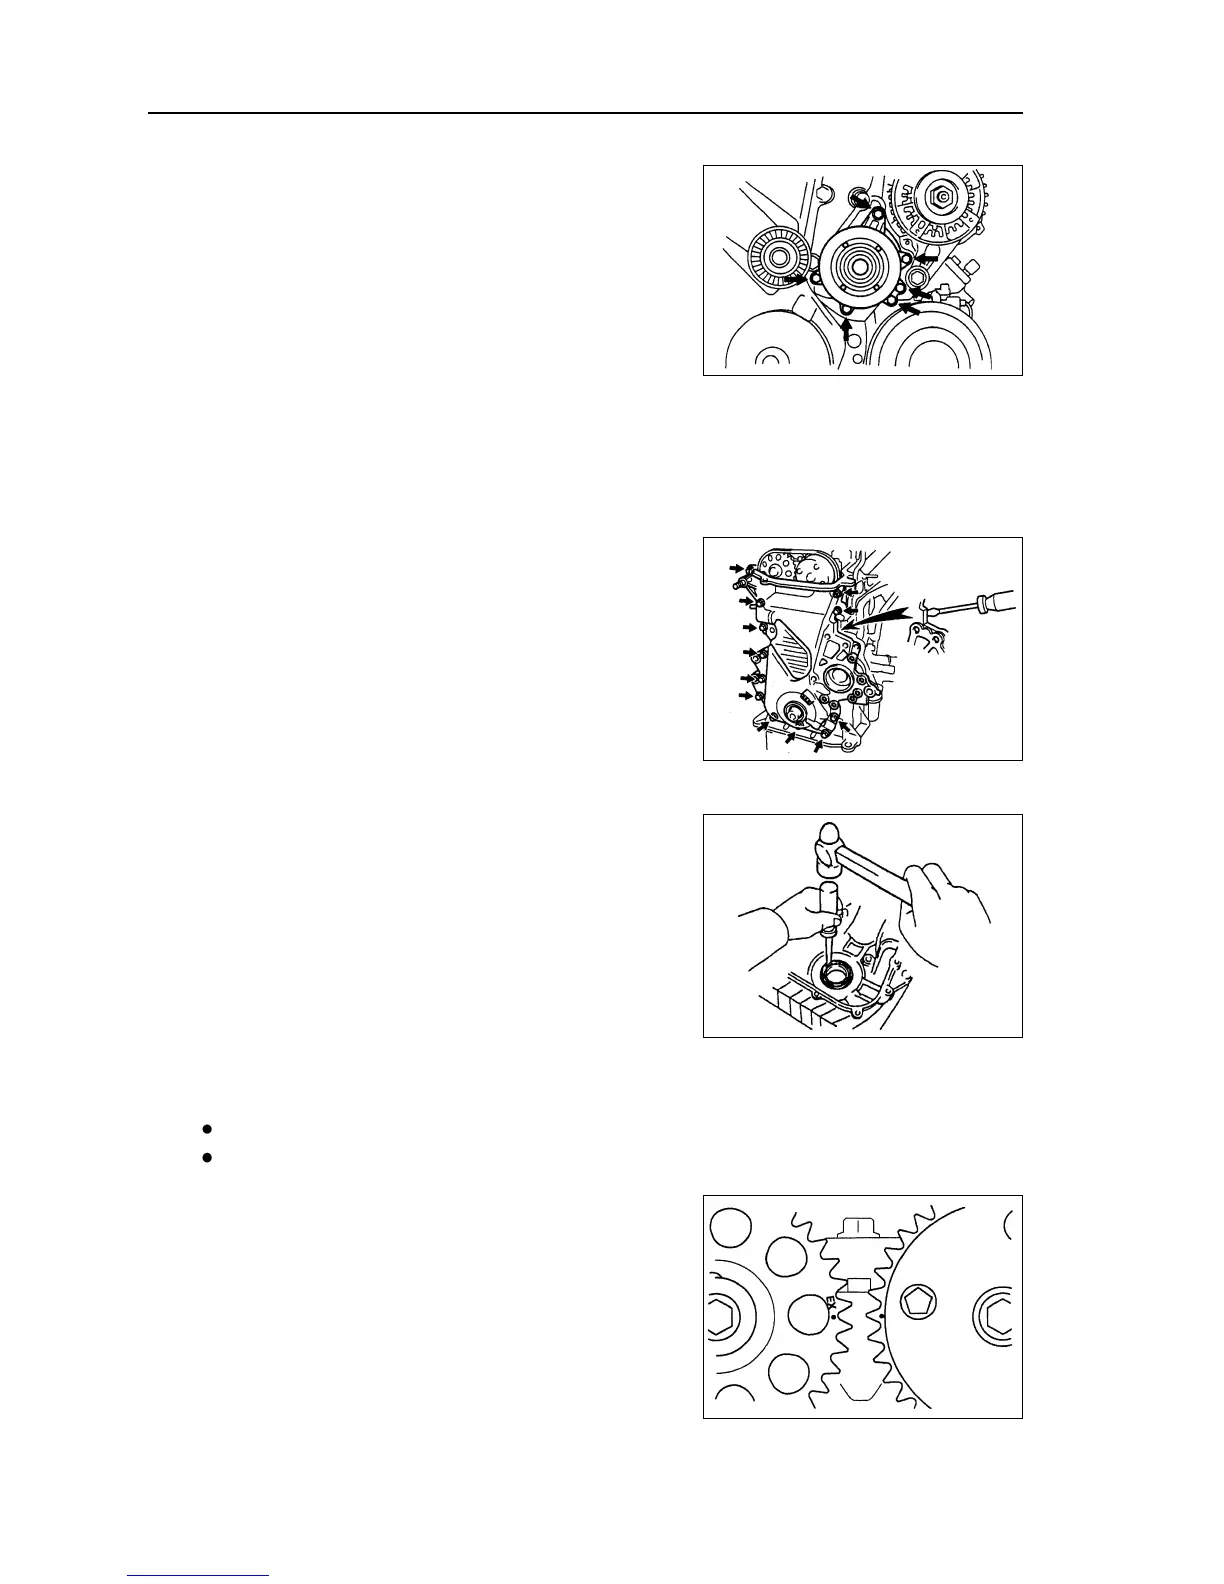
26. Install timing chain.
(a)Turn crankshaft to cylinder 1 compression top dead
center position.
(1) Turn camshaft from hexagon head part of
camshaft, and align dot marks on camshaft timing
sprocket.
46