102
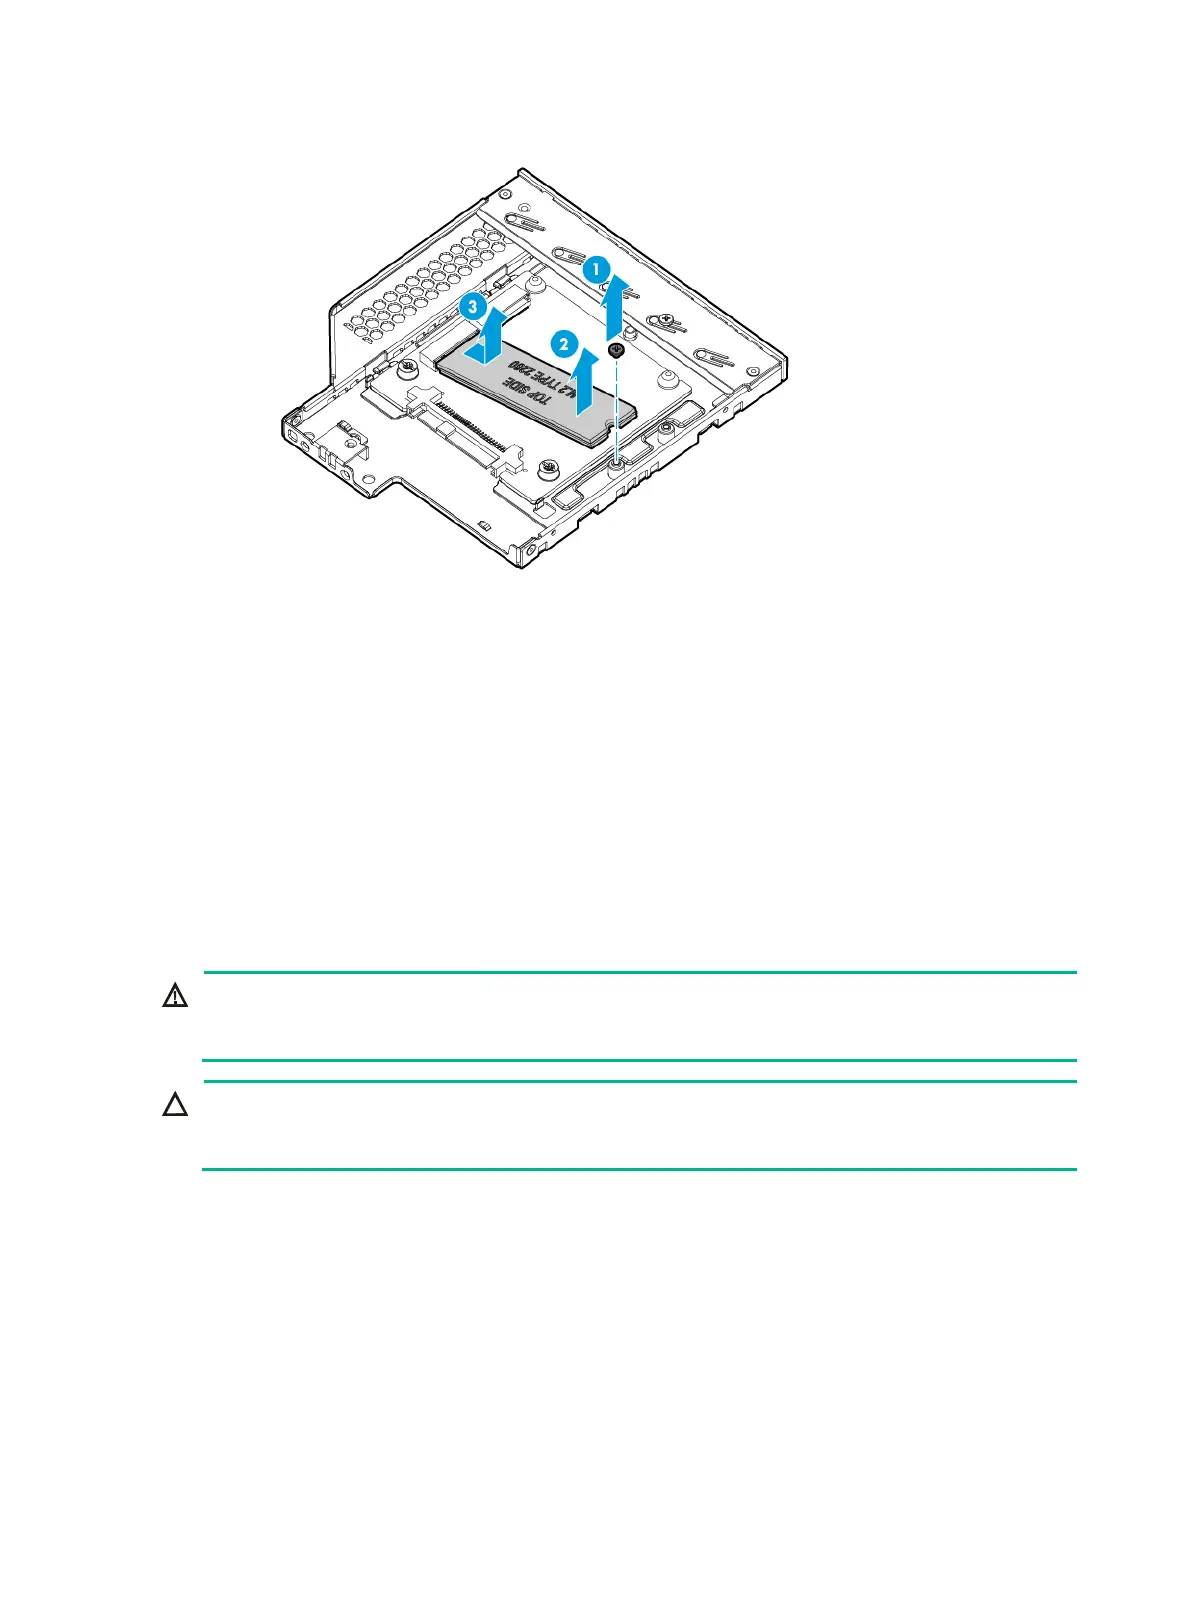
Figure 136 Removing a SATA M.2 SSD
8. Install a new SATA M.2 SSD. For more information, see "Installing SATA M.2 SSDs."
9. Install the removed security bezel, if any. For more information, see "Replacing the security
bezel."
10. Install the re
moved fan cage. For more information, see "Installing fans."
11. Install the removed chassis air baffle. For more information, see "Installing air baffles."
12. Install the access pan
el. For more information, see "Installing the access panel."
13. Rack-mount the server. For more information, see "Rack-mounting the server."
14. Con
nect the power cord. For more information, see "Connecting the power cord."
15. Powe
r on the server. For more information, see "Powering on the server."
Replacing a fan
WARNING!
To avoid bodily injury from hot surfaces, allow the server and its internal modules to cool before
touching them.
CAUTION:
To avoid thermal damage to the server, do not operate the server for long periods with the access
panel open or uninstalled.
The fans are hot swappable. If sufficient space is available for replacement, you can replace a fan
without powering off the server or removing the server from the rack. The following procedure is
provided based on the assumption that no sufficient space is available for replacement.
Procedure
1. Power off the server. For more information, see "Powering off the server."
2. Remove the server from the rack. For more information, see "Removing the server from a rack."
3. Remove the
access panel. For more information, see "Removing the access panel."
4. Pinch the latches on both sides of the fan to pull the fan out of the
slot, as shown in Figure 137.

 Loading...


