117
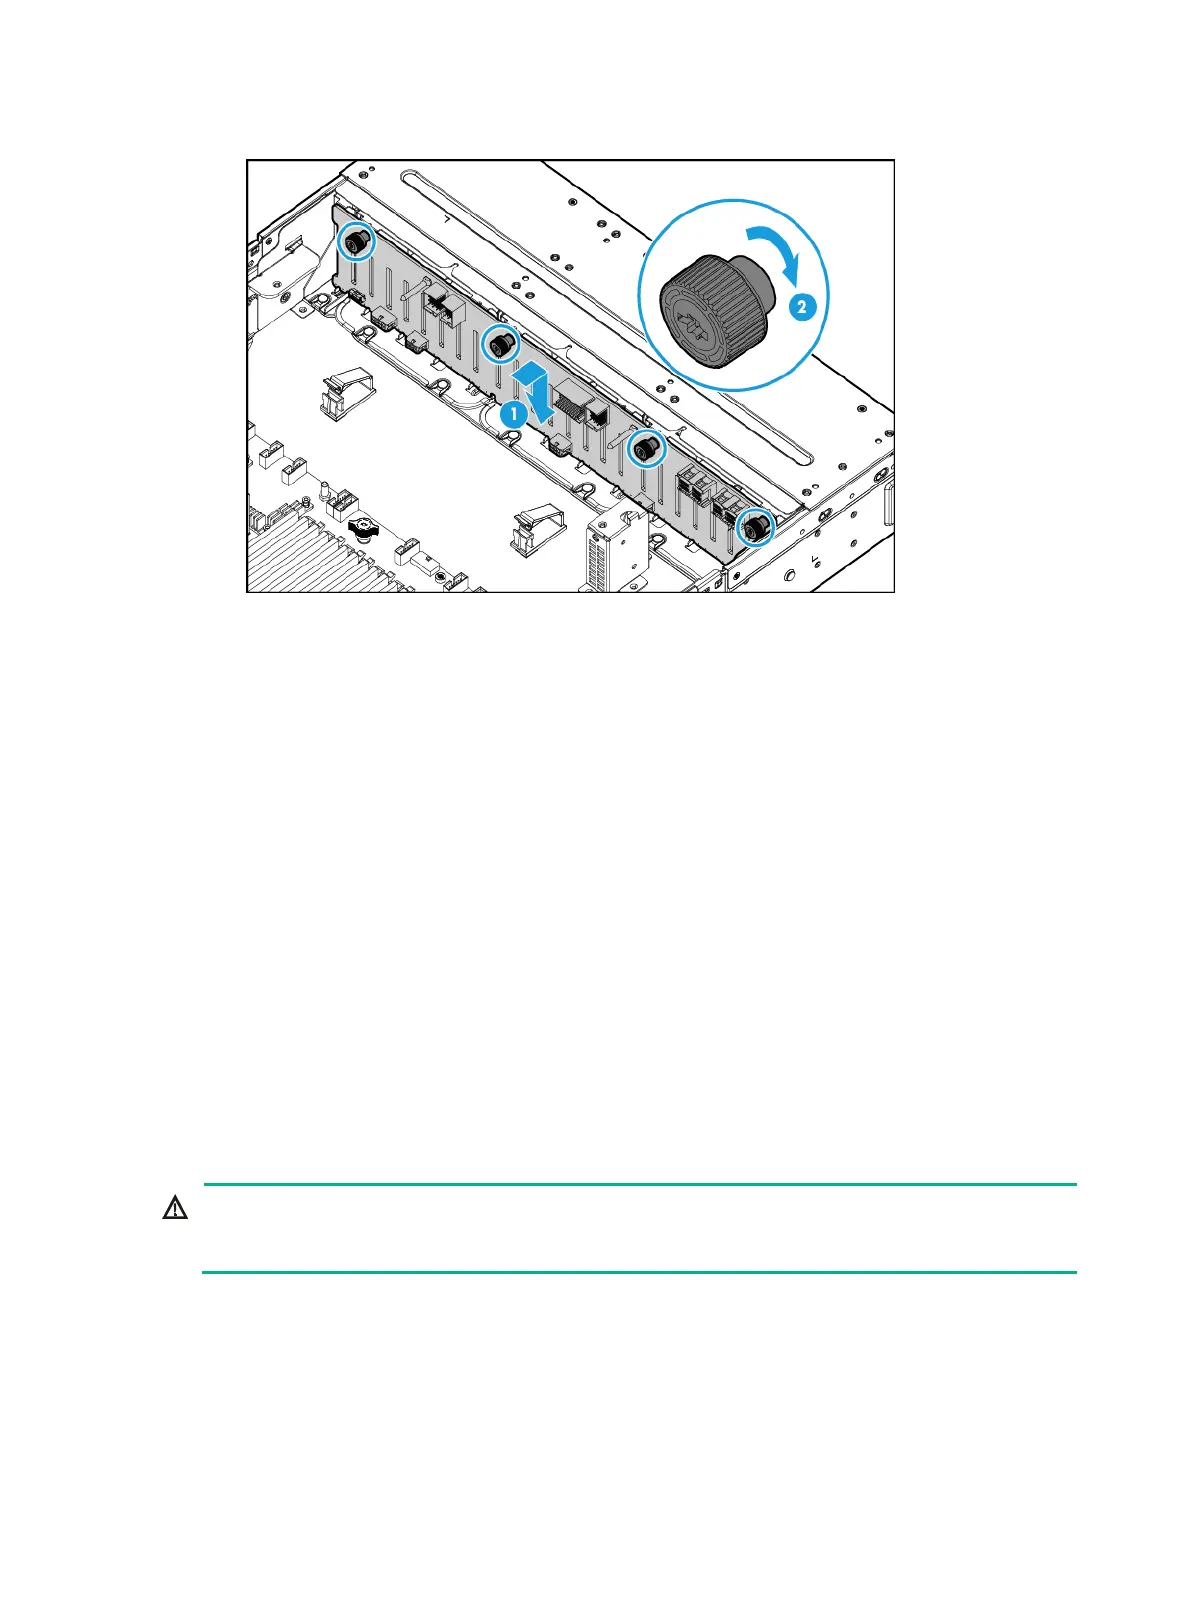
Figure 154 Installing the 25SFF drive backplane on the UIS-Cell 3020 G3 server
2. Connect cables to the drive backplanes. For more information, see "Connecting drive cables."
3. Install the removed drive expander module. For more information, see "Replacing the drive
expand
er module."
4. Installed the removed drives. For more information, see "Installing SAS/SATA drives."
5. Install the re
moved security bezel. For more information, see "Installing the security bezel."
6. Install the removed fan cage. For more information, see "Installing fans."
7. Install the removed chassis air baffle. For more information, see "Installing air baffles."
8. Install the access pan
el. For more information, see "Installing the access panel."
9. Rack-mount the server. For more information, see "Rack-mounting the server."
10. Con
nect the power cord. For more information, see "Connecting the power cord."
11. Powe
r on the server. For more information, see "Powering on the server."
Verifying the replacement
Log in to HDM to verity that the drive backplanes are in a correct state. For more information, see
HDM online help.
Replacing the SATA optical drive
WARNING!
To avoid bodily injury from hot surfaces, allow the server and its internal modules to cool before
touching them.
To replace the SATA optical drive:
1. Power off the server. For more information, see "Powering off the server."
2. Remove the server from the
rack. For more information, see "Removing the server from a rack."
3. Remove the
access panel. For more information, see "Removing the access panel."
4. Remove the
chassis air baffle. For more information, see "Removing air baffles."
5. Remove the f
an cage. For more information, see "Replacing the fan cage."

 Loading...


