91
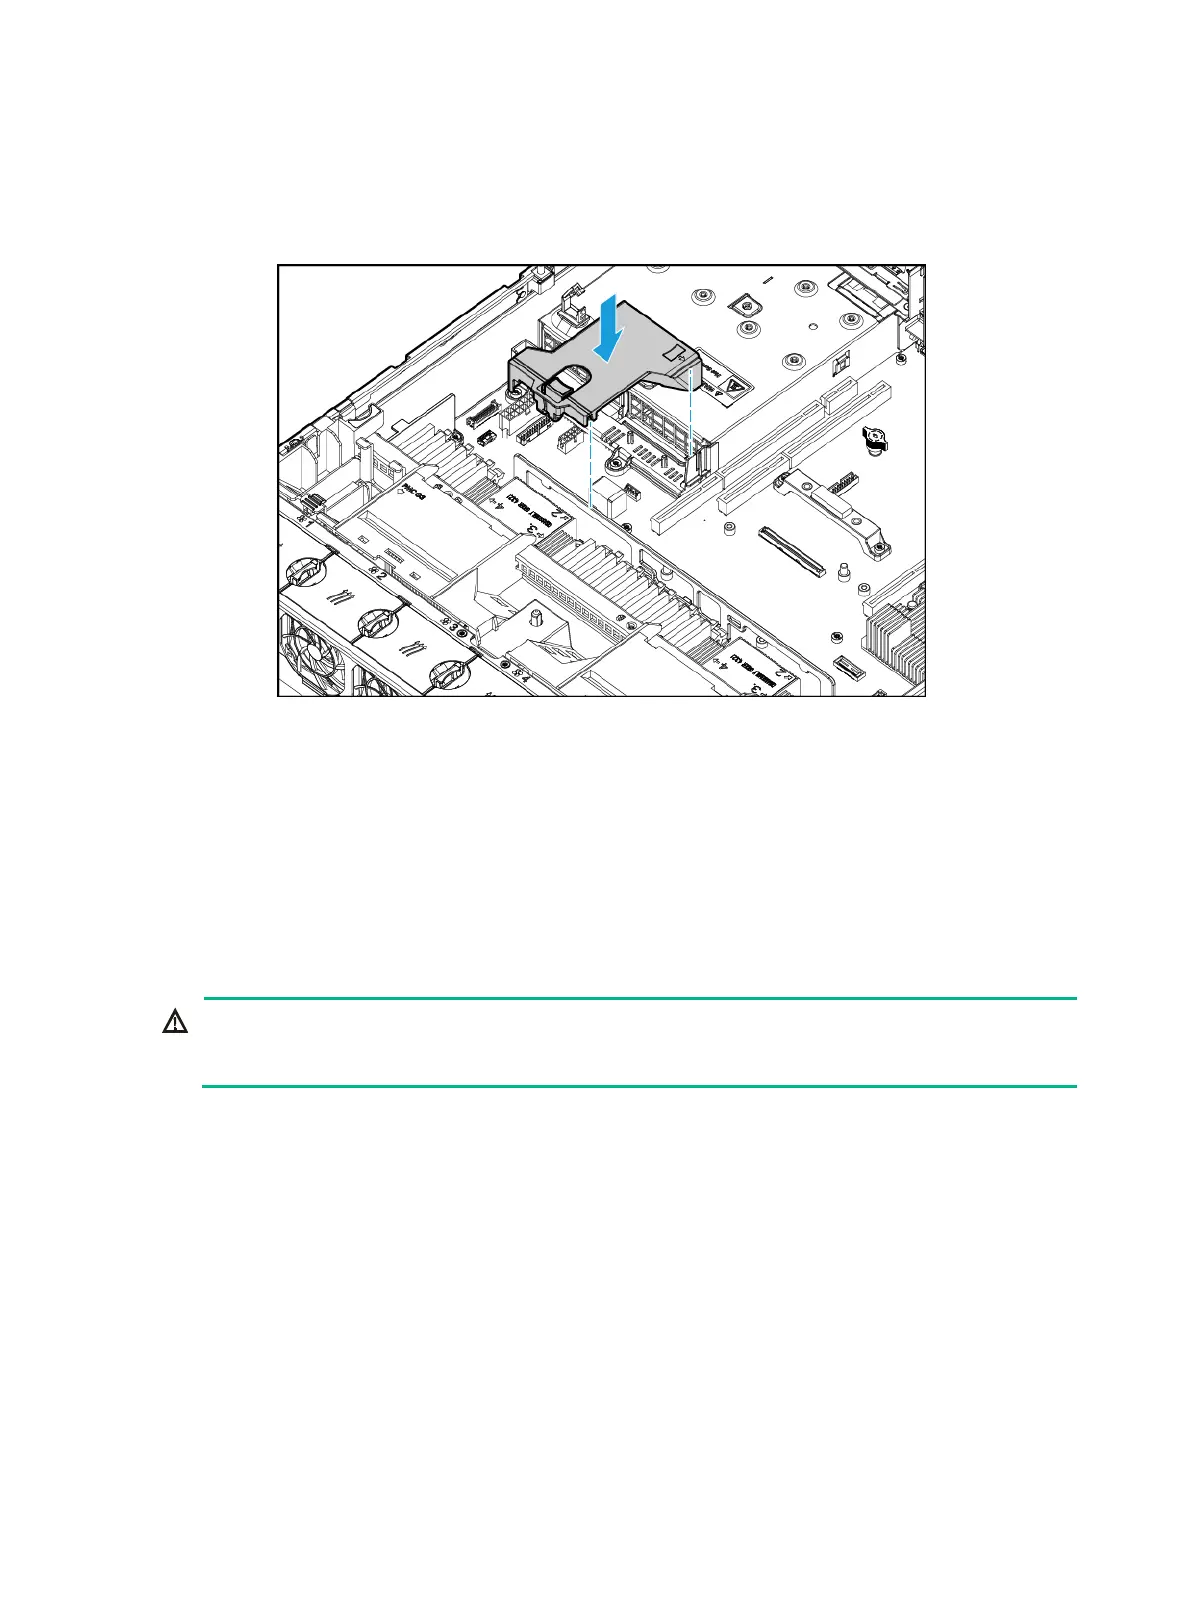
{ To install the power supply air baffle, place the air baffle in the chassis as shown in Figure
125. Make sure the groove in the air baffle is aligned with the system board handle, and the
extended narrow side indicated by the arrow mark makes close contact with the clip on the
system board. Then gently press the air baffle until it snaps into place.
Figure 125 Removing the power supply air baffle
3. Install the removed riser card and GPU module, if any. For more information, see "Replacing a
riser card and a PCIe module."
4. Install the access panel. For more information, see "Installing the access panel."
5. Mount the server in a rack. For more information, see "Installing the server."
6. Connect the power cord. For more information, see "Connecting the power cord."
7. Powe
r on the server. For more information, see "Powering on the server."
Replacing a riser card and a PCIe module
WARNING!
To avoid bodily injury from hot surfaces, allow the server and its internal modules to cool before
touching them.
To replace a riser card and a PCIe module:
1. Power off the server. For more information, see "Powering off the server."
2. Remove the server from the
rack. For more information, see "Removing the server from a rack."
3. Remove the
access panel. For more information, see "Removing the access panel."
4. Disco
nnect all PCIe cables from the riser card.
5. Loosen the captive screw on the riser card, and lift the riser card slowly out of the chassis, as
shown in Figure 126.
Skip this
step if the riser card does not have a captive screw. This example uses the
UIS-RC-GPU/FHHL-2U-G3-F riser card, which has a captive screw.

 Loading...


