45
Installing hardware options
If you are installing multiple hardware options, read their installation procedures and identify similar
steps to streamline the entire installation procedure.
Installing the security bezel
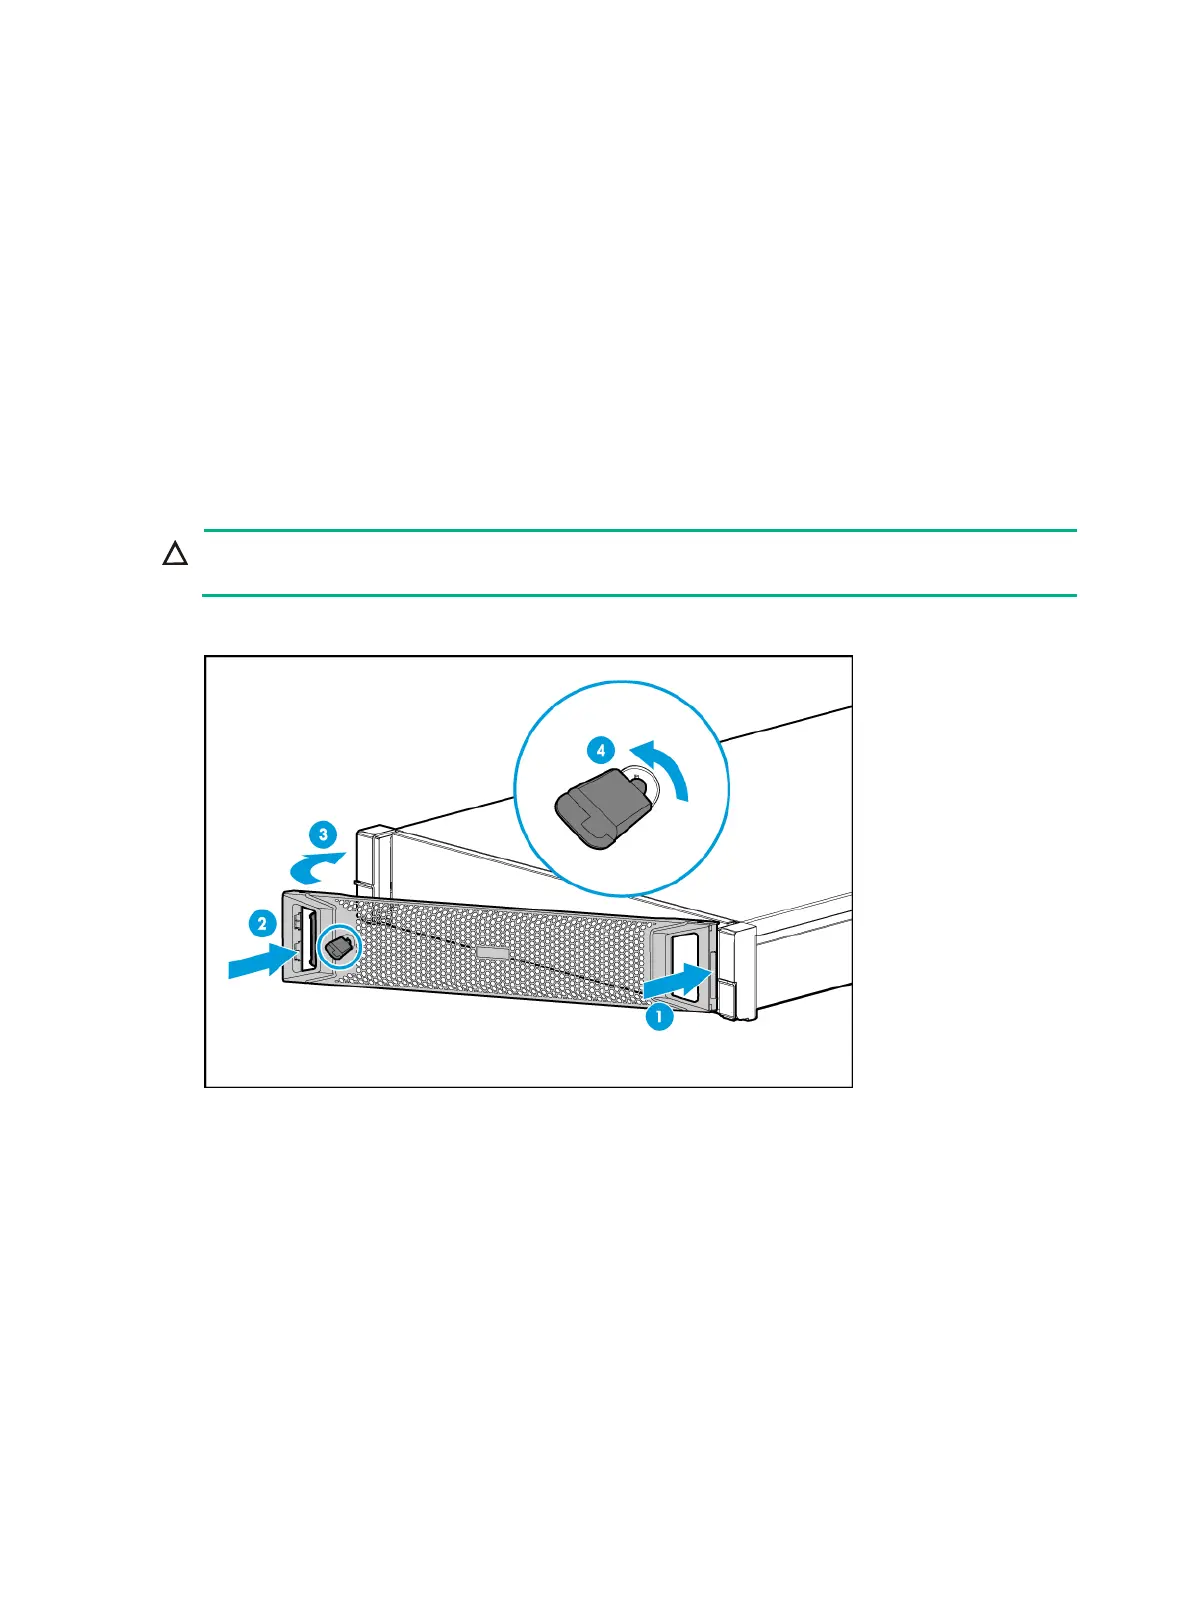
1. Press the right edge of the security bezel into the groove in the right chassis ear on the server,
as shown by callout 1 in Figure 57.
2. Press the latch at the other end, clo
se the security bezel, and then release the latch to secure
the security bezel into place. See callouts 2 and 3 in Figure 57.
3. Insert the
key provided with the bezel into the lock on the bezel and lock the security bezel, as
shown by callout 4 in Figure 57. Then, p
ull out the key and keep it safe.
CAUTION:
To avoid damage to the lock, hold down the key while you are turning the key.
Figure 57 Installing the security bezel
Installing SAS/SATA drives
Guidelines
If you are using the drives to create a RAID, follow these restrictions and guidelines:
• To build a RAID (or logical drive) successfully, make sure all drives in the RAID are the same
type (HDDs or SSDs) and have the same connector type (SAS or SATA).
• For efficient use of storage, use drives that have the same capacity to build a RAID. If the drives
have different capacities, the lowest capacity is used across all drives in the RAID. Whether a
drive with extra capacity can be used to build other RAIDs depends on the storage controller
model, as follows:

 Loading...


