Done Recording
A confirmation message is displayed.
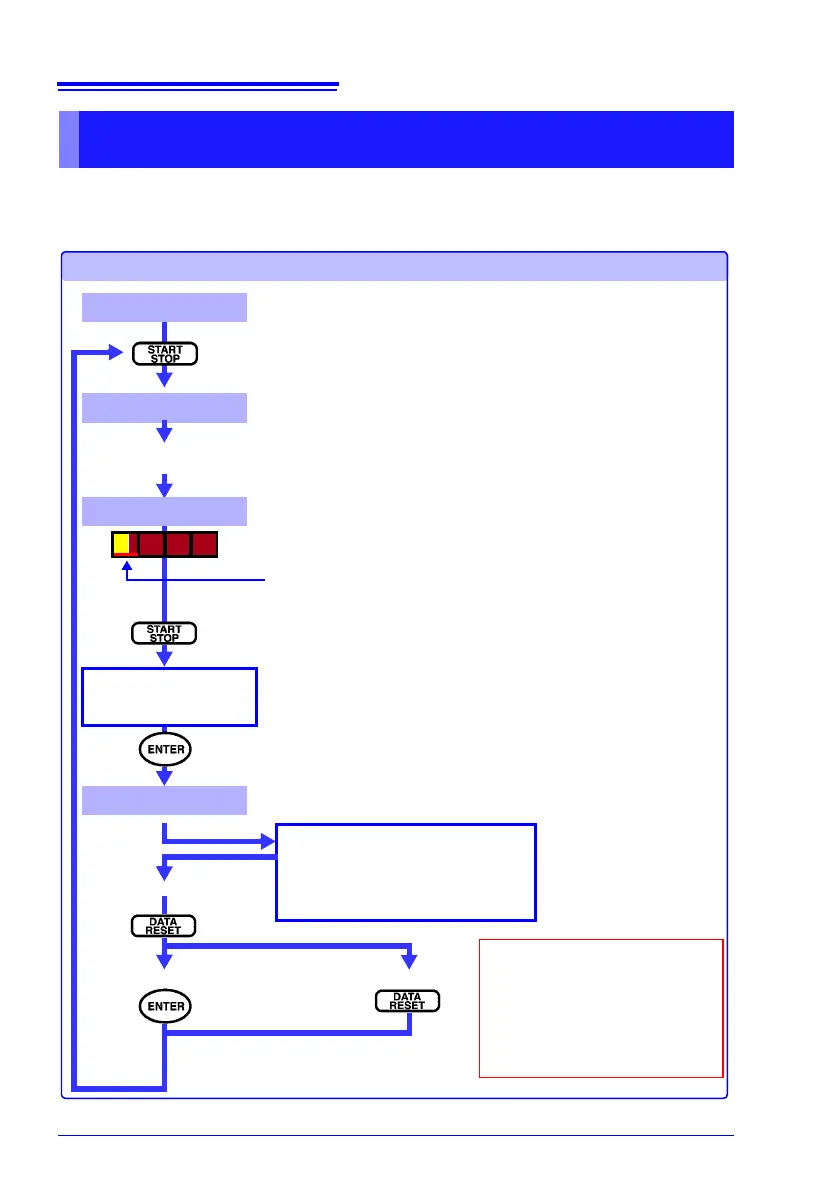
[SET]
[WAITING]
[RECORDING]
[ANALYZE]
Recording Multiple Times
Recording Starts
Starts recording
(Press the START/STOP key during [SET])
The POWER LED blinks quickly (half-second on, half-second off
Recording starts at an appropriate time for the selected interval.
See: "The Effect of the Interval Setting on the Start Time" (p. 89)
The POWER LED blinks slowly (half-second on, one and half-sec-
onds off).
During
[RECORDING], measurement data is written to internal
memory.
The red underline indicates the memory partition that is being used
for recording.
Time series data is written at each measurement interval.
Event data is written when an event occurs.
The POWER LED blinks (two seconds on, two seconds off).
Store recorded data Erase recorded data
Data is stored sequentially in
memory partitions 1, 2, 3 and 4.
To store data from more than
four measurements, copy the
existing data to a computer via
USB cable (p. 127).
When restarting recording while continuing to
store previous data, new data is stored in the
next memory partition.
The POWER LED blinks (four and half-seconds on, half-second off
Recording is stopped.
Analyze Data: press ESC
Store Data / Return to SETTING status:
press DATA RESET
Press ESC to close window.
To record again
A confirmation message
is displayed.
Stop Recording.
Are you sure?
Yes: ENTER No: ESC