71
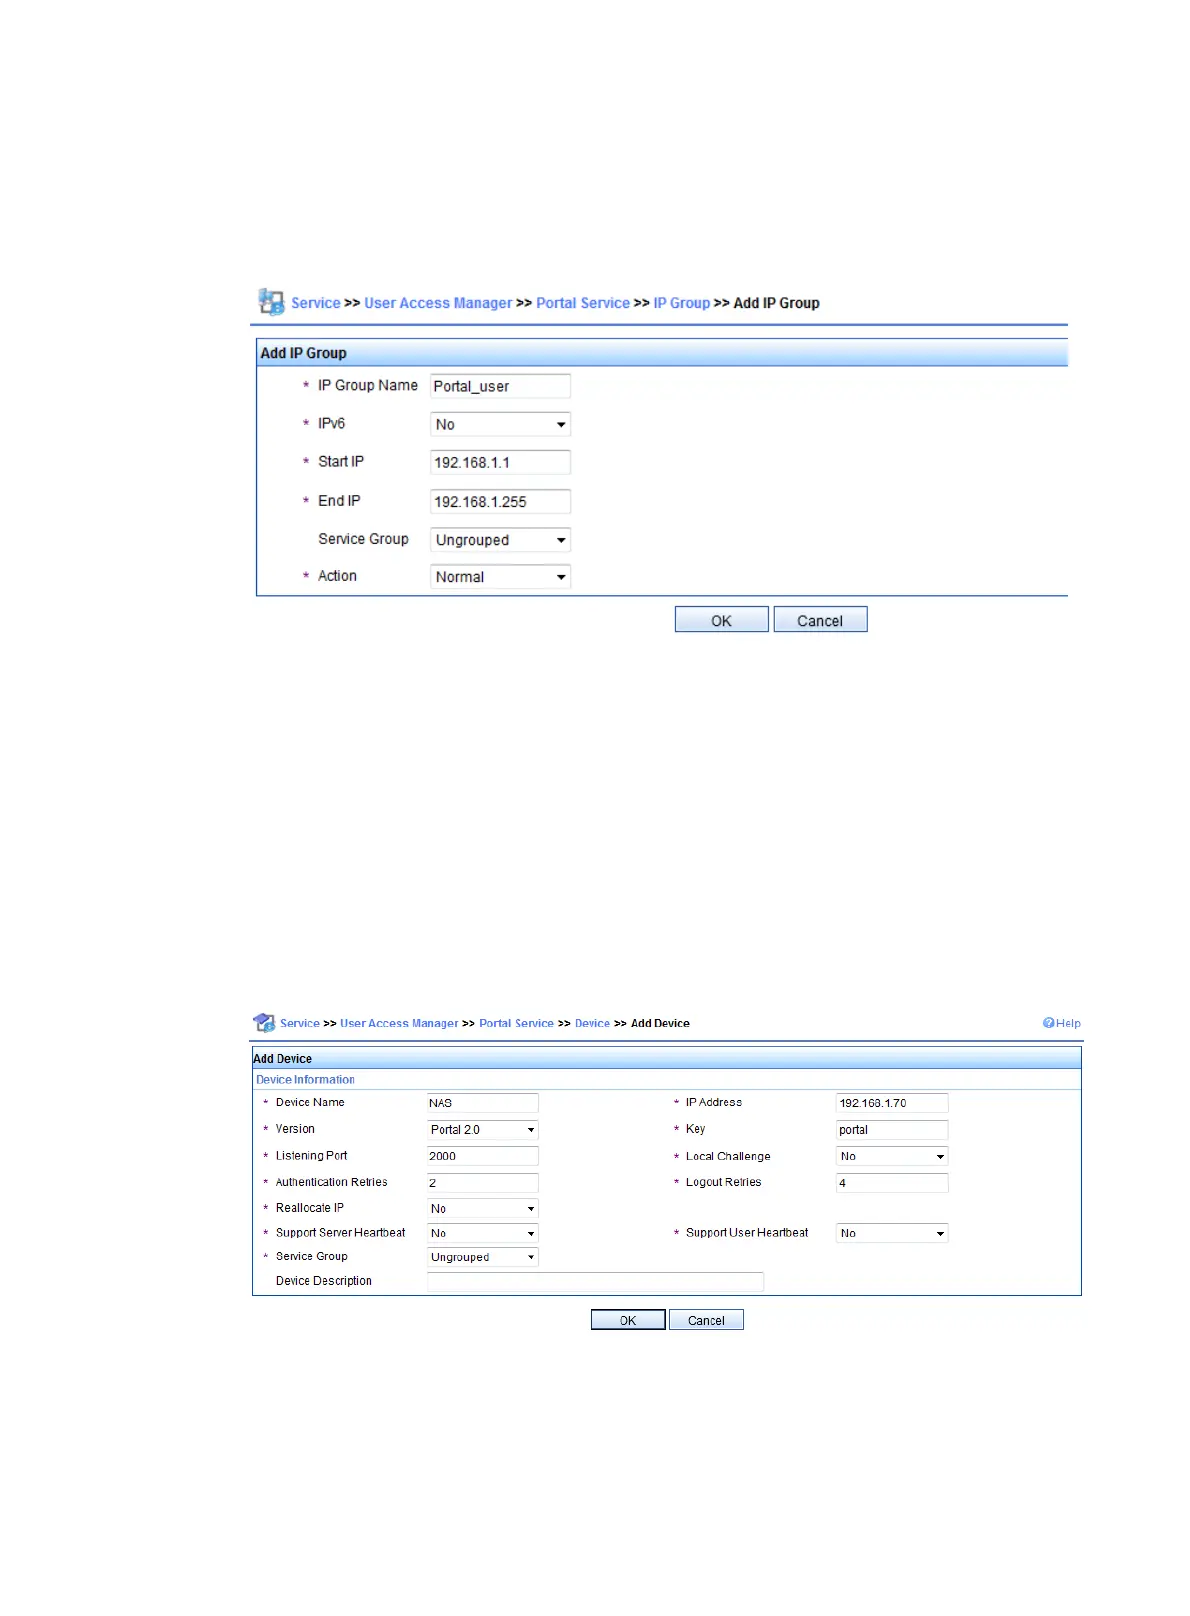
− Set the start IP address to 192.168.1.1 and the end IP address to 192.168.1.255. Make
sure the IP address group contains the IP address of the host.
− Select the action Normal.
c. Click OK.
Figure 28 Adding an IP address group
3. Configure the router as a portal device:
a. From the navigation tree, select User Access Manager > Portal Service Management >
Device.
b. Click Add to configure a portal device as follows:
− Enter the device name NAS.
− Enter the IP address of the access interface on the router, which is 192.168.1.70.
− Enter the key, which is portal, the same as that configured on the router.
− Specify whether to enable IP address reallocation. This example uses direct portal
authentication by selecting No from the Reallocate IP list.
c. Leave the default settings for other parameters and click OK.
Figure 29 Adding a portal device
4. Associate the portal device with the IP address group:
a. In the portal device list, click the icon in the Port Group Information Management column
for NAS.
b. Click Add to configure a port group for the portal device as follows:
 Loading...