8. Reinstall the drive in the enclosure.
9. Allow the drive to perform mid-tape recovery. This takes several minutes.
When this activity completes, push the Unload button to eject the cartridge.
10. Test the drive (see “Function Code 1: Run Drive Diagnostics” on in the 7226
Model 1U3 Storage Device Enclosure Setup and Operator Guide) to determine if it
should be replaced.
Tape Pulled from or Broken near Leader Pin
Use the following procedure to remove a tape cartridge when the tape has pulled
from or broken near the leader pin:
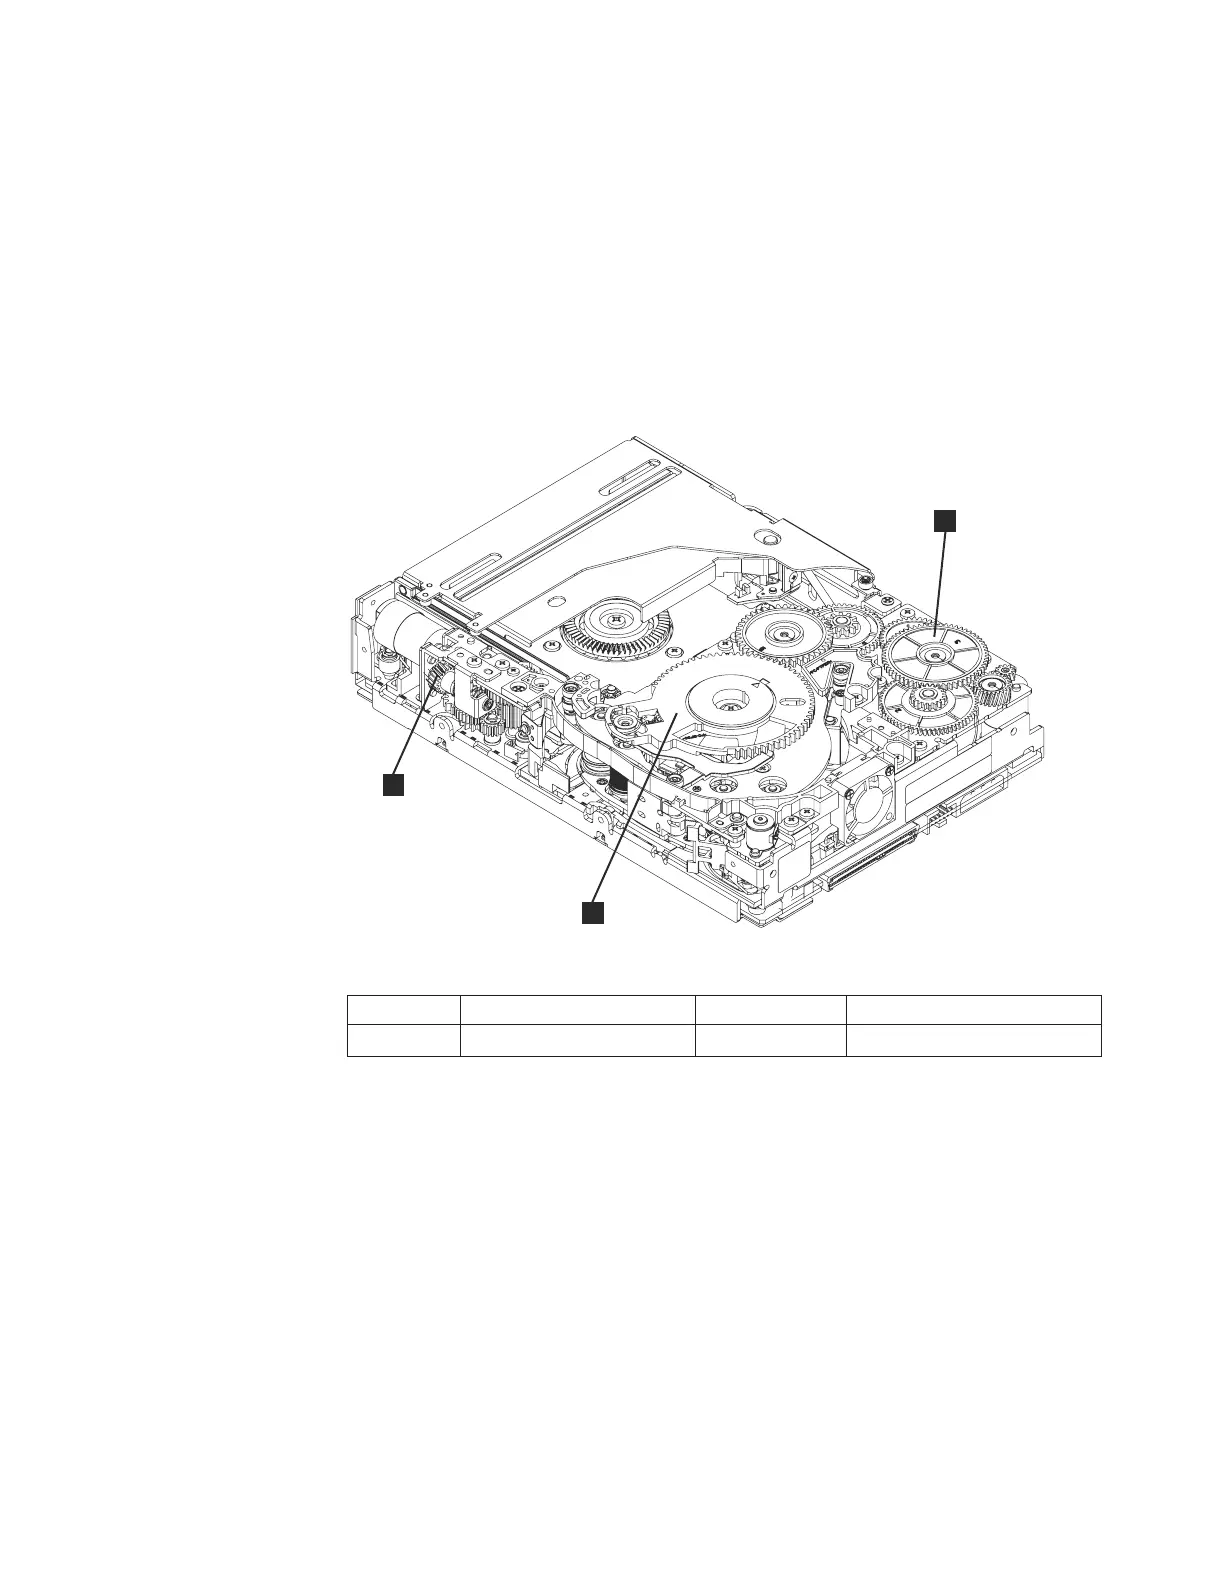
1 Threader intermediate gear 2 Threader mechanism gear
3 Loader motor worm gear
1. Pull out tape from the take up reel.
Note: If there is more than approximately 0.6 m (2 ft.) of tape on the take up
reel, go to “Tape Broken in Mid-tape” on page 186.
2. If there is less than approximately 0.6 m (2 ft.) of tape on the take up reel, cut
off the excess tape as close to the leader pin, as possible.
3. Reattach the leader pin to the remaining tape.
4. Locate the threader intermediate gear (1 in Figure 118) near the rear of the
drive. You can use your finger to rotate the threader intermediate gear and
slowly rotate the threader mechanism gear (2 in Figure 118) clockwise. This
draws the tape leader block assembly (LBA) into the cartridge.
5. As the leader pin is secured in the cartridge, you should hear the leader pin
retention spring clips click into place. If you do not hear the click, continue
rolling until the threader intermediate gear (1 in Figure 118) stops. The LBA
is in the correct position.
3
1
2
RLHSV522-0
Figure 118. LTO Tape Drive with the Cover Removed
Chapter 11. Installation and Removal Procedures 185

 Loading...


