Installing the Slide Rails
To install the Slide Rails into a rack, complete the following steps:
Note: You may need to move other components in the rack to provide access for
this installation. You will need to access both the front and rear of the rack.
Note: The slide rails may be installed in a rack with round or square holes
1. Ensure that the system and the 7226 Storage Enclosure are powered off.
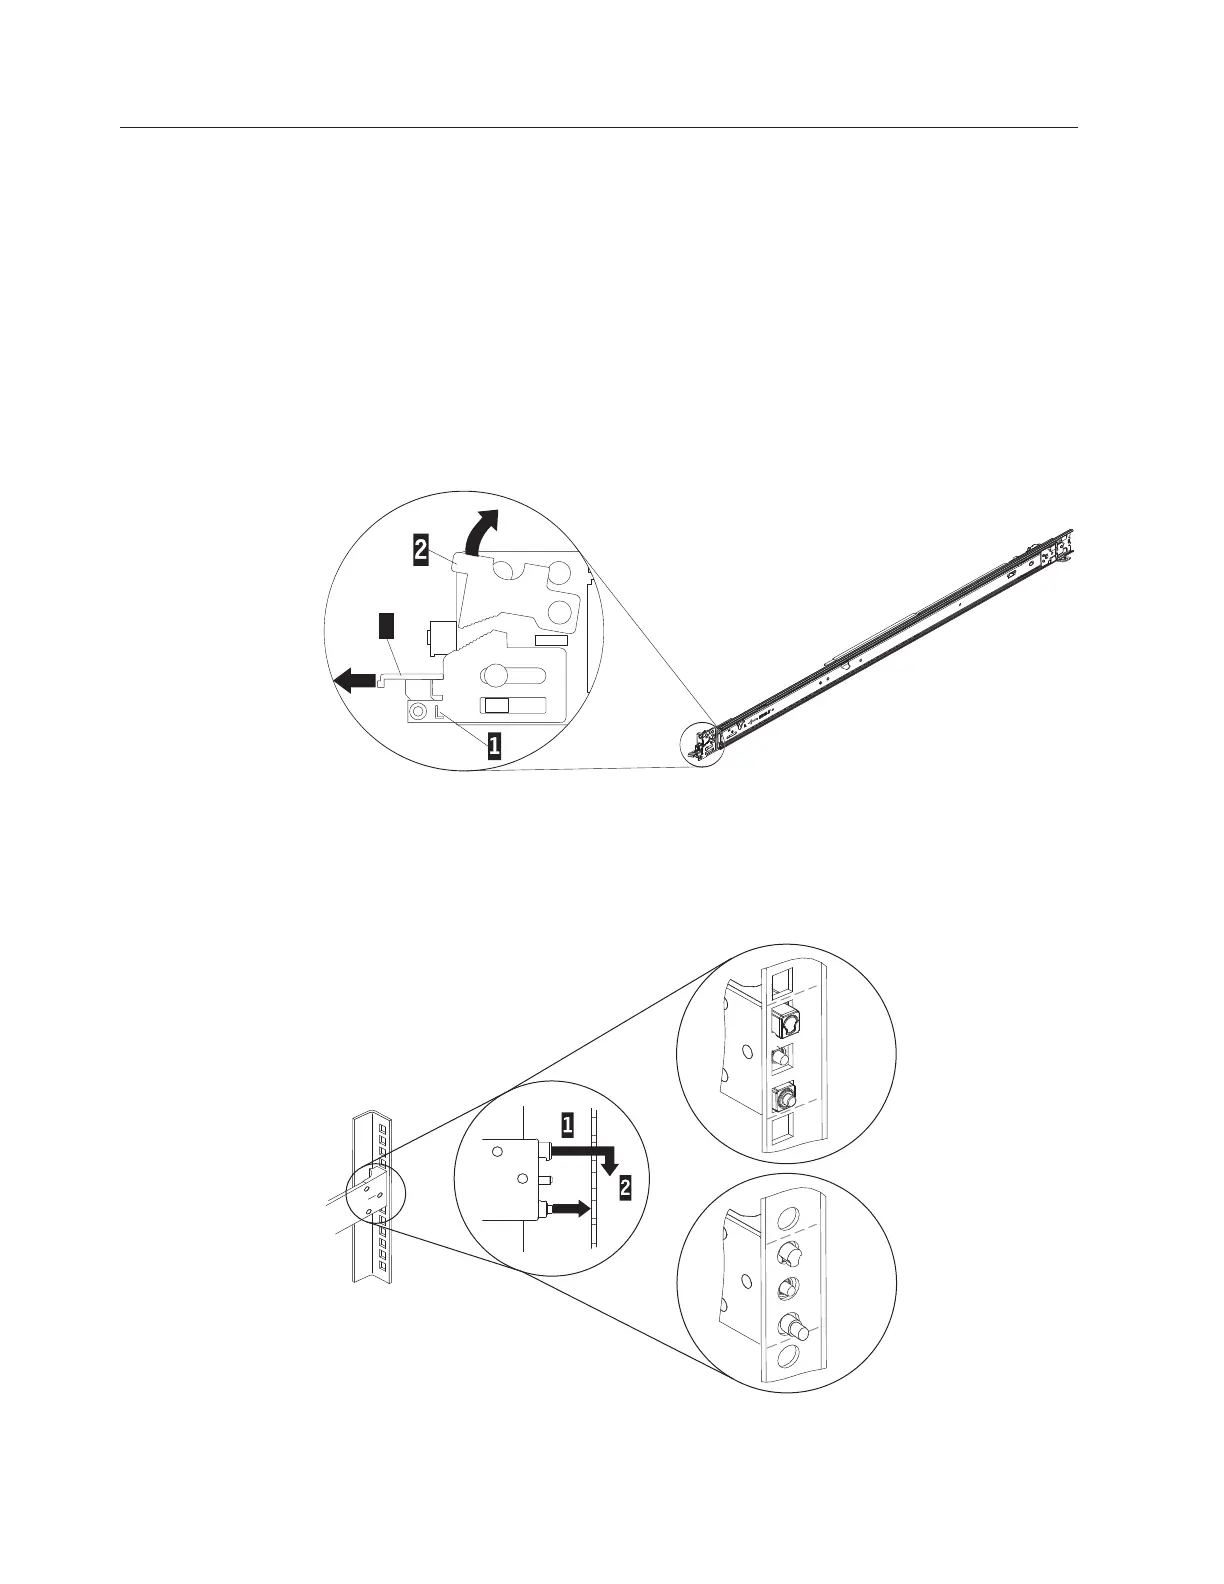
2. Each slide rail is marked with either an R (right) or an L (left) 1. Select one of
the slide rails and push up on the front movable tab 2; then, pull out the
front latch 3. Make sure that the front latch remains extended and does not
click back into place.
3. Align the three pins on the rear of the slide rail with the three holes in the
selected U on the rear of the rack. Push the rails so that the pins go into the
holes 1, and drop the slide rail down 2 until it latches into place.
ROLSOS801a-0
3
3
Figure 4. Slide rail and movable tab
ROLSOS802-0
Rack Rear
Figure 5. Rack rear rail and pins
14 7226 Storage Device Enclosure Setup, Operator and Service Guide

 Loading...


