CEAST 9340 - Instructions for Use and Maintenance 7510.000MN1r ed. 1 rev. 1 - Page 69
X
X
DISASSEMBLY
a) Open the door of the chamber.
b) Loosen the screw on the fixed height stands (see fig. below).
c) Lift and remove the Charpy test fixture.
X
a) Choose the correct pair of shoulders according to the specimen dimensions and stan-
dard of reference (see Appendix I and previous Fig. 1, 2 and 3).
b) Remove the two shoulder screws fastening the shoulders (see fig. 1 B).
c) Lift and remove the shoulders from the fixture and replace them with the choosen
ones.
d) Fasten the specimen shoulders with shoulder screws.
e)
For shoulders according to ASTM standards (notched plastic specimen) only:
- Loosen the screws fastening the adjustable blocks (see fig. 1 C);
- Align the reference plane of blocks with the line of the specimen thickness: 3.17,
6.35, 12.7 [mm];
- Tighten the screws fastening the adjustable blocks.
f)
For shoulders according to ISO standards (notched plastic specimen) only:
- Check that the stop plate is turned downward (see fig. 3 A).
g)
For shoulders according to ISO standards (unnotched plastic specimen) only:
- Check that the stop plate is turned upward and secured with screw (see fig. 3 B).
ASSEMBLY
Specimen shoulders
X
X
Screw
Fixed height
stand
Clamping plate
without clamp-
ing ring
X
X
X
X
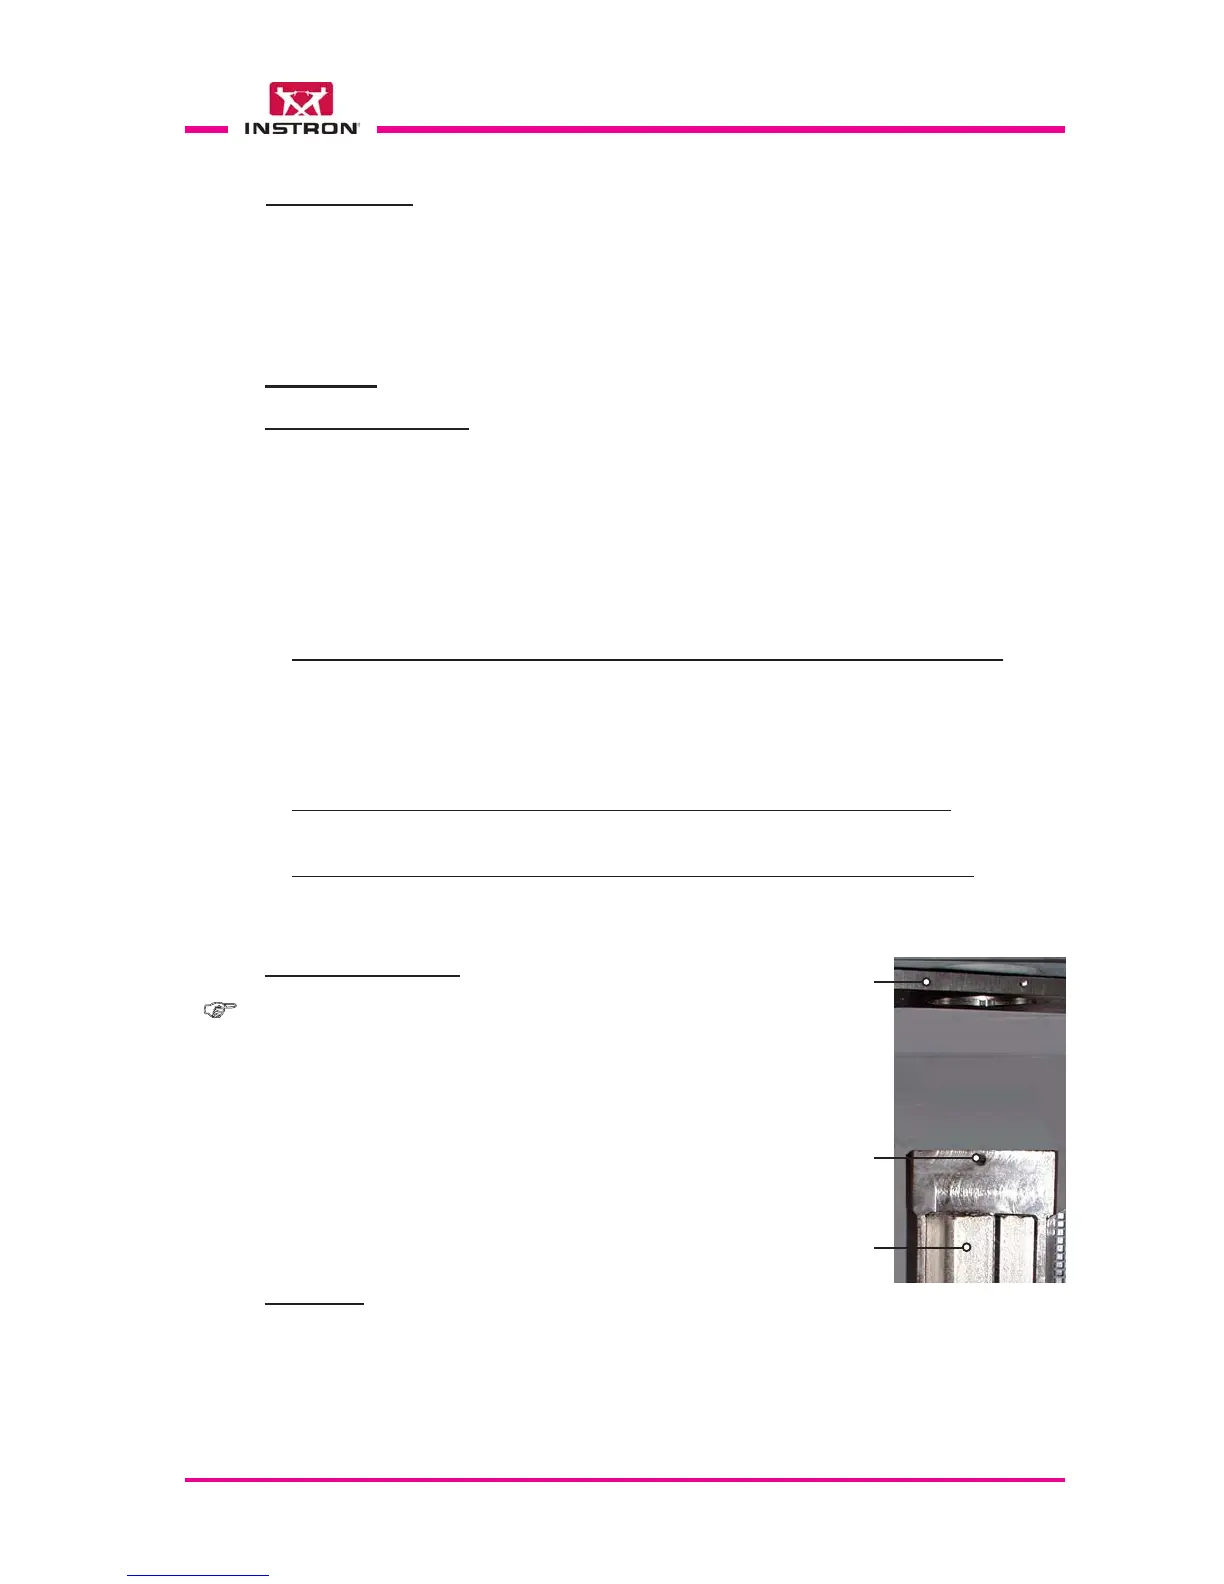
Note: verify that the clamping plate is with-
out clamping ring (see fig. to the right).
h) Place the Charpy test fixture on top of
the fixed height stand.
i) Turn the Charpy test fixture until the pin
enter in the slot of the stand. This pin al-
low to find quickly the correct position of
the fixture.
j) Fasten the Charpy test fixture with screw.
Charpy Test Fixture
k) Place the specimen (notched specimen with notch downward) against the adjustable
blocks (fig. 1 A) or against the alignment pins (fig. 2 or 3 A).
Push the notch centering pin forward and center the notch.
For unnotched specimen use the stop plate.
Specimen
X
X
X
X
X