Page 70 - CEAST 9340 - Instructions for Use and Maintenance 7510.000MN1r ed. 1 rev. 1
X
X
X
X
DISASSEMBLY
8.6.2.1.3 FIXTURE FOR IZOD TEST
a) Choose the correct specimen adapter
according to the specimen dimensions
and standard of reference (see Appen-
dix A).
b) Place the Izod test fixture on a table,
loosen the specimen clamping screw
until the bracket can be lifted allow-
ing to remove the specimen adapter.
c) Remove the two screws fastening the
specimen adapter. They are located
under the Izod test fixture.
d) Lift and remove the specimen adapter
from its seat and replace it with the
choosen one.
e) Fasten the specimen adapter with screws.
a) Open the door of the chamber.
b) Loosen the screw on the fixed height
stands.
c) Lift and remove the Izod test fixture.
ASSEMBLY
X
X
X
X
X
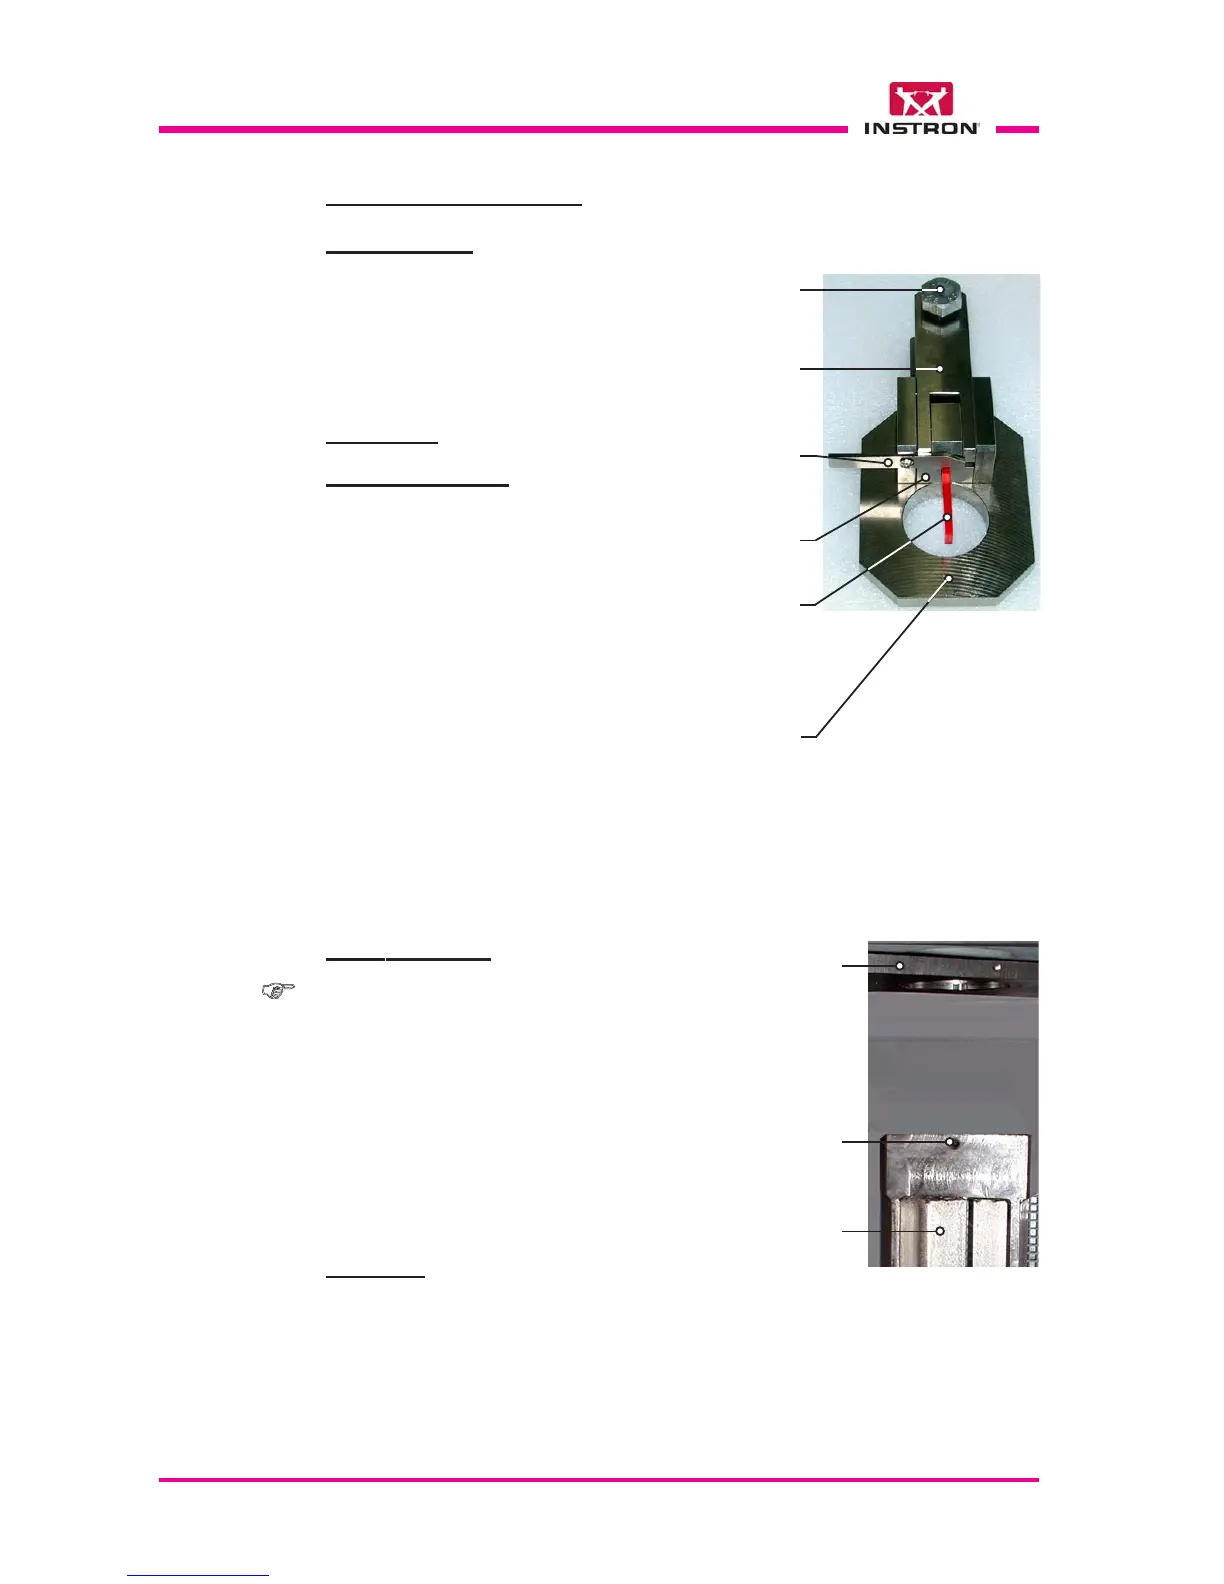
Notch
centering
blade
Specimen
adapter
Specimen
clamping
screw
Specimen
(edgewise
position,
notch
upward)
Screw
Fixed height
stand
Clamping plate
without clamp-
ing ring
Izod test
fixture
Note: verify that the clamping plate is
without clamping ring.
f) Place the Izod test fixture on top of
the fixed height stand.
g) Turn the Izod test fixture until the pin
enter in the slot of the stand. This pin
allow to find quickly the correct posi-
tion of the fixture.
h) Fasten the Izod test fixture with screw.
Specimen Adapter
Izod Test Fixture
Specimen
clamping
bracket
i) Lift the specimen clamping bracket, insert the specimen (notch upward) in
the slot of the specimen adapter and center the notch using the notch cen-
tering blade.
j) Clamp the specimen with the clamping screw.
Specimen
X
X
X
X