PLDC01938
REVISION 00
01/06/2011
TECHNICAL DEPT
Stavale
- date 05/09/2011
167/195
21
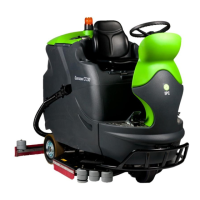
Keeping the pedal fully raised, proceed to regulate the micro switch C, moving it forwards towards the
connecting rod until the wheel on the micro switch C goes in, emitting the classic click.
22
Fix the position of the micro switch C by tightening the first two nuts C2 with moderation, screw up the other
two nuts C3 as lock nuts to avoid the single nut coming loose, causing the position of the micro switch C to
be lost.
Reassembly
1
Press the pedal a few times to verify operation and remount as described in paragraph C3.1.
Checking adjustment
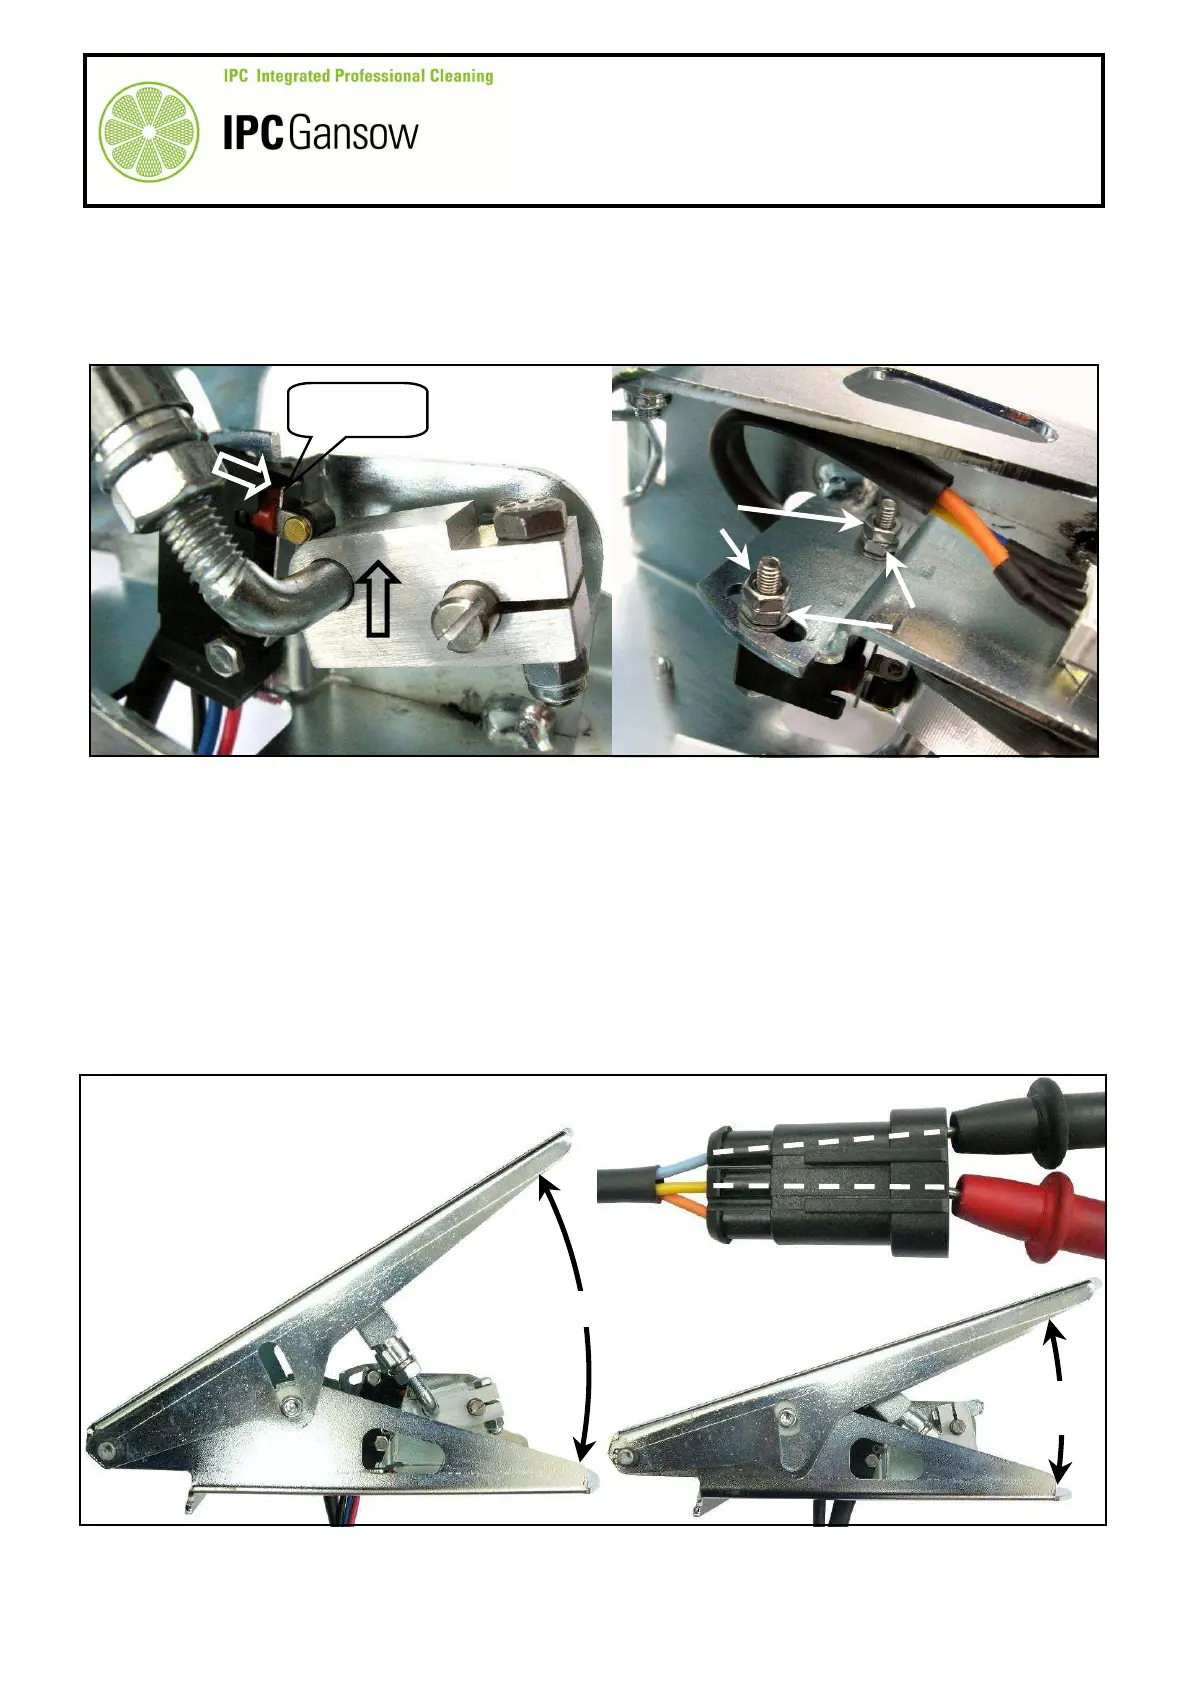
1
Before mounting the pedal (if without Curtis controller), check correct operation of the pedal potentiometer.
2
With a digital multimeter able to read up to 5 KOhms, verify operation of the potentiometer.
3
Position one probe of the tester on the blue wire of the three-pin potentiometer connector and the other on
the yellow wire.
4
Read the initial value, pressing the pedal slowly as far as it will go, and read and note the value at the end of
pedal travel. The value must be between 150 - 2100 Ohm ± 100 Ohm.
"CLIC"
D
C
C2
C3
PHOTO 349
PHOTO 350
100 Ohm ± 100 Ohm
± 100 Ohm
2
1
 Loading...