Aircraft Technical Manual
J120, J160, J170, J200/J400, J230/J430, J250/J450 Variants
This document is controlled while it remains on the Jabiru server. Once this no longer applies the document becomes uncontrolled.
11.6.2 Removal & Installation
L2 or LAME (A&P or LSA Repairman / Maintenance)
L2 or LAME (A&P or LSA Repairman / Maintenance)
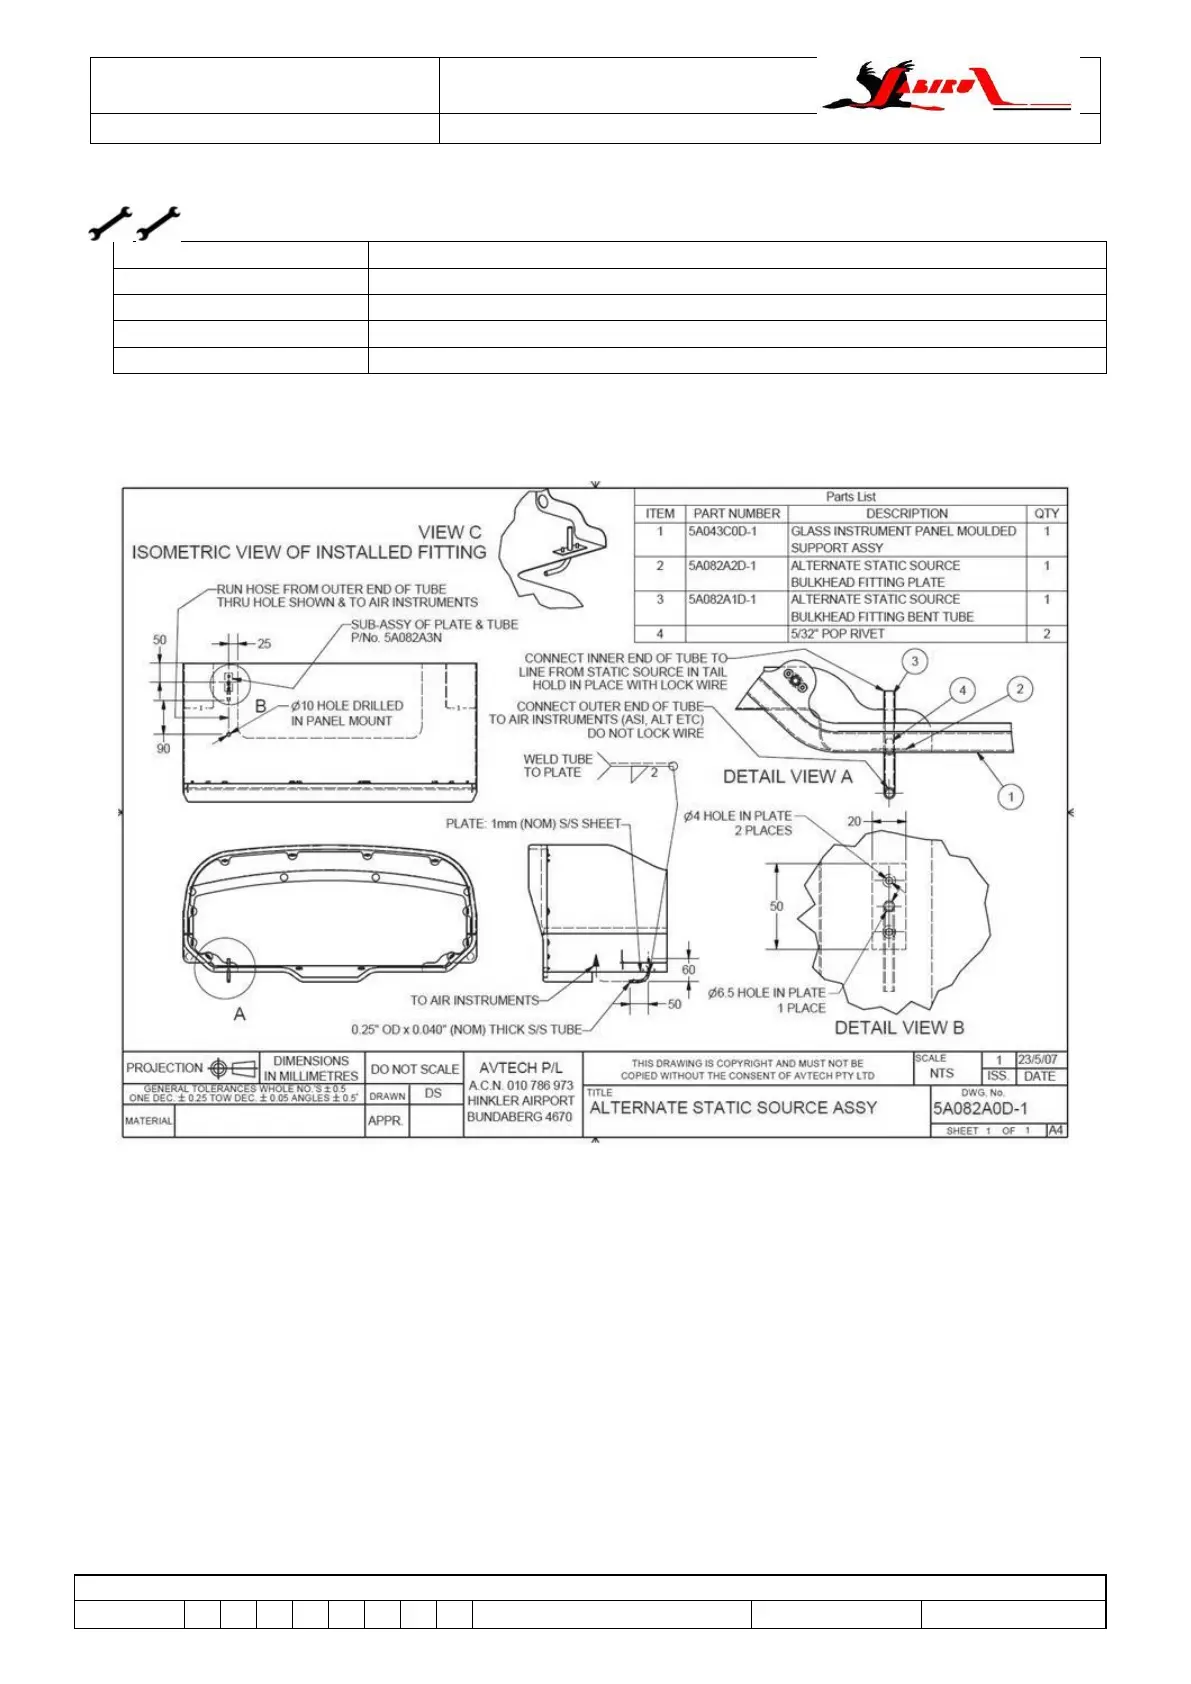
Drill the rivets holding the fitting to the panel and remove.
Disconnect static system tubes.
For installation, reverse removal steps listed above.
Figure 192 – Alternate Static Source Assy (all J-Series)
11.7 Analogue Tachometer (all J-Series)
11.7.1 Description
Jabiru Aircraft may be equipped with an analogue tachometer or a digital RPM read-out as a part of
an engine monitoring system.
Analogue tachometers are driven by a variety of sensors, depending on the aircraft model. In some
the sensor is positioned so that the teeth of the flywheel ring gear pass close by and produce a
signal. In others the same sensor reads off metal tags bolted to the flywheel. Finally, in some
aircraft a sensor is mounted on the alternator mount plate and produces a signal from the ignition
magnets.
Refer to the Engine Maintenance Manual for additional details.