ELECTRICAL
4222983 Second Edition 4-149
4
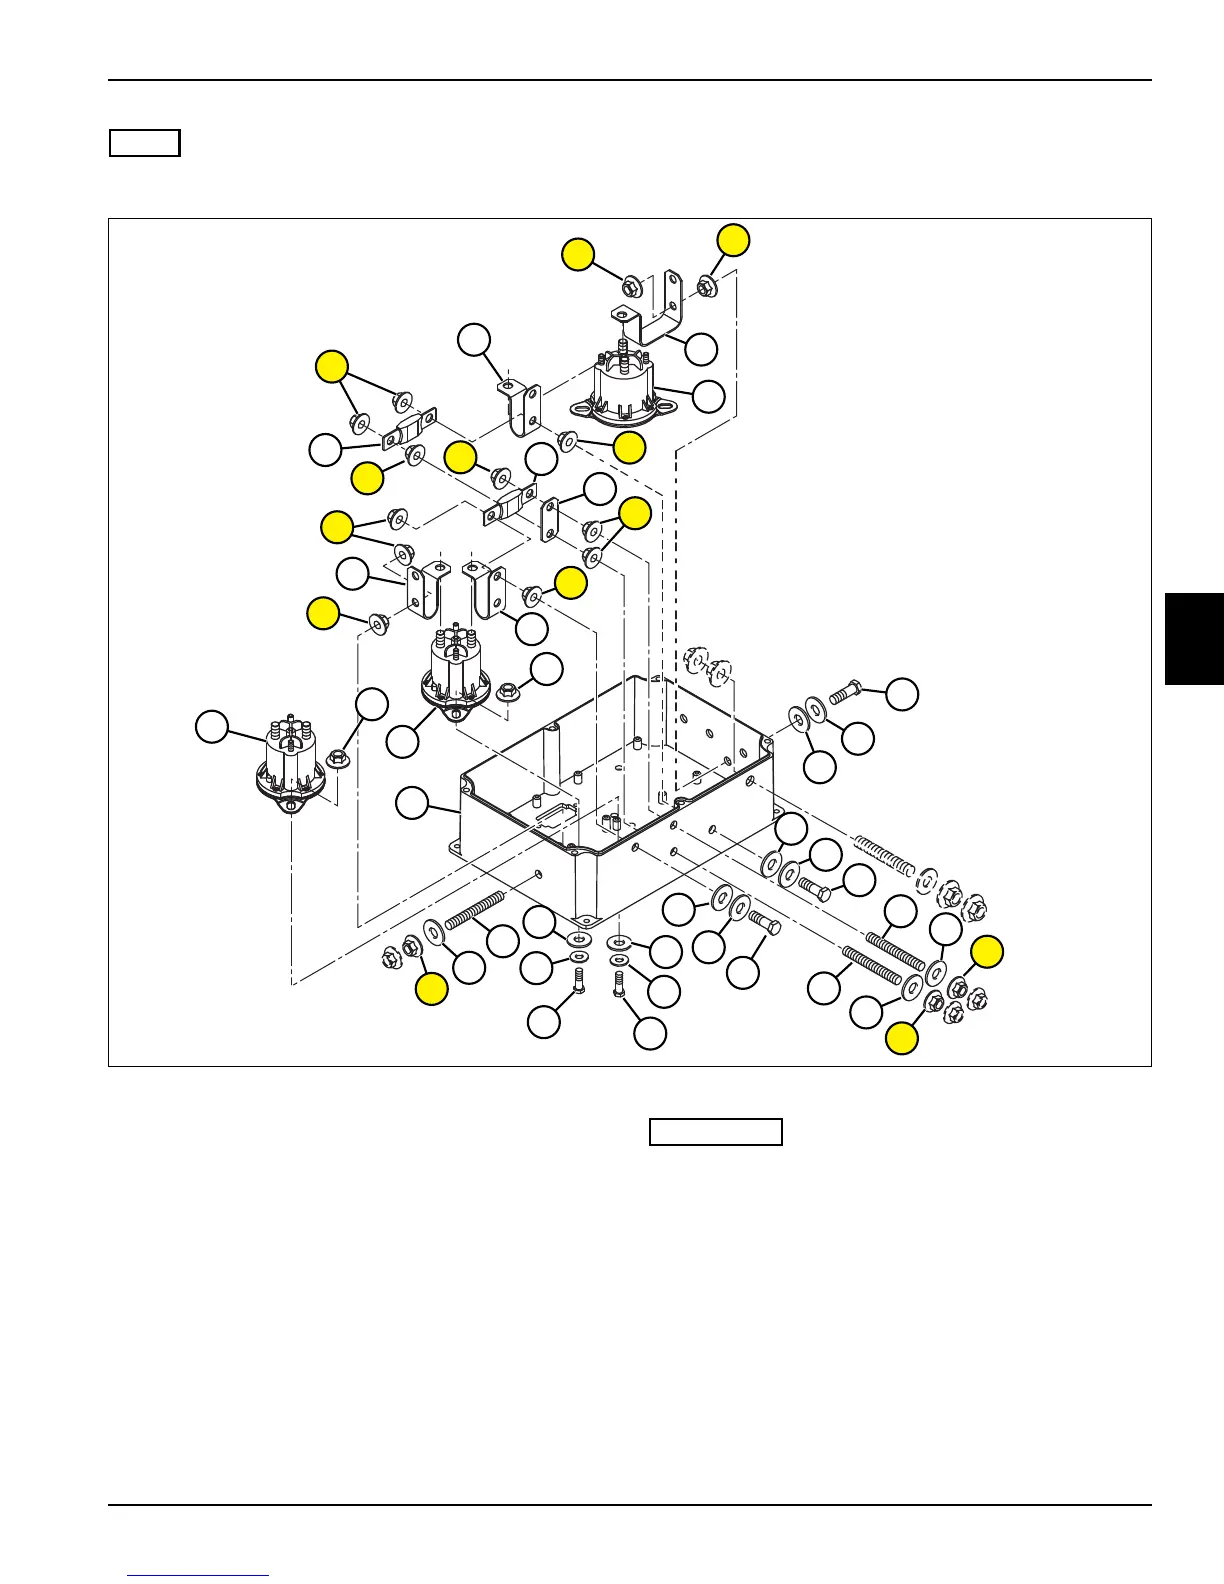
NOTE
Highlighted items require a specific torque value. See the installation notes on the bottom of page for more information.
Figure 4-123
7. Remove nuts (8 and 10), 150 A fuse (25), 300A fuse
(27), and 48-volt fuse busbar (28).
8. Remove nuts (16), seals (17), and studs (18).
9. Remove 48-volt busbars (9 and 11).
10. Remove six nuts (23).
11. Remove contactors (12, 22, and 24) from PDU (21).
IMPORTANT
Flange nuts (16, 8, and 10) are the same part number;
however, torque values vary depending on location.
Installation Notes
• Install contactors by reversing the order of removal.
• Tighten flange nut (16) to 40 lb-in. (4.5 N·m).
• Tighten flange nut (8) to 80 lb-in. (9 N·m).
• Tighten nuts (4) to 35 lb-in. (4.0 N·m).
• Tighten nuts (5) to 15 lb-in. (1.7 N·m).
• Apply dielectric grease (Jacobsen PN 365422) to any
connectors removed.
TN2836
TN2836
11
12
9
27
28
27
9
9
23
22
21
17
19
13
15
14
20
19
17
18
18
17
17
17
14
17
10
10
10
8
8
10
16
10
10
8
16
16
16
13
14
13
23
24
20
19
17