6-26 4222983 Second Edition
CUTTING UNITS
6
Bedknife Backing Assembly
Removal and Installation
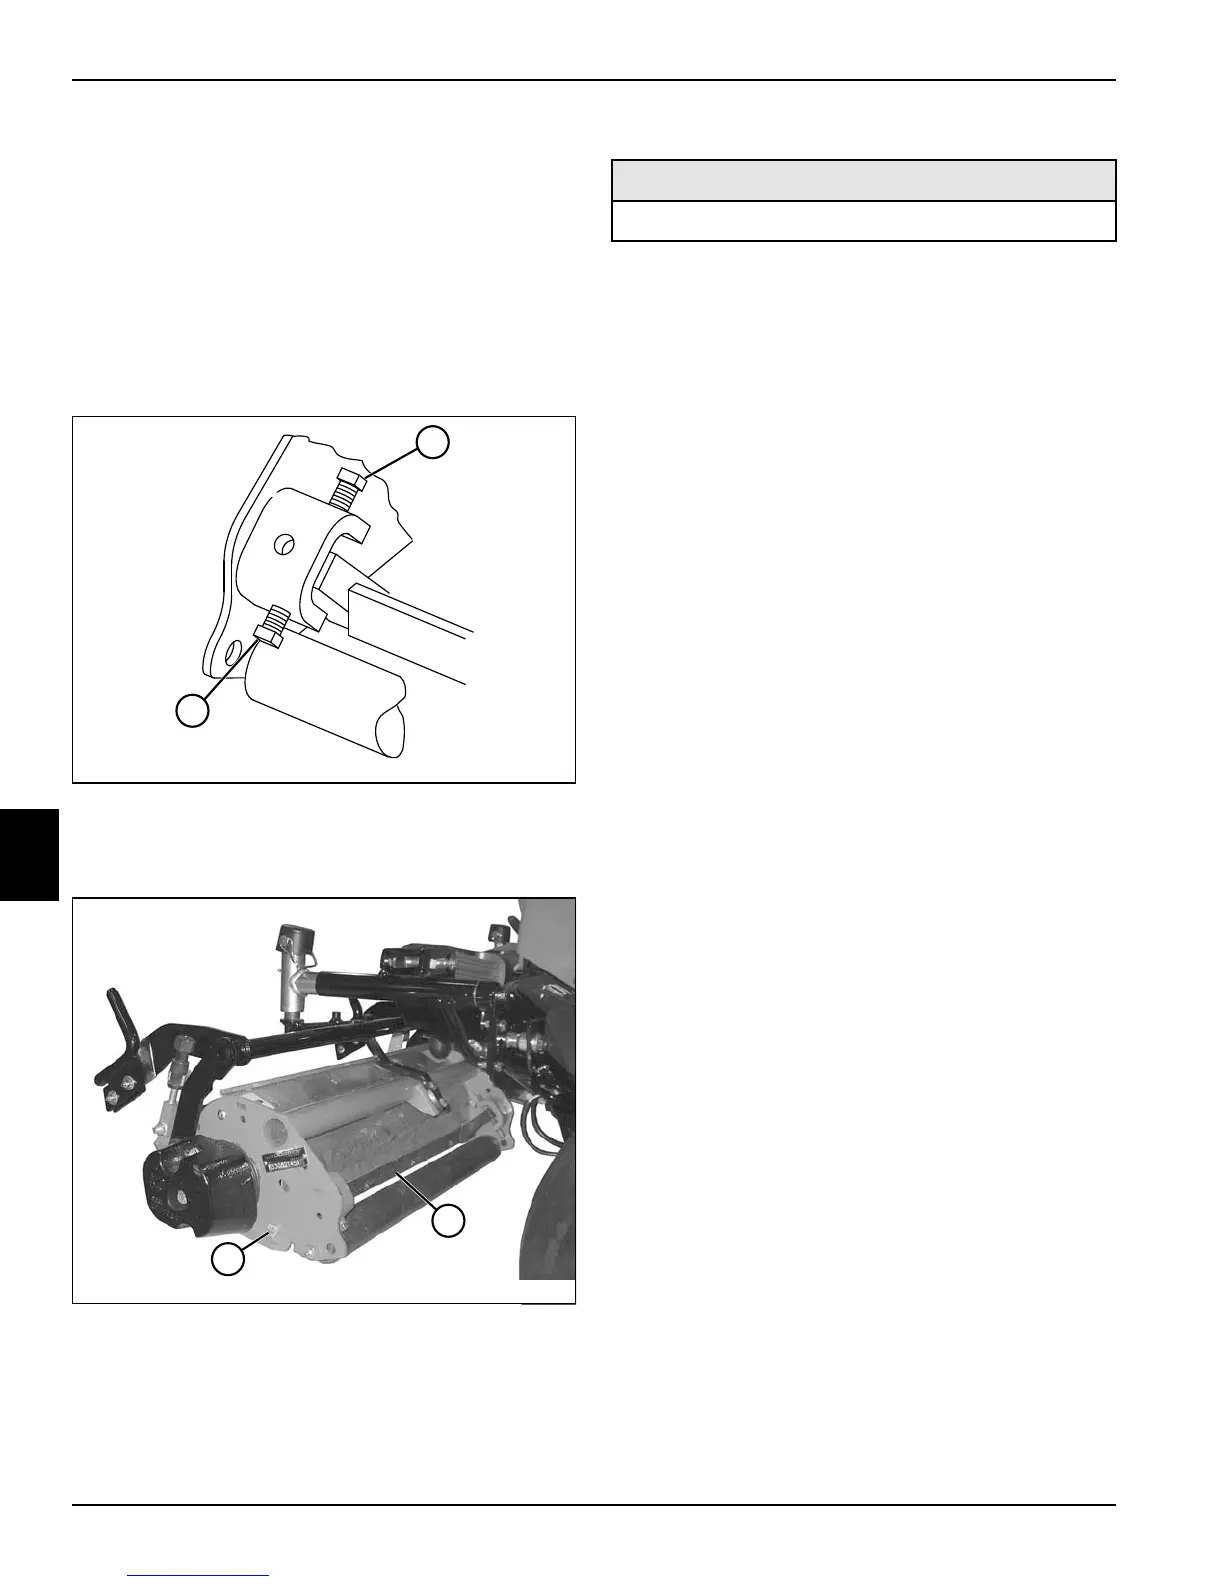
See Figures 6-27 and 6-28.
1. Park the mower safely. (See “Park Mower Safely” on
page 1-6.)
2. Remove cutting unit from mower. (See “Center
Cutting Unit” on page 6-24 or “Right and Left Cutting
Units” on page 6-25.)
3. Place cutting unit on a solid work surface.
Figure 6-27
4. Loosen bedknife adjuster screws (1) and (2) on both
sides of the cutting unit.
Figure 6-28
5. Support bedknife backing assembly (3).
6. Remove bedknife backing mounting screw (4) on
both sides of cutting unit.
7. Remove bedknife backing assembly (3).
Installation Notes
• Install bedknife backing assembly by reversing the
order of removal.
• Apply anti-seize compound to the threads of the
bedknife backing mounting screws before installing.
• Adjust bedknife-to-reel clearance. (See
“Bedknife-to-Reel Clearance Adjustment” on
page 6-16.)
TN0893
1
2
TN2650
4
3
Required Materials
Anti-Seize Compound

 Loading...