6-32 4222983 Second Edition
CUTTING UNITS
6
Rear Roller
Removal and Installation
See Figure 6-39.
1. Park the mower safely. (See “Park Mower Safely” on
page 1-6.)
2. Raise cutting unit assembly with a suitable lifting
device and support the cutting unit frame to remove
weight from roller.
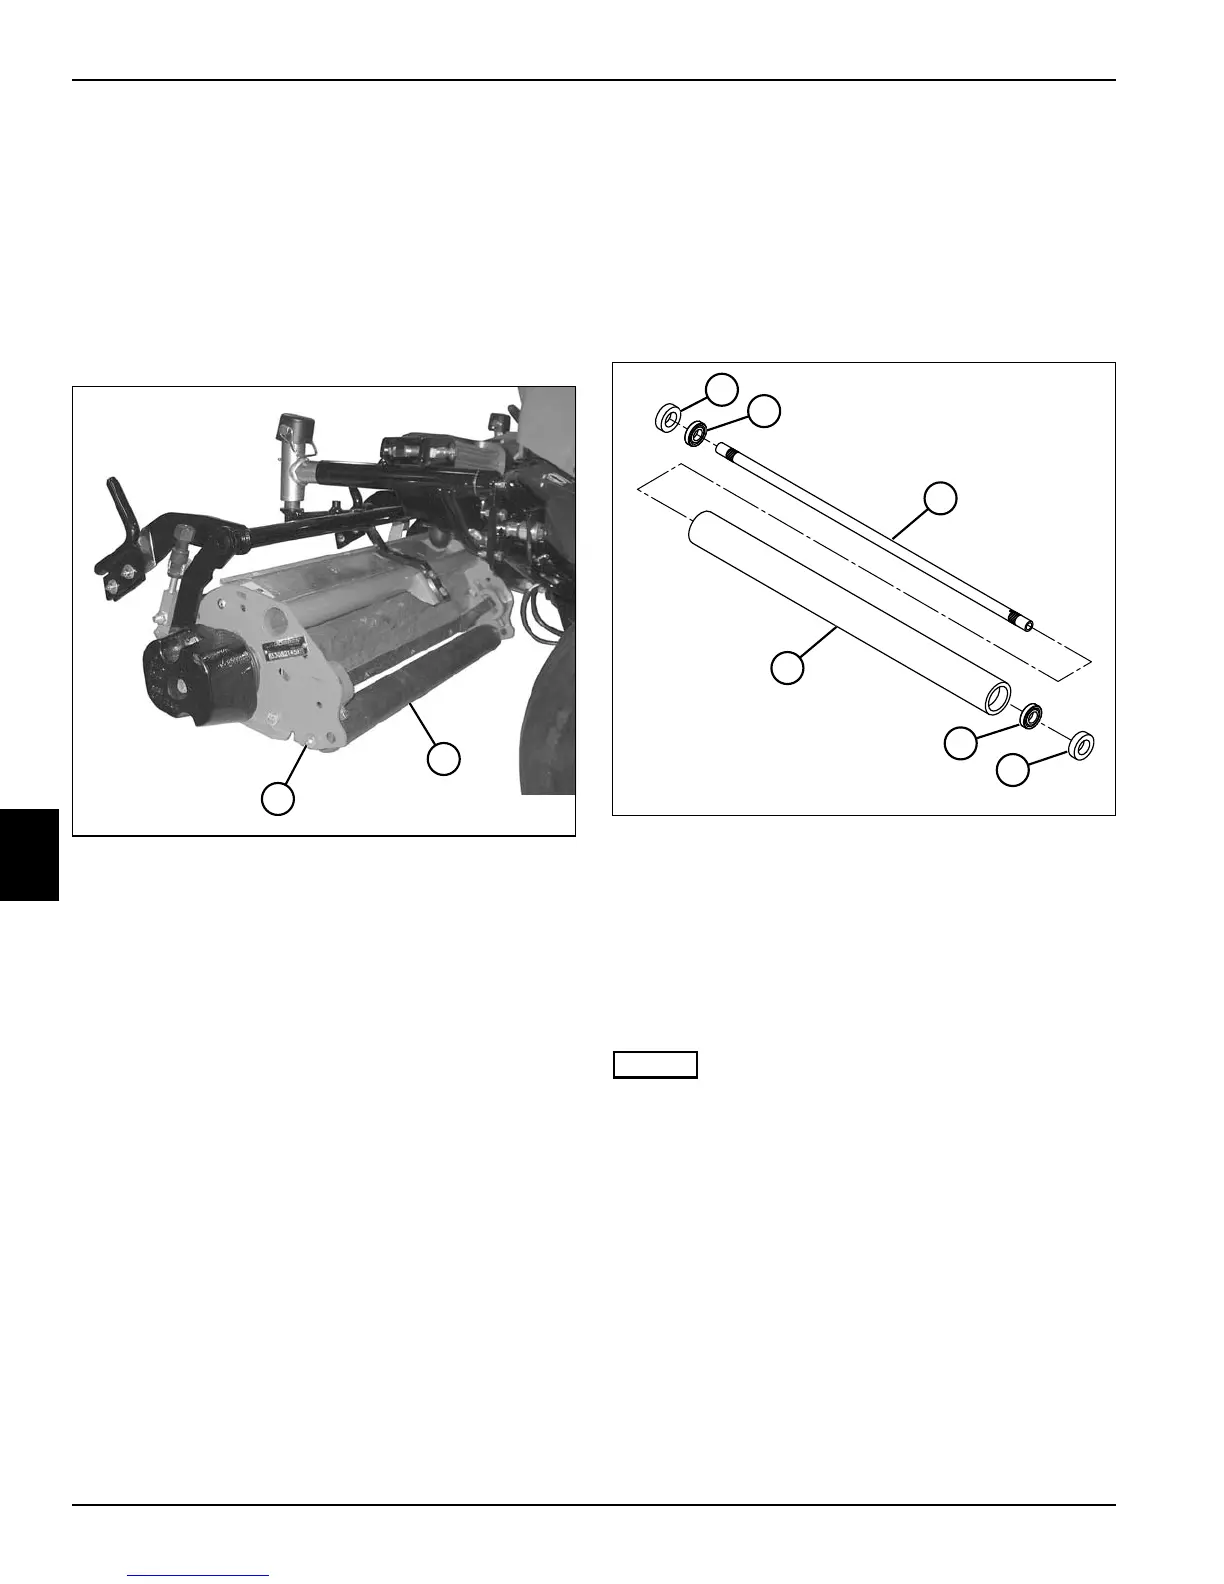
Figure 6-39
3. Remove screw with grease fitting (1) on both sides of
rear roller (2).
4. Remove rear roller (2).
Installation Notes
• Install rear roller by reversing the order of removal.
• Lubricate grease fittings with grease that meets or
exceeds NLGI Grade 2 LB specifications. Clean
grease fittings before lubricating and apply grease to
the fittings with a hand grease gun only. Pump the
gun slowly until a slight amount of pressure is felt,
then stop—do not over-grease. Do not use
compressed air gun.
Roller Bearings
Removal
See Figure 6-40.
1. Park the mower safely. (See “Park Mower Safely” on
page 1-6.)
2. Remove roller. (See “Front Roller” on page 6-31 or
“Rear Roller” on page 6-32.)
Figure 6-40
3. Using a suitable hammer, support one end of roller
(4) and drive the bearing (2) and seal (1) out of roller
by tapping opposite end of shaft (3).
4. Remove bearing (2) and seal (1) from shaft (3).
5. Repeat steps 3 and 4 for other end of roller.
Installation
NOTES
• Pack bearings (2) with grease that meets or exceeds
NLGI Grade 2 LB specifications before installation.
• Apply grease that meets or exceeds NLGI Grade 2
LB specifications to the lips of the seals (1).
1. Press one bearing (2) onto end of shaft (3) until it
contacts the shoulder on the shaft.
2. Install shaft and bearing assembly to roller (4) and
press bearing into roller.
3. Support bearing end of shaft and roller and press the
other bearing onto the opposite end of shaft until it
contacts the shoulder on the shaft.
4. Install seals (1).
TN2650
1
2
TN2651
4
2
1
3
1
2

 Loading...