7-4 4222983 Second Edition
ACCESSORIES AND MISCELLANEOUS REPAIR
7
Repair
Work Light Assembly
Removal and Installation
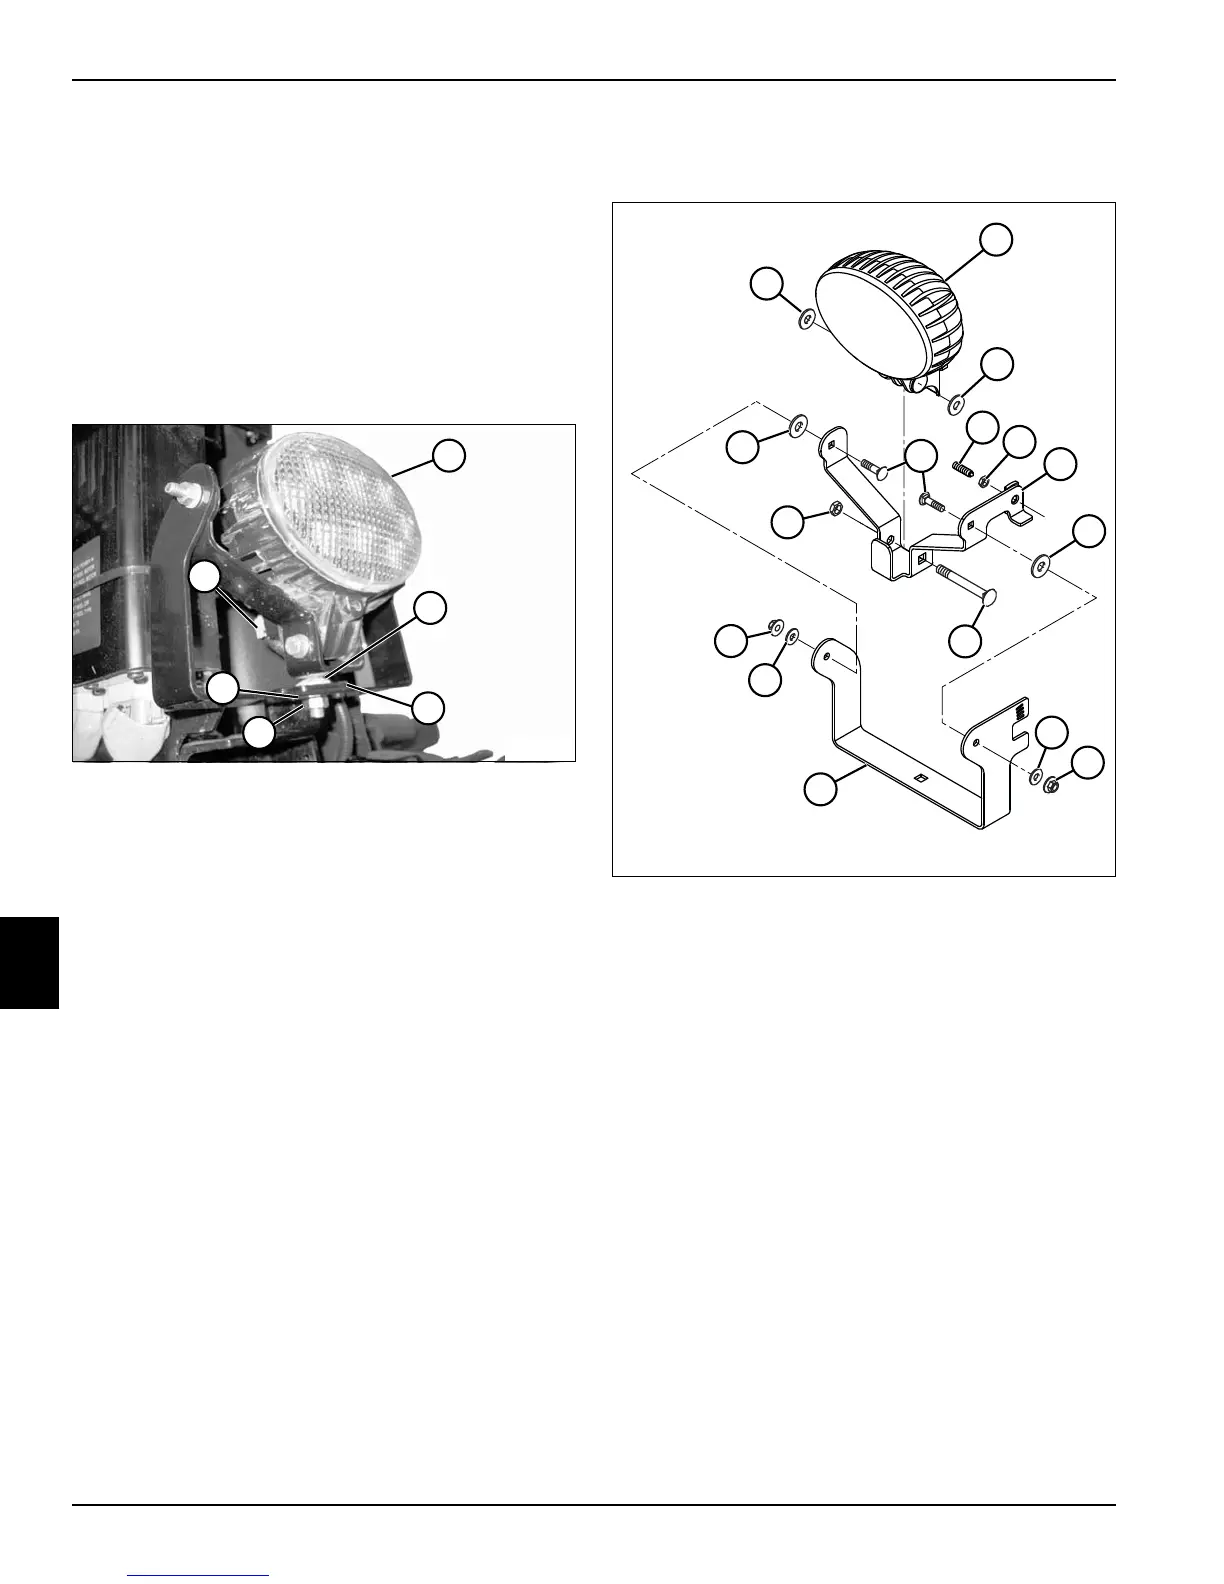
See Figure 7-2.
1. Park the mower safely. (See “Park Mower Safely” on
page 1-6.)
2. Remove front cover. (See “Front Cover” on
page 7-16.)
Figure 7-2
3. Tag and disconnect wire harness connector (1) from
work light assembly (2).
4. Remove nut (5), washer (6), and carriage bolt (3)
from mounting bracket (4).
5. Remove work light assembly (2).
Installation Notes
• Install work light assembly by reversing the order of
removal.
• Adjust the wor k light to project the desired distance in
front of the machine. See the “Parts and
Maintenance Manual” for additional information and
illustrations.
Disassembly and Assembly
See Figure 7-3.
Figure 7-3
5
1
2
3
4
TN2360
6
1 Flat Washer 7 Carriage Bolt
2 Work Light 8 Flat Washer
3 Flat Washer 9 Lock Nut
4 Spring Plunger 10 Outer Pivot Bracket
5 Nut 11 Nut
6 Inner Pivot Bracket 12 Carriage Bolt
TN2362
2
3
4
5
6
1
7
8
9
10
8
9
11
1
1
12