Powered by
Eaton Technology
VSD Series Drives User Manual
LIT-1201828
For more information visit:
www.johnsoncontrols.com
v
November 2009
List of Figures
Figure 2-1: Mounting Space Requirements . . . . . . . . . . . . . . . . . . . . . . . . . . . . . . . . . . . . 2-1
Figure 3-1: Input Power and Motor Cable Stripping and Wire Lengths . . . . . . . . . . . . . . 3-4
Figure 3-2: . . . . . . . . . . . . . . . . . . . . . . . . . . . . . . . . . . . . . . . . . . . . . . . . . . . . . . . . . . . . . . . 3-5
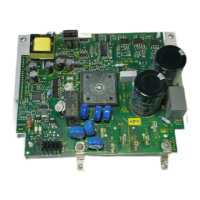
Figure 3-3: Principle Wiring Diagram of VSD Series Power Unit,
FR4, FR5 and FR6 . . . . . . . . . . . . . . . . . . . . . . . . . . . . . . . . . . . . . . . . . . . . . . . . . . . . . 3-6
Figure 3-4: . . . . . . . . . . . . . . . . . . . . . . . . . . . . . . . . . . . . . . . . . . . . . . . . . . . . . . . . . . . . . . . 3-8
Figure 3-5: Option Board A9 Location and Settings . . . . . . . . . . . . . . . . . . . . . . . . . . . . . . 3-8
Figure 4-1: Option Board Slots . . . . . . . . . . . . . . . . . . . . . . . . . . . . . . . . . . . . . . . . . . . . . . . 4-1
Figure 4-2: Option Board A2 Terminal Locations . . . . . . . . . . . . . . . . . . . . . . . . . . . . . . . . 4-2
Figure 4-3: Positive/Negative Logic . . . . . . . . . . . . . . . . . . . . . . . . . . . . . . . . . . . . . . . . . . . 4-2
Figure 5-1: Identification of NEMA Type 1 Components . . . . . . . . . . . . . . . . . . . . . . . . . . 5-4
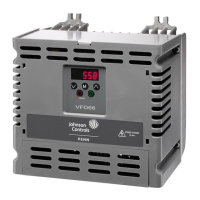
Figure 5-2: VSD Series IntelliPass/IntelliDisconnect Drive Dimensions . . . . . . . . . . . . . . 5-4
Figure 5-3: VSD Series IntelliPass with Three Contactors . . . . . . . . . . . . . . . . . . . . . . . . . 5-7
Figure 5-4: Identification of NEMA Type 12 and NEMA Type 3R Components . . . . . . . . 5-9
Figure 5-5: VSD Series Enclosed Drive Dimensions . . . . . . . . . . . . . . . . . . . . . . . . . . . . . 5-9
Figure 5-6: . . . . . . . . . . . . . . . . . . . . . . . . . . . . . . . . . . . . . . . . . . . . . . . . . . . . . . . . . . . . . . . 5-12
Figure 5-7: Schematic for Static Checks (Sample for Frames 4 and 5) . . . . . . . . . . . . . . . 5-15
Figure 5-8: Option Board B5 Wiring Diagram . . . . . . . . . . . . . . . . . . . . . . . . . . . . . . . . . . . 5-16
Figure 5-9: Option Board B5 Terminal Location . . . . . . . . . . . . . . . . . . . . . . . . . . . . . . . . . 5-17
Figure 5-10: Enable Bypass . . . . . . . . . . . . . . . . . . . . . . . . . . . . . . . . . . . . . . . . . . . . . . . . . 5-17
Figure 6-1: Keypad and Display . . . . . . . . . . . . . . . . . . . . . . . . . . . . . . . . . . . . . . . . . . . . . . 6-1
Figure 6-2: Operate Menu Navigation . . . . . . . . . . . . . . . . . . . . . . . . . . . . . . . . . . . . . . . . . 6-1
Figure 6-3: Main Menu Navigation . . . . . . . . . . . . . . . . . . . . . . . . . . . . . . . . . . . . . . . . . . . 6-5
Figure 6-4: Parameter Menu Structure Example . . . . . . . . . . . . . . . . . . . . . . . . . . . . . . . . 6-6
Figure 6-5: Keypad Control Menu . . . . . . . . . . . . . . . . . . . . . . . . . . . . . . . . . . . . . . . . . . . . 6-7
Figure 6-6: Active Fault Display Example . . . . . . . . . . . . . . . . . . . . . . . . . . . . . . . . . . . . . . 6-8
Figure 6-7: Sample Fault History Display . . . . . . . . . . . . . . . . . . . . . . . . . . . . . . . . . . . . . . 6-10
Figure 6-8: System Menu Keypad Structure . . . . . . . . . . . . . . . . . . . . . . . . . . . . . . . . . . . . 6-11
Figure 6-9: Expander Board Menu Structure . . . . . . . . . . . . . . . . . . . . . . . . . . . . . . . . . . . 6-19
Figure 6-10: Digital Inputs — DI-1, DI-2, DI-3 Status . . . . . . . . . . . . . . . . . . . . . . . . . . . . . . 6-20
Figure 6-11: Digital Inputs — DI-4, DI-5, DI-6 Status . . . . . . . . . . . . . . . . . . . . . . . . . . . . . . 6-21
Figure 6-12: Digital and Relay Outputs — DO-1, RO-1, RO-2 Status . . . . . . . . . . . . . . . . . 6-21
Figure 7-1: Start-Up Wizard Navigation (1 of 3) . . . . . . . . . . . . . . . . . . . . . . . . . . . . . . . . . 7-4
Figure 7-2: Start-Up Wizard Navigation (2 of 3) . . . . . . . . . . . . . . . . . . . . . . . . . . . . . . . . . 7-5
Figure 7-3: Start-Up Wizard Navigation (3 of 3) . . . . . . . . . . . . . . . . . . . . . . . . . . . . . . . . . 7-6
Figure 7-4: Remote Input Start-Up Wizard . . . . . . . . . . . . . . . . . . . . . . . . . . . . . . . . . . . . . 7-7
Figure 15-1: AI-1 No Signal Inversion . . . . . . . . . . . . . . . . . . . . . . . . . . . . . . . . . . . . . . . . . 15-4
Figure 15-2: AI-1 Signal Inversion . . . . . . . . . . . . . . . . . . . . . . . . . . . . . . . . . . . . . . . . . . . . 15-4
Figure 15-3: AI-1 No Signal Filtering . . . . . . . . . . . . . . . . . . . . . . . . . . . . . . . . . . . . . . . . . . 15-5
Figure 15-4: Analog Input AI-2 Scaling . . . . . . . . . . . . . . . . . . . . . . . . . . . . . . . . . . . . . . . . 15-5
Figure 15-5: Setpoint Scaling . . . . . . . . . . . . . . . . . . . . . . . . . . . . . . . . . . . . . . . . . . . . . . . . 15-6
Figure 15-6: Sensor Scaling . . . . . . . . . . . . . . . . . . . . . . . . . . . . . . . . . . . . . . . . . . . . . . . . . 15-6
Figure 15-7: Analog Output Filtering . . . . . . . . . . . . . . . . . . . . . . . . . . . . . . . . . . . . . . . . . . 15-7
Figure 15-8: Analog Output Invert . . . . . . . . . . . . . . . . . . . . . . . . . . . . . . . . . . . . . . . . . . . . 15-8
Figure 15-9: Analog Output Scaling . . . . . . . . . . . . . . . . . . . . . . . . . . . . . . . . . . . . . . . . . . 15-9
Figure 15-10: Output Frequency Supervision . . . . . . . . . . . . . . . . . . . . . . . . . . . . . . . . . . . 15-11
Figure 15-11: Acceleration/Deceleration (S-shaped) . . . . . . . . . . . . . . . . . . . . . . . . . . . . . 15-13
Figure 15-12: Example of Prohibit Frequency Area Setting . . . . . . . . . . . . . . . . . . . . . . . 15-14
Figure 15-13: Ramp Speed Scaling between Prohibit Frequencies . . . . . . . . . . . . . . . . . 15-15
Figure 15-14: Linear and Squared V/Hz Ratio . . . . . . . . . . . . . . . . . . . . . . . . . . . . . . . . . . . 15-17
Figure 15-15: Programmable V/Hz Curve . . . . . . . . . . . . . . . . . . . . . . . . . . . . . . . . . . . . . . 15-17
Figure 15-16: Motor Thermal Current IT Curve . . . . . . . . . . . . . . . . . . . . . . . . . . . . . . . . . 15-21