• Installing MX5, MX10, MX40, and MX80 Chassis in the Rack on page 85
• Connecting MX5, MX10, MX40, and MX80 Routers to Management Devices on page 97
• Connecting Interface Cables to MX5, MX10, MX40, and MX80 Routers on page 99
Moving the Mounting Brackets for Center-Mounting MX5, MX10, MX40, and MX80
Routers
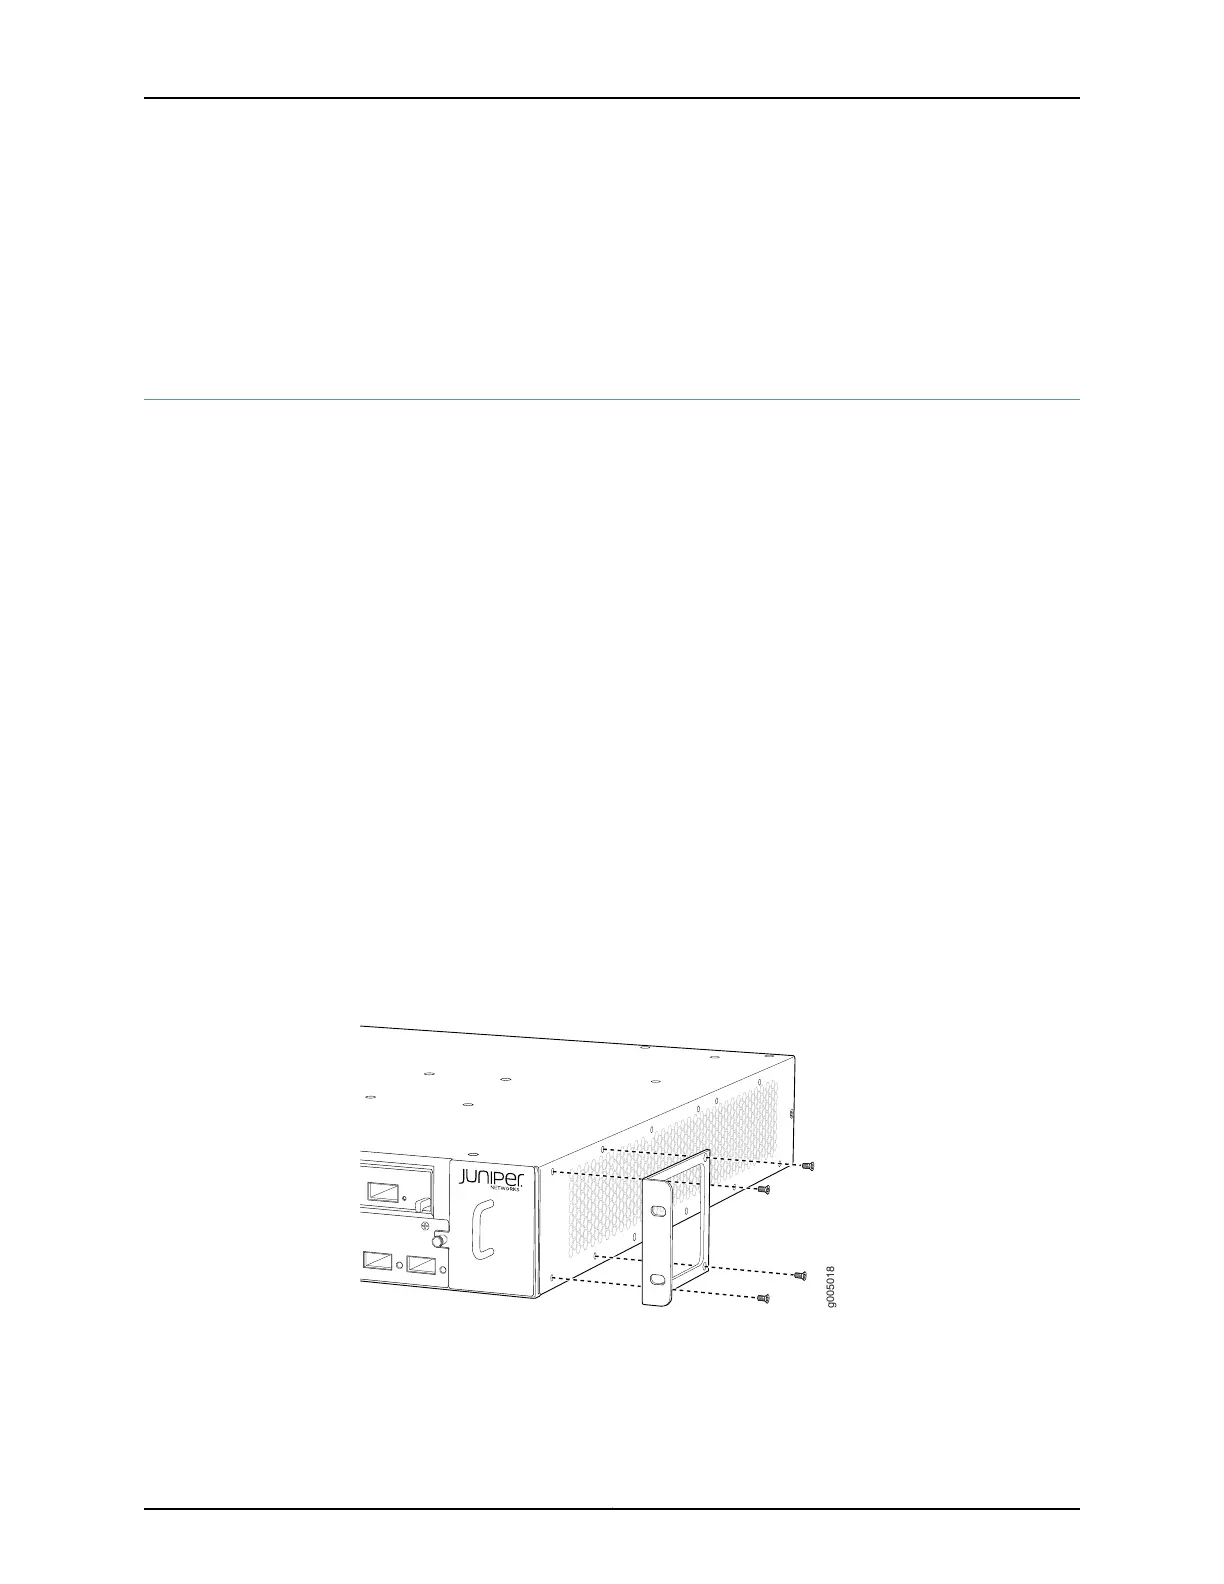
Two removable mounting brackets are attached to the mounting holes closest to the
front of the chassis (see Figure 31 on page 80). You can move the pair of brackets to
another position on the side of the chassis for center-mounting the router.
To move the mounting brackets from the front of the chassis toward the center of the
chassis (see Figure 32 on page 81):
1. Remove the four screws at the top and bottom of the bracket.
2. Pull the bracket away from the chassis.
3. Align the bracket with the two sets of mounting holes located toward the center of
the chassis.
4. Insert the four screws at the top and bottom of the bracket and tighten each partially.
5. Tighten the four screws completely.
6. Repeat the procedure for the other bracket.
Figure 31: Front-Mounting the Brackets on MX5, MX10, MX40, and MX80
Routers
Copyright © 2017, Juniper Networks, Inc.80
MX5, MX10, MX40, and MX80 3D Universal Edge Router Hardware Guide