Installing an MX5, MX10, MX40, and MX80 MIC
To install a MIC (see Figure 49 on page 115):
NOTE: The MIC can be installed in either the front slots or the rear slot.
1. Attach an ESD grounding strap to your bare wrist and connect the strap to one of the
ESD points on the chassis.
2. If the MIC uses fiber-optic cable, verify that a rubber safety cap is over each transceiver
on the faceplate. Install a cap if necessary.
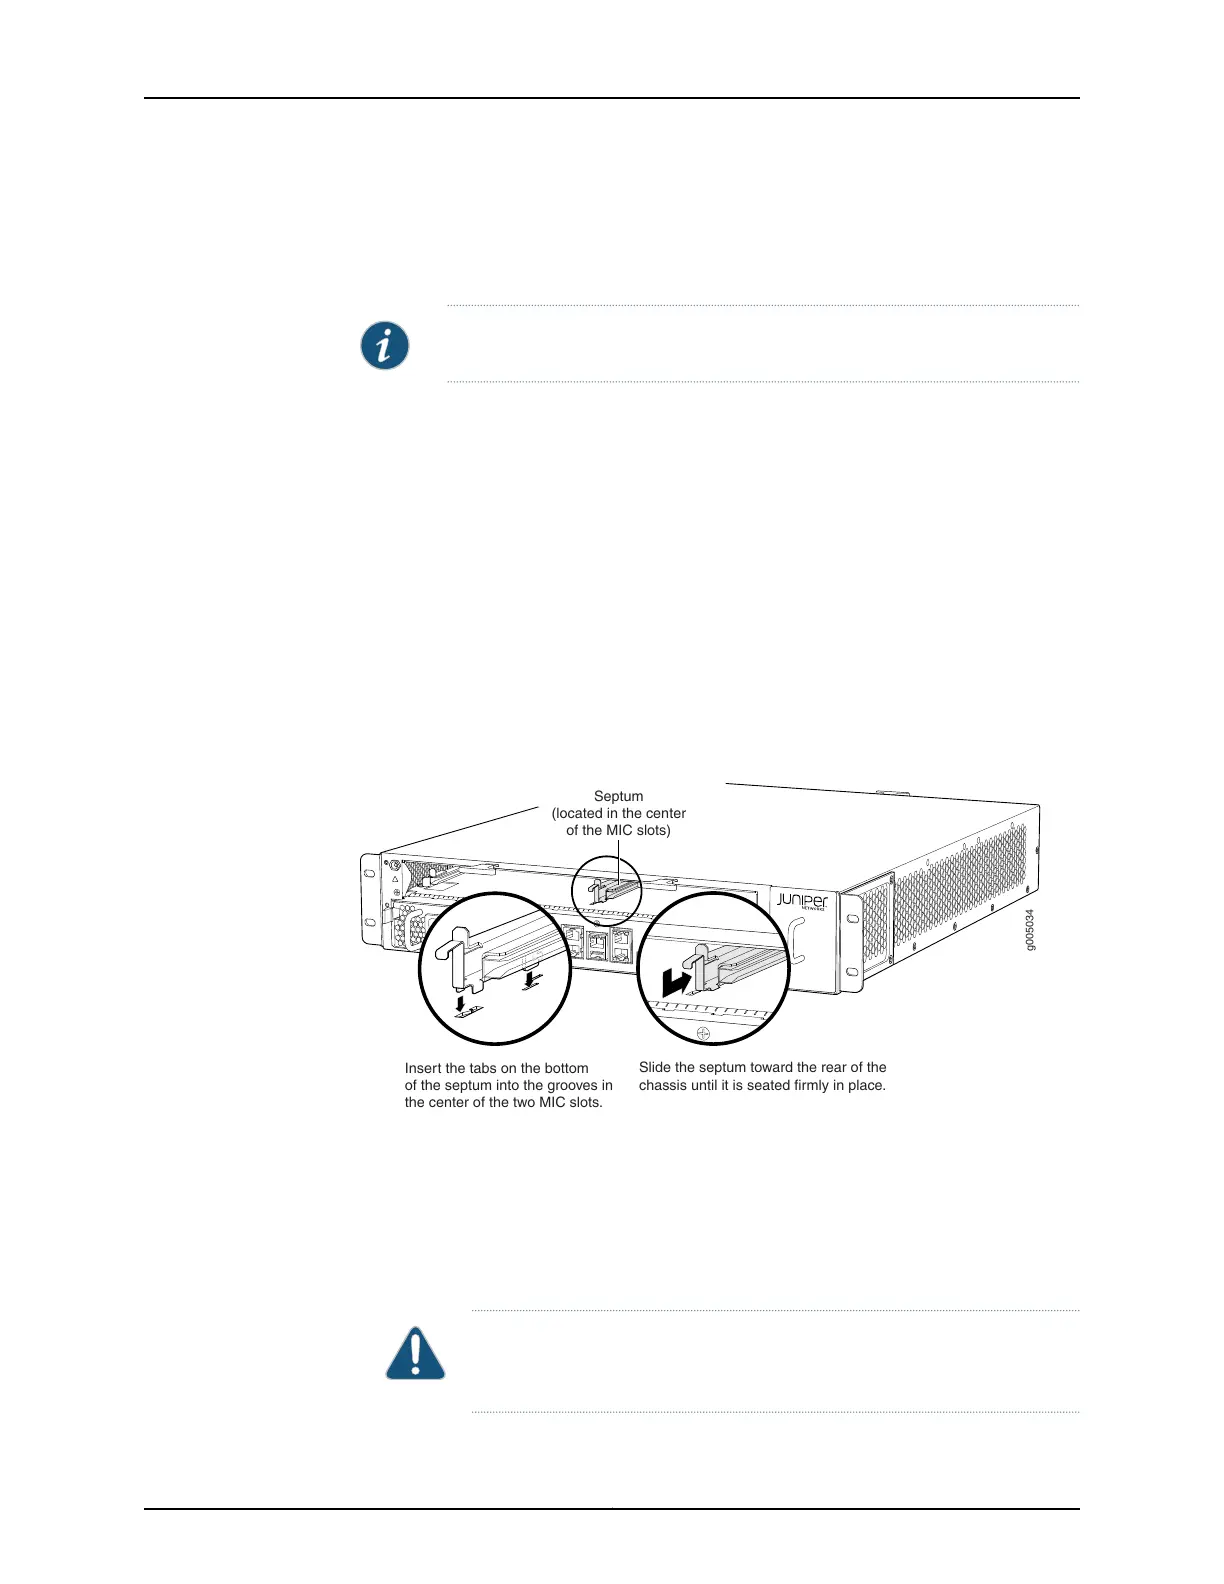
3. If you have used a dual-wide MIC and are now replacing it with two “single” MICs,
install the septum (see Figure 48 on page 114):
a. Align the bottom of the septum with the grooves in the center of the two MIC slots.
b. Slide the septum toward the rear of the chassis until it is seated firmly in place.
Figure 54: Installing the Septum
g005034
Slide the septum toward the rear of the
chassis until it is seated firmly in place.
Insert the tabs on the bottom
of the septum into the grooves in
the center of the two MIC slots.
Septum
(located in the center
of the MIC slots)
4. Pull the ejector lever above the MIC slot away from the router.
5. Align the rear of the MIC with the guides located at the corners of the MIC slot.
6. Slide the MIC into the MIC slot until it is firmly seated in the chassis.
CAUTION: Slide the MIC straight into the slot to avoid damaging the
components on the MIC.
121Copyright © 2017, Juniper Networks, Inc.
Chapter 19: Replacing Line Card Components