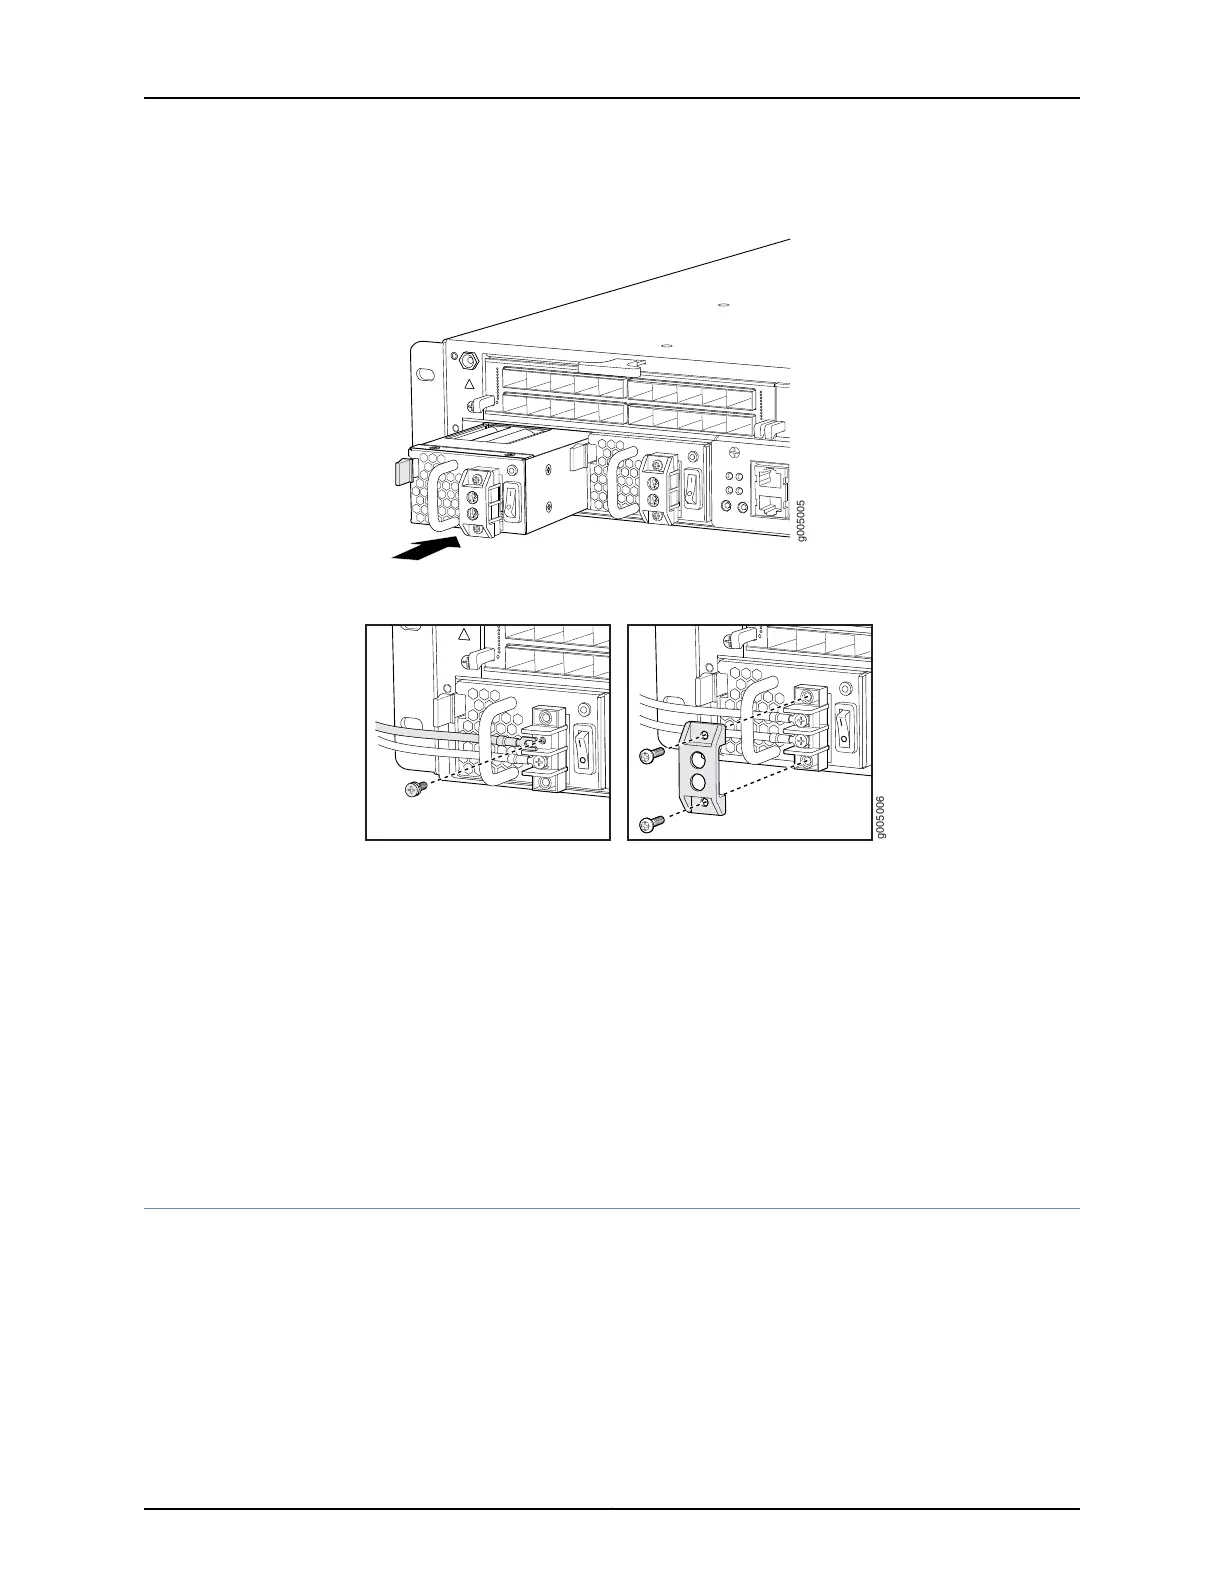
Figure 66: Installing a DC Power Supply
Figure 67: Connecting the DC Power Cables
Related
Documentation
MX5, MX10, MX40, and MX80 Power System Description on page 35•
• Preventing ElectrostaticDischarge Damage to an MX5, MX10, MX40, and MX80 Router
on page 194
• MX5, MX10, MX40, and MX80 Routers DC Power Specifications on page 59
• DC Power Circuit Breaker Requirements for the MX5, MX10, MX40, and MX80 Routers
on page 62
• DC Power Source Cabling for MX5, MX10, MX40, and MX80 Routers on page 62
• DC Power Cable Specifications for MX5, MX10, MX40, and MX80 Routers on page 63
Replacing an MX5, MX10, MX40, and MX80 DC Power Supply Cable
•
Disconnecting an MX5, MX10, MX40, and MX80 DC Power Supply Cable on page 148
•
Connecting an MX5, MX10, MX40, and MX80 DC Power Supply Cable on page 149
147Copyright © 2017, Juniper Networks, Inc.
Chapter 20: Replacing Power System Components