The air filter is installed on the right side of the fan tray. To remove the air filter (see
Figure 43 on page 109):
1. Attach an ESD grounding strap to your bare wrist and connect the strap to one of the
ESD points on the chassis.
2. Remove the fan tray as described in “Removing an MX5, MX10, MX40, and MX80 Fan
Tray” on page 111.
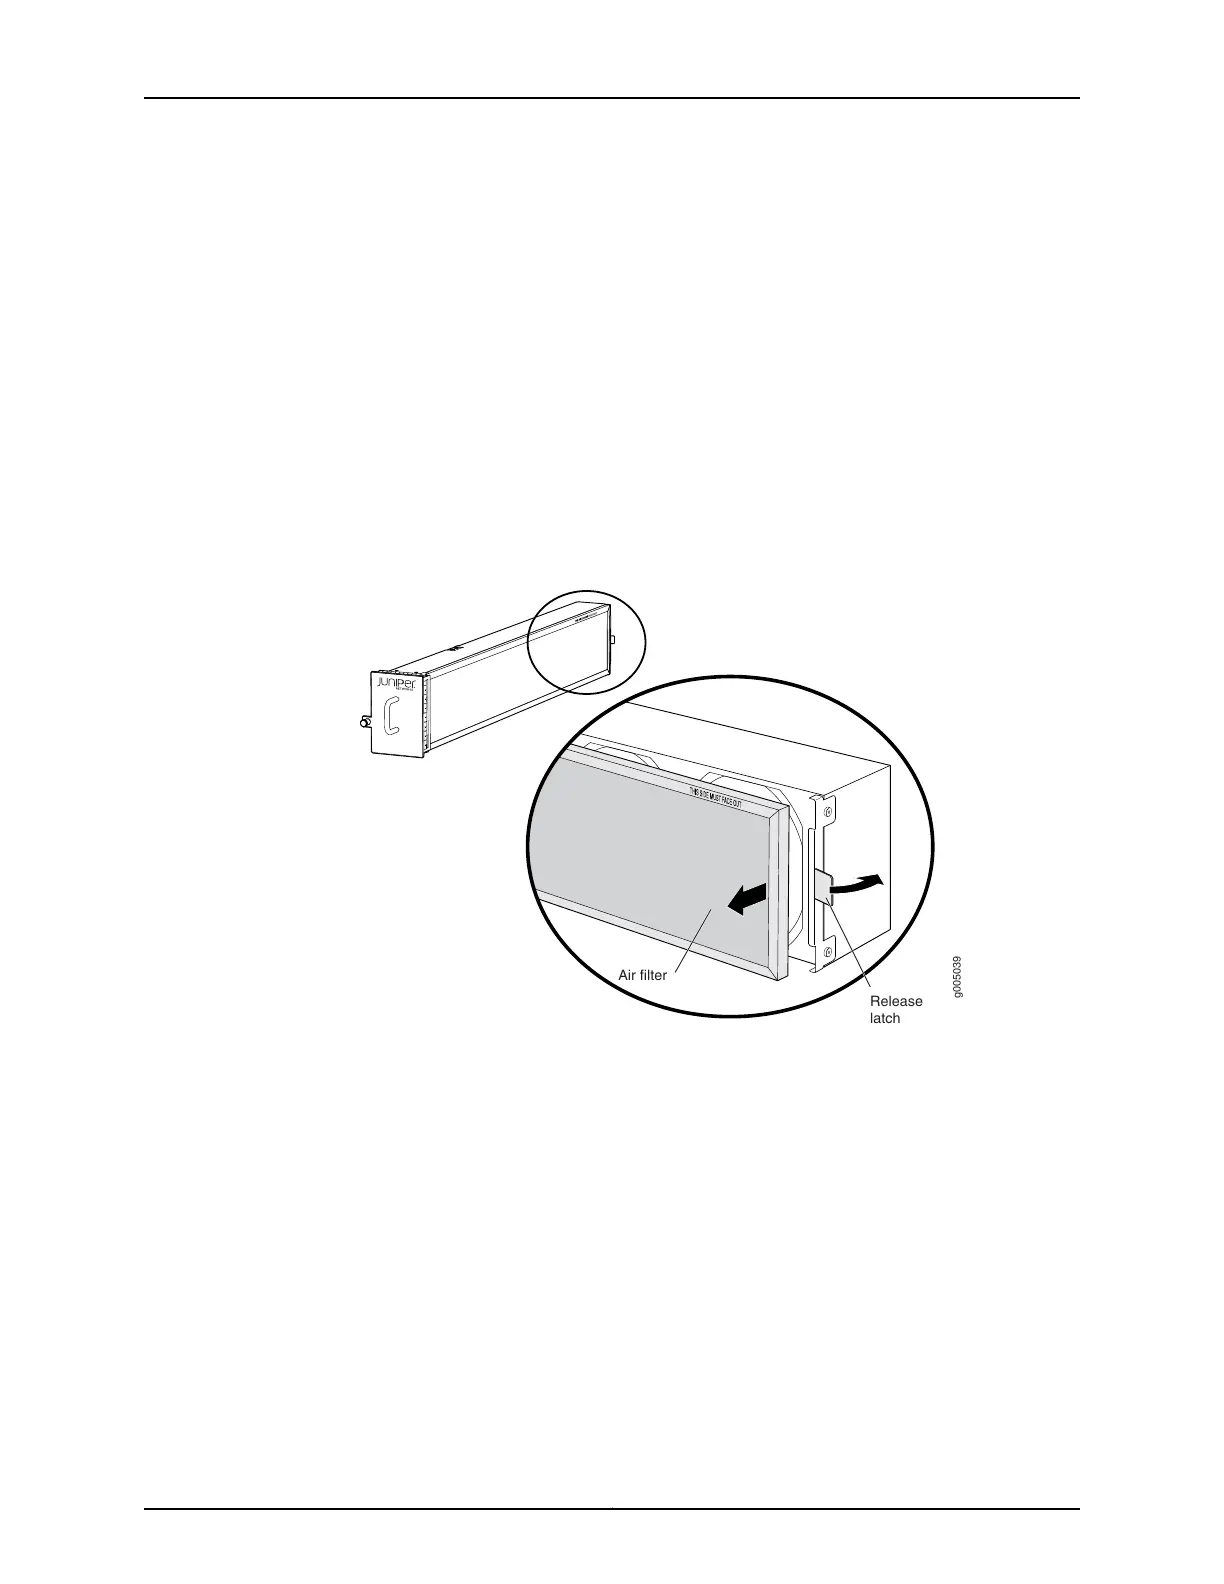
3. Press the release tab on the rear of the fan tray to release the air filter.
4. Grasp the sides of the air filter, and slide it away from the fan tray faceplate.
Figure 43: Removing the Air Filter
g005039
Air filter
Release
latch
Installing an MX5, MX10, MX40, and MX80 Air Filter
The air filter installs on the right side of the fan tray. To install the air filter (see
Figure 42 on page 108):
1. Attach an ESD grounding strap to your bare wrist and connect the strap to one of the
ESD points on the chassis.
2. Locate the THIS SIDE MUST FACE OUT label, and ensure that the air filter is right side
up.
3. Insert the air filter into the groove located toward the front of the fan tray.
109Copyright © 2017, Juniper Networks, Inc.
Chapter 18: Replacing Cooling System Component