bizhub C652/C552 7-14
7.1 System Settings
7
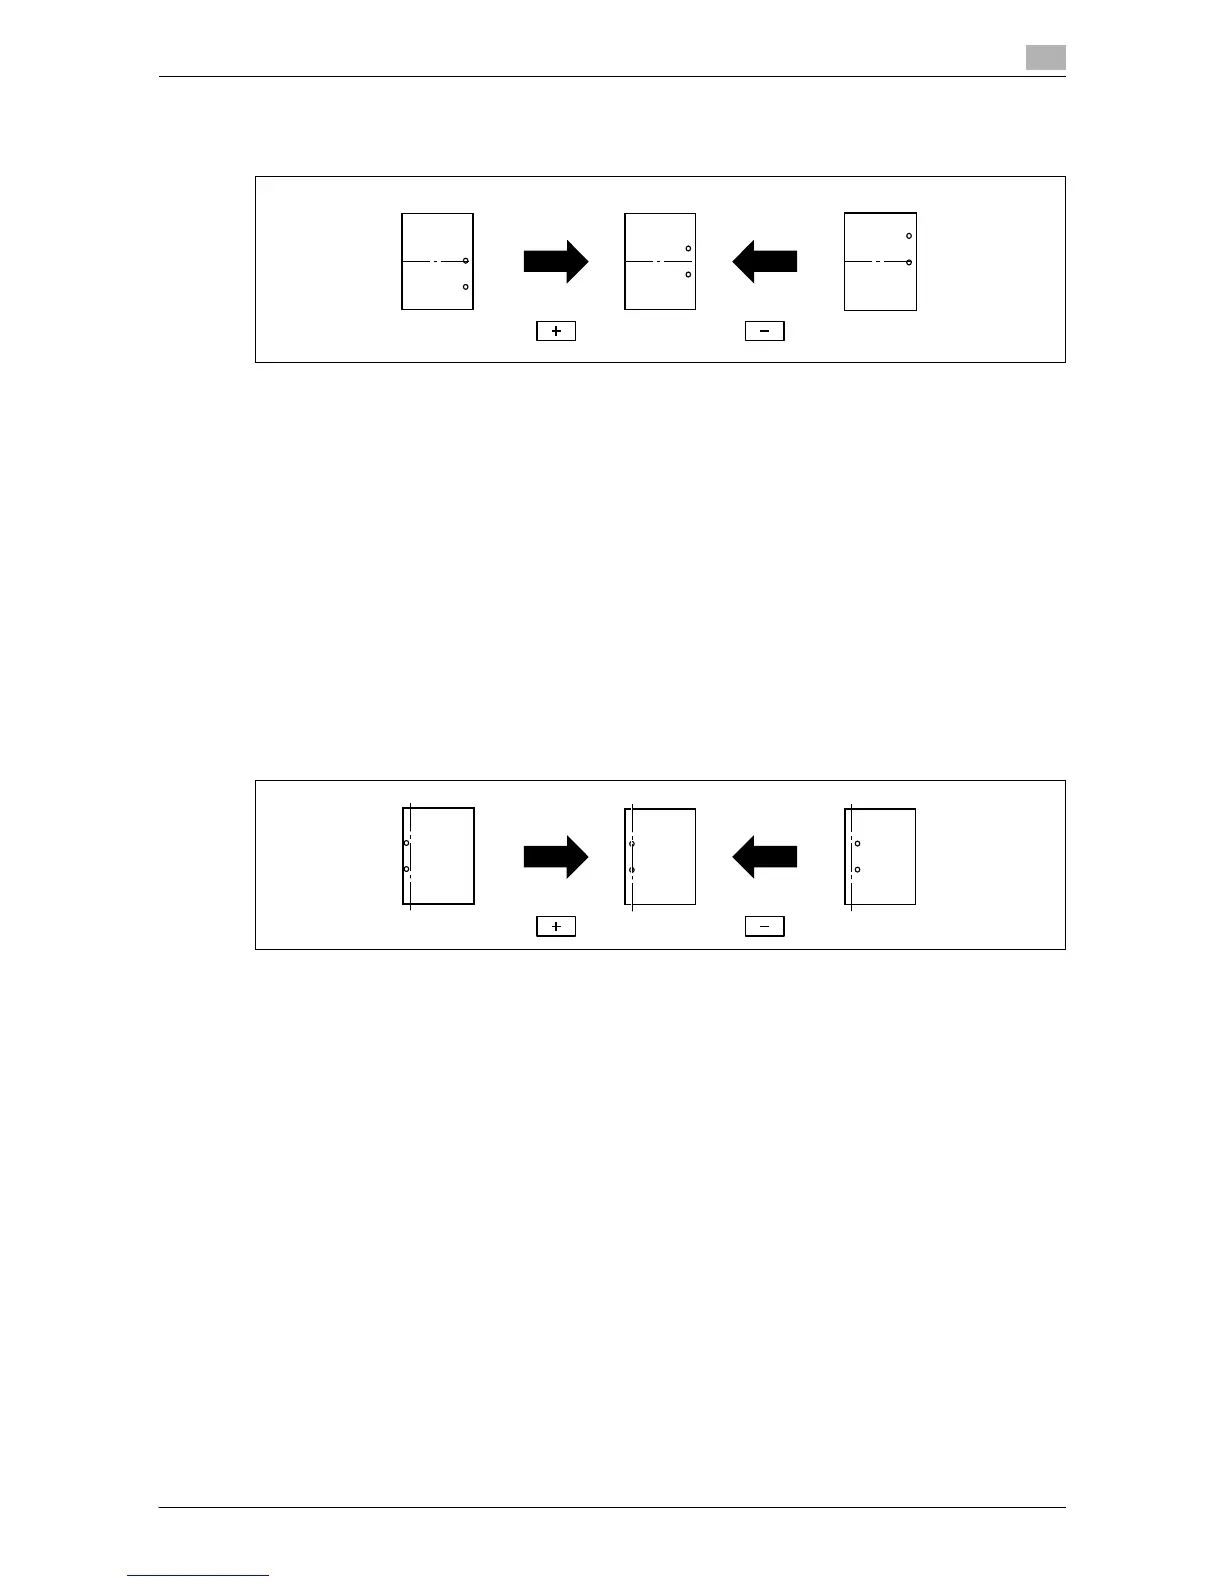
Punch Vertical Position Adjustment
Adjust the vertical position of the punched holes for each paper size.
0 Before making any adjustments, create a sample using the punch settings. Adjust the punched hole
position while checking the created sample.
0 This adjustment is available if the punch kit is installed.
1 Press the [Utility/Counter] key ö [Administrator Settings] ö [System Settings] ö [Expert Adjustment]
ö [Finisher Adjustment] ö [Punch Vertical Position Adjustment].
2 Select the size of paper of which the horizontal punched hole position is adjusted.
3 Press [+] or [-] to adjust the punched hole position while checking the sample.
4 Press [OK].
5 Create a sample, and check the print result.
Punch Horizontal Position Adjustment
Adjust the horizontal position of the punched holes.
0 Before making any adjustments, create a sample using the punch settings. Adjust the punched hole
position while checking the created sample.
0 This adjustment is available if the punch kit is installed.
1 Press the [Utility/Counter] key ö [Administrator Settings] ö [System Settings] ö [Expert Adjustment]
ö [Finisher Adjustment] ö [Punch Horizontal Position Adjustment].
2 Press [+] or [-] to adjust the punched hole position while checking the sample.
3 Press [OK].
4 Create a sample, and check the print result.